Delicious Doughnuts: The Ultimate Guide to Fluffy, Homemade Happiness
INTRODUCTION
Growing up, Sunday mornings meant one thing: doughnut day! My parents would take my siblings and me to our favorite local bakery, where the air was filled with the sweet scent of freshly fried doughnuts. Those warm, soft bites of bliss would bring us all together, laughter and happiness bubbling over with each sugary bite. Today, I want to share my passion for making irresistible doughnuts right in your kitchen. This recipe is not just another cooking instruction; it’s a heartwarming path to creating those cherished family moments.
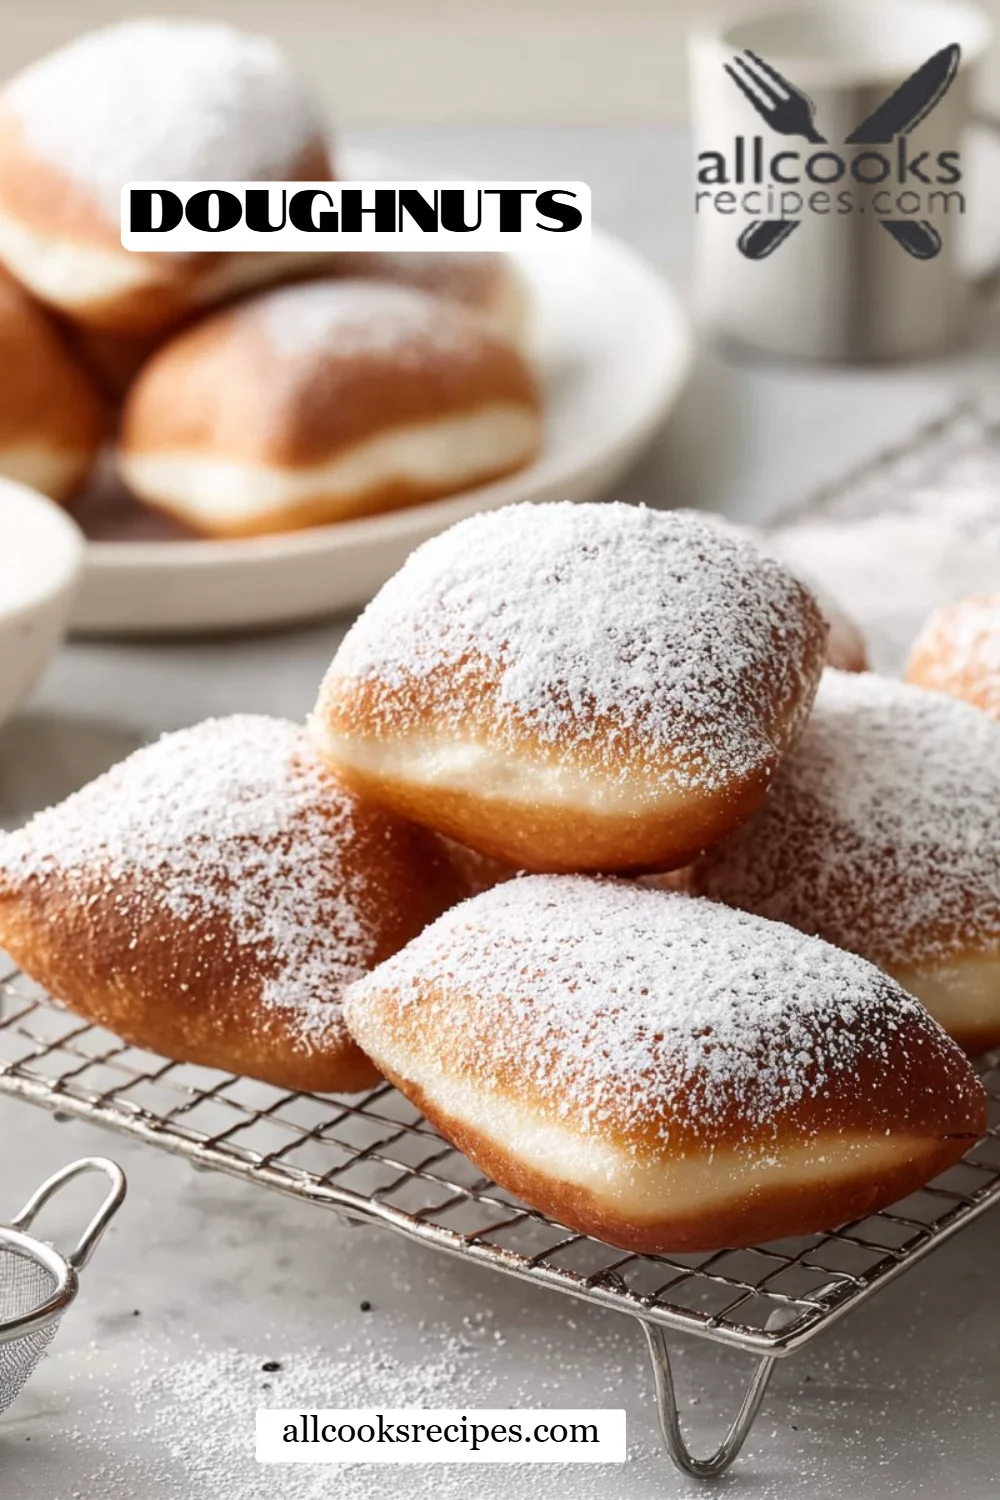
What makes my doughnut recipe stand out from the rest? Well, it’s all about the technique and the love infused in each step. You’ll learn how to make pillowy beignets that are both light and airy, with a hint of nostalgia, just like the ones I enjoyed as a child. I promise you’ll discover how easy it is to whip up a batch that even your family will rave about! Get ready to roll up your sleeves and create a sweet memory that will stick with you for years to come.
WHAT ARE DOUGHNUTS?
Doughnuts have a rich history that dates back centuries, with origins tracing as far back as the 19th century. They are essentially sweet, deep-fried dough pastries, and their taste is pure joy: crispy on the outside, soft and pillowy on the inside. The texture dances between being light and chewy, making them utterly addictive — it’s hard to eat just one!
What sets doughnuts apart is their versatility; they can be glazed, powdered, filled with delectable creams or jams, and topped with a variety of sprinkles and toppings. Whether you’re making them for a breakfast treat, a snack, or a celebration, doughnuts are the perfect way to bring a smile to people’s faces, whether young or old.
So, when should you make these delightful treats? Honestly, any day is a good day for doughnuts! Weekend brunches, holidays, or even a random Tuesday night when you need a pick-me-up. Embracing your inner baker has never been more satisfying!
WHY YOU’LL LOVE THIS RECIPE
There are many reasons to love my doughnut recipe, and here are just a few that set it apart from the store-bought or restaurant versions:
-
Homemade Freshness: There’s something magically comforting about biting into a freshly made doughnut. The aroma that fills your kitchen will make your mouth water!
-
Cost-Effective: Making doughnuts at home is not only fun, but it’s also a money-saver! Store-bought doughnuts can be pricey, especially if you’re feeding a crowd. With this recipe, you can make 32 delightful beignets for a fraction of the cost.
-
Customization: Want to experiment with flavors? Go ahead! You can infuse your dough with vanilla, chocolate, or even seasonal spices like cinnamon. Make them your own!
-
Easy to Master: This doughnut recipe is beginner-friendly. With just a little patience and love, you’ll be frying up those golden doughnuts in no time.
-
Time Well-Spent: Sure, the process takes a bit of time, but trust me, every minute you invest will pay off the moment you take that first bite — just try not to eat them all at once!
INGREDIENTS SECTION
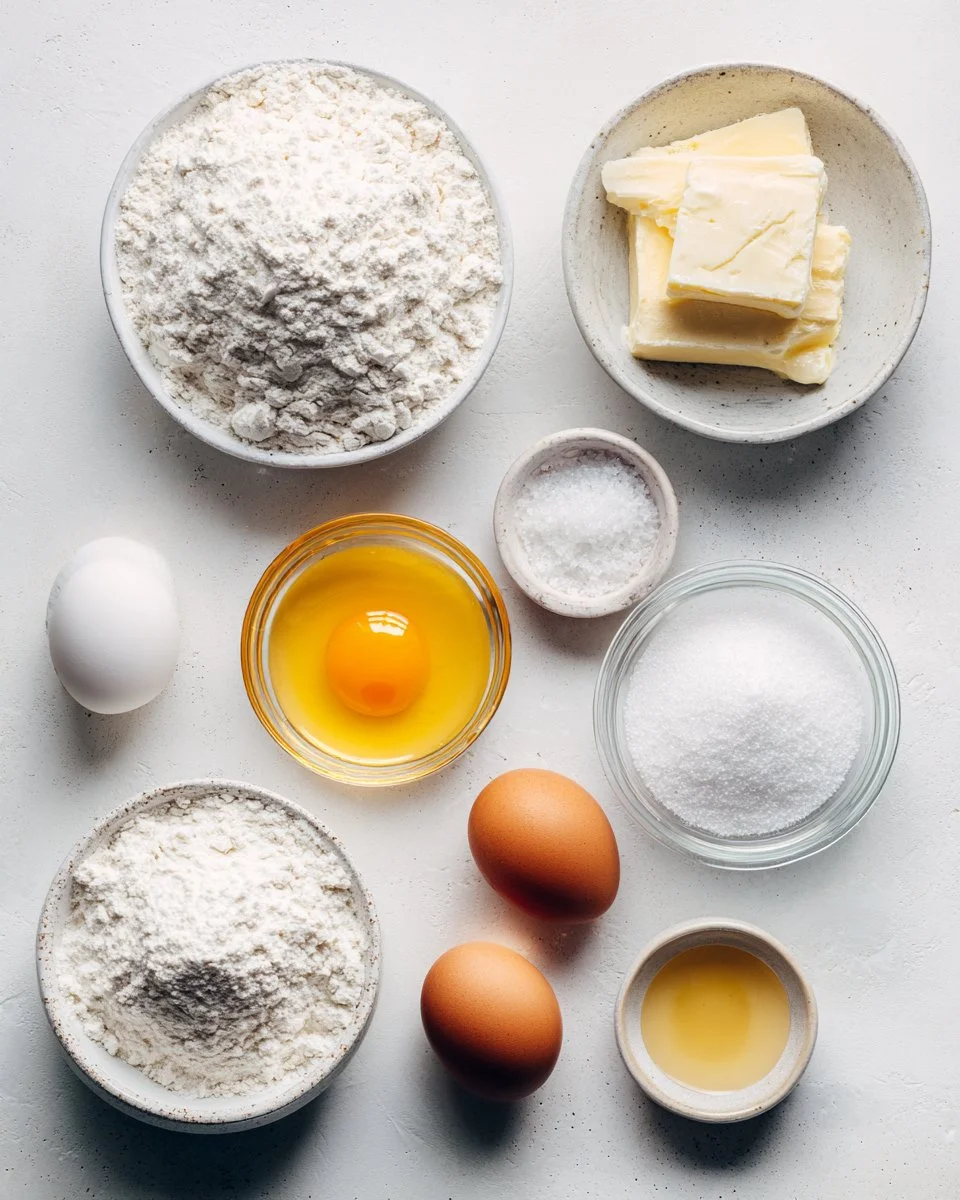
To craft these irresistible doughnuts, you’ll need the following ingredients:
-
3/4 cup water, lukewarm (about 105 degrees F): It’s crucial to get it just right for the yeast to activate.
-
1/4 cup granulated sugar: This adds sweetness to the dough and helps feed the yeast.
-
1 packet (2 1/4 teaspoons) active dry yeast: Use a reliable brand like Red Star for best results.
-
1/2 cup whole milk, room temperature: Adds richness. If you’re dairy-free, almond or oat milk work well too.
-
1 large egg, room temperature: This binds the dough together.
-
3 1/2 cups all-purpose flour: I recommend King Arthur or Bob’s Red Mill for high-quality, consistent results.
-
1/2 teaspoon kosher salt: Enhances flavor.
-
2 tablespoons unsalted butter, softened: Use high-fat butter for a more tender dough.
-
Vegetable oil, for frying: Make sure to use a neutral oil that can withstand high temperatures.
-
Confectioners sugar, for dusting: The sweet finish to your beautiful doughnuts!
Note: Make sure your milk and egg are at room temperature to ensure a better rise.
STEP-BY-STEP INSTRUCTIONS
Now onto the fun part! Let’s make the doughnuts step-by-step.
-
Activate Yeast: In a medium bowl, whisk together the lukewarm water, sugar, and yeast. Let it sit for 5 to 10 minutes until the mixture is foamy.
-
Combine Wet Ingredients: Once foamy, add the room temperature milk and egg. Whisk until fully combined, then set aside.
-
Prepare Dry Ingredients: In the bowl of a stand mixer fitted with a dough hook, combine flour and salt. With the mixer on low, pour in the yeast mixture and add the softened butter. Mix until just combined.
-
Knead the Dough: Increase the speed to medium and knead for 2 to 3 minutes, or until the dough is smooth and pulls away from the sides of the bowl.
-
First Rise: Transfer the dough to a large bowl coated with non-stick cooking spray. Cover it with a clean kitchen towel and let it rise in a warm place until doubled in size, about 1 to 2 hours.
-
Shape Doughnuts: Once risen, roll out the dough on a lightly floured surface into a rectangle about 1/4 to 1/2 inch thick. Using a pizza cutter, cut the dough into 32 squares.
-
Prepare for Frying: In a large pot over medium heat, heat about 3 inches of vegetable oil until it reaches 360 degrees F. This is where the kitchen starts smelling heavenly!
-
Fry the Beignets: Working in batches, carefully place 4 to 6 squares of dough into the hot oil. Fry for about 30 seconds to 1 minute per side, until they are golden brown.
-
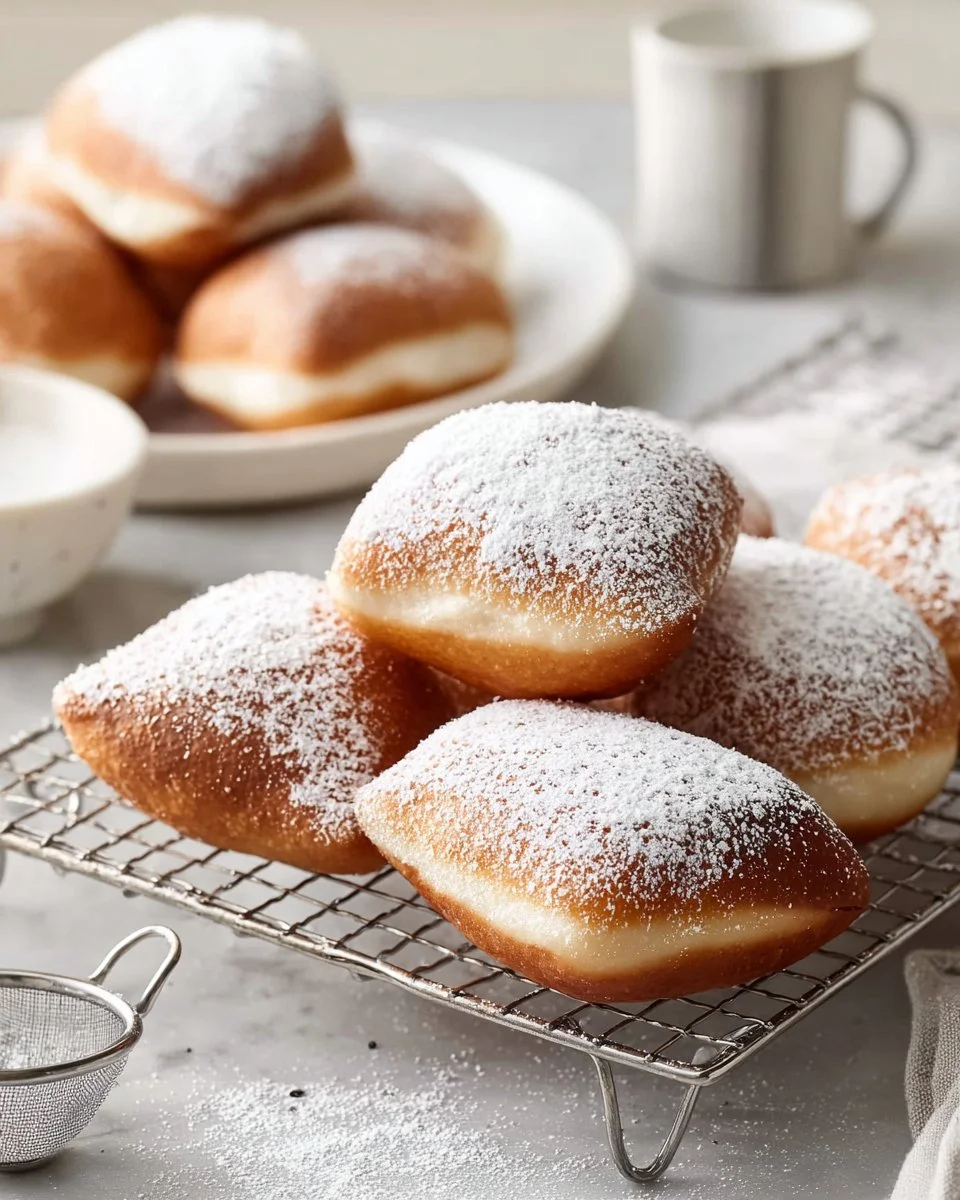
Dust with Sugar: Place the fried beignets on a paper towel-lined baking sheet to absorb excess oil, and dust generously with confectioners sugar.
-
Alternative Baking Instructions: If you prefer baking, line two baking sheets with parchment paper, allow the beignets to rise for 45 minutes, preheat the oven to 350 degrees F, brush with milk, and bake for 12 to 15 minutes. Dust with confectioners sugar before serving.
-
Air Fryer Option: Preheat your air fryer to 350 degrees F. Place beignets in a single layer, cook for 2 to 3 minutes, and dust with confectioners sugar before serving.
Chef’s Tips:
- Timing: Ensure you allow enough time for yeast to activate and dough to rise.
- Visual Cues: The dough should be smooth and elastic—you want it to spring back when you poke it.
- Common Mistakes: Avoid frying at temperatures that are too high; this can lead to uneven cooking.
EXPERT TIPS & TRICKS
-
Perfecting Texture: If your doughnuts are too dense, ensure your yeast is fresh and you’ve allowed the dough to rise adequately. Nothing makes a doughnut more sumptuous than a good rise!
-
Storage Recommendations: Keep leftover doughnuts in an airtight container at room temperature for up to 3 days. They can be frozen for up to 2 months—just reheat in the oven when you’re ready to enjoy.
-
Make-Ahead Instructions: Prepare the dough the night before and allow it to rise in the fridge overnight. Then, shape them in the morning for fresh doughnuts in no time!
-
Troubleshooting: If your dough isn’t rising, it could be due to cold ingredients or a drafty environment. Find a cozy spot for dough rising, maybe near your oven while it’s preheating!
-
Enhancing Freshness: For a delightful extra touch, consider adding a pinch of nutmeg or cinnamon to your dough for a warm, cozy flavor.
SERVING SUGGESTIONS
These doughnuts are perfect on their own, but you can also serve them alongside a rich hot chocolate or a freshly brewed cup of coffee for a delightful brunch experience. For a touch of elegance, consider plating them with a dollop of fresh whipped cream or a fruit compote on the side. They’re ideal for celebrations, holiday gatherings, or simply a cozy weekend treat.
VARIATIONS & SUBSTITUTIONS
Get creative with your doughnuts! Want to jazz things up? Here are a few ideas:
-
Flavor Infusions: Try adding maple syrup or chocolate chips to the dough or filling your doughnuts with pastry cream, jam, or Nutella.
-
Dietary Adaptations: For a gluten-free version, substitute the all-purpose flour with a 1-to-1 gluten-free flour mix, and for vegan options, use almond milk and flax egg!
-
Seasonal Twists: In the fall, add pumpkin puree and spice for a seasonal favorite, or during the holidays, incorporate peppermint extract for a festive touch.
NUTRITION & STORAGE INFO
- Prep time: 30 minutes
- Cook time: 30 minutes
- Total time: 1 hour (plus rising time)
- Yield: 32 servings
- Estimated calories per serving: Approximately 150 calories (varies based on size and toppings)
Storage Instructions:
- Room Temperature: Keep in an airtight container for up to 3 days.
- Refrigerator: Doughnuts can dry out in the fridge. It’s better to keep them at room temperature.
- Freezer: Freeze for up to 2 months. Defrost at room temperature or briefly warm in the oven.
FAQ SECTION
-
Can I double the recipe?
Absolutely! Just ensure you have a large enough space to let your dough rise. -
Why did my doughnut sink while frying?
This could be due to the dough being too dense or the oil temperature being too low. Ensure the dough is properly risen and the oil is hot enough. -
Can I use whole wheat flour?
You can, but the texture will be denser. You may want to combine it with all-purpose flour for a lighter doughnut. -
What if I don’t have a stand mixer?
You can knead by hand! Just make sure to knead for a longer time (about 8-10 minutes) until the dough is smooth. -
How do I know when the oil is hot enough?
Use a candy thermometer or drop a small piece of dough into the oil. It should sizzle and float to the surface. -
Can I bake these instead of frying?
Yes, follow the baking instructions listed above for a lighter option! -
Why are my doughnuts greasy?
If they soak up too much oil, it could be due to frying at too low of a temperature or over-crowding the pot. -
How can I make my doughnuts sweeter?
You can adjust the sugar content in the dough and add flavored glazes for extra sweetness. -
What are some good toppings?
Try glazing with chocolate, rolling in cinnamon sugar, or topping with fresh fruit. -
Can I fill these doughnuts?
Absolutely! Just cut a small slit in the side and use a pastry bag to fill with your favorite filling.
CONCLUSION
In conclusion, making these doughnuts is more than just a recipe; it’s about creating joyful moments and delicious memories with your loved ones. Homemade doughnuts have a special place in our hearts and kitchens—there’s nothing quite like them! I encourage you to give this recipe a try and share your own memories. I’d love to hear how your doughnuts turned out! Don’t forget to explore some related recipes on the blog for more sweet adventures in baking!

Homemade Doughnuts
Ingredients
Method
- In a medium bowl, whisk together the lukewarm water, sugar, and yeast. Let it sit for 5 to 10 minutes until foamy.
- Add room temperature milk and egg to the yeast mixture. Whisk until fully combined and set aside.
- In the bowl of a stand mixer, combine flour and salt. With the mixer on low, add the yeast mixture and softened butter. Mix until just combined.
- Increase the mixer speed to medium and knead for 2 to 3 minutes until the dough is smooth and pulls away from the bowl.
- Transfer the dough to a large bowl coated with non-stick cooking spray, cover with a kitchen towel, and let rise until doubled in size, about 1 to 2 hours.
- Once risen, roll out the dough to a rectangle about 1/4 to 1/2 inch thick. Cut into 32 squares.
- Heat about 3 inches of vegetable oil in a large pot over medium heat until it reaches 360 degrees F.
- Working in batches, add 4 to 6 squares of dough into the hot oil and fry for about 30 seconds to 1 minute per side until golden brown.
- Place fried beignets on a paper towel-lined baking sheet to absorb excess oil, and dust generously with confectioners sugar.
- For baking, line baking sheets with parchment paper, allow to rise for 45 minutes, preheat oven to 350 degrees F, brush with milk, and bake for 12 to 15 minutes, dust with sugar before serving.
- For air frying, preheat the air fryer to 350 degrees F, cook for 2 to 3 minutes, and dust with sugar before serving.