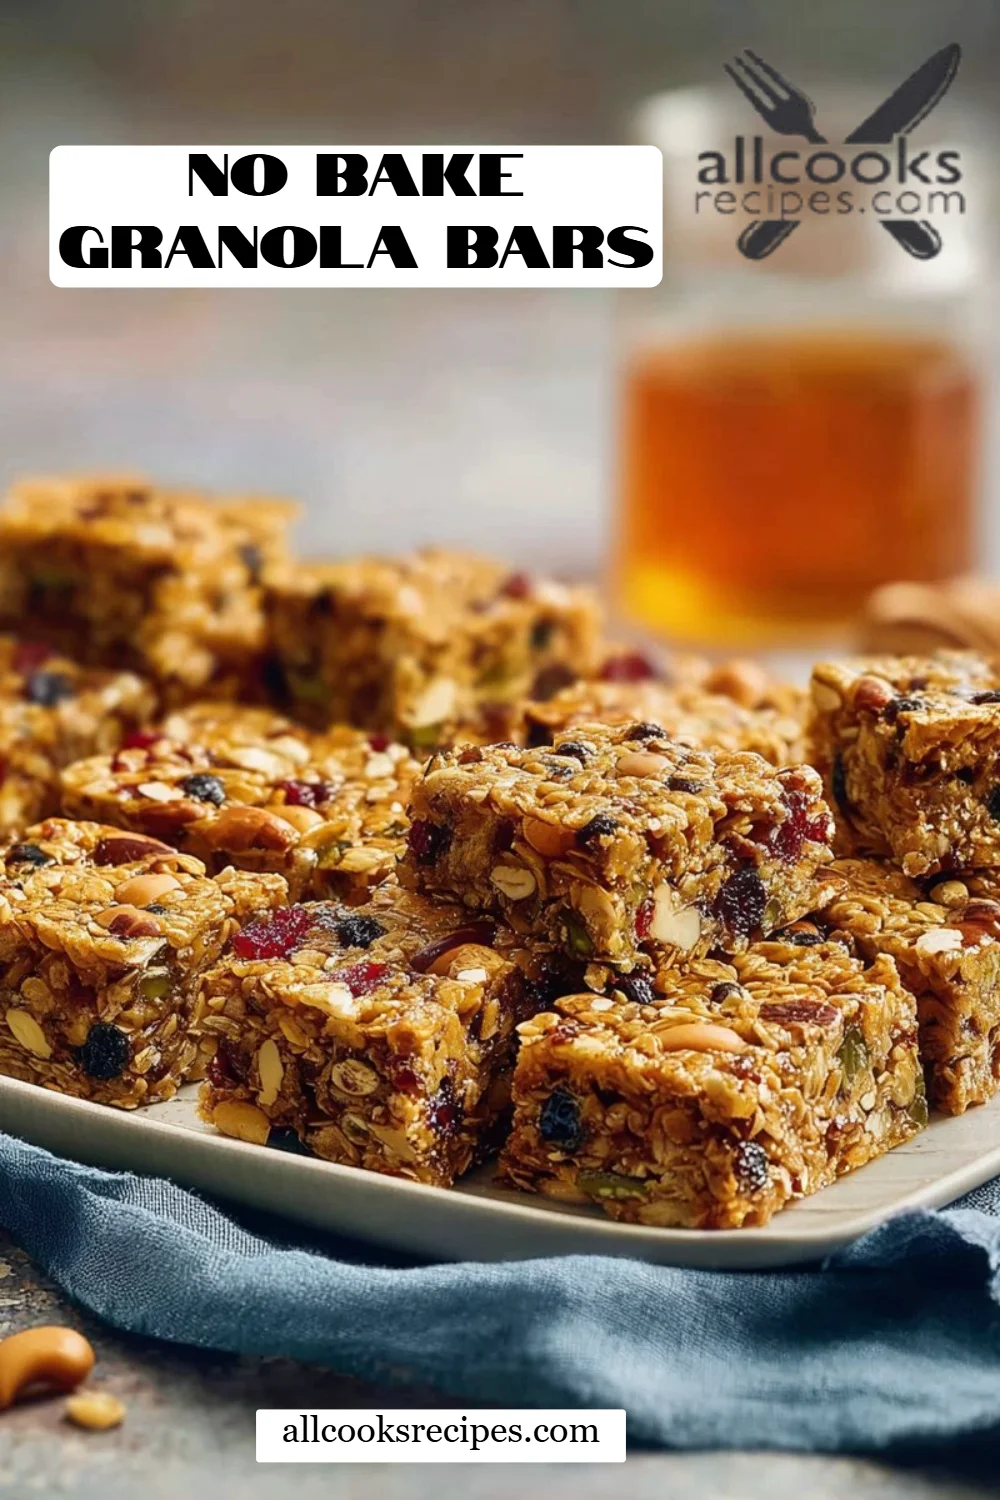
Irresistibly Easy No Bake Granola Bars: Your New Go-To Snack!
There’s something magical about the smell of freshly baked goods wafting through the kitchen, but let’s be honest—sometimes life is too busy for that. I remember the chaotic mornings when my kids would rush out the door, and I desperately needed a quick and nutritious breakfast. Enter the No Bake Granola Bars, a lifesaver in our household! These delightful little bars have become our go-to snack for everything from school lunches to post-workout refuels.
What makes these No Bake Granola Bars so special? Well, not only are they incredibly easy to whip up, but they’re also packed with wholesome ingredients that tell your taste buds they’re something to be celebrated. Unlike store-bought versions filled with additives or overly sweet ingredients, my homemade bars offer a perfect balance of nutty flavors and a chewy texture that will have you reaching for seconds (or thirds!).
With this simple recipe, you’ll learn how to create these delicious, customizable bars that can be tailored to your family’s favorite flavors. Think of these as your new canvas for creativity in the kitchen—because I promise, once you’ve made them, you’ll be hooked!
What Are No Bake Granola Bars?
No bake granola bars have been a beloved snack for decades, dating back to the ’60s when health-conscious folks began experimenting with natural food options. They typically consist of oats, nuts, seeds, and a sticky sweetener, bringing together a delightful mix of crunchy and chewy textures in one bite. What sets them apart is their convenience—you don’t need an oven, and they’re ready to enjoy in under an hour!
When you take that first bite, you’ll experience a warm hug of nutty flavors combined with just the right amount of sweetness, making them perfect for breakfast, an afternoon snack, or even a satisfying dessert.
Why You’ll Love This Recipe
-
Simplicity at Its Best: This No Bake Granola Bar recipe is as easy as it gets! No baking, no fuss. In just a few steps, you’ll have a batch ready to chill.
-
Better Than Store-Bought: Those pre-packaged bars might be convenient, but they often brake our wallets and taste buds! Making your granola bars at home is not only more cost-effective but allows you to control the ingredients.
-
Customize to Your Heart’s Desire: One of the best parts of this recipe is the flexibility it offers. Swap out your oats for gluten-free alternatives, throw in some dried berries, or toss in a handful of chocolate chips—let your creativity shine!
-
Time-Saving Prep: In just about 15-20 minutes of prep work, plus a bit of chilling time, you’ll have 16 satisfying bars that are ready to fuel your day.
-
Family Approved: Trust me, these bars have been taste-tested by my own crew, and I can confirm, they have never lasted long at home! They’re perfect for everyone, from toddlers to adults, making them a fantastic family treat.
Ingredients
- 2 cups oats: Use old-fashioned rolled oats for the best chew; quick oats may become too mushy.
- 1.5 tsp cinnamon: Opt for fresh cinnamon for richer flavor.
- 0.75 tsp sea salt: Balances the sweetness and enhances flavors.
- 2 cups mix-ins: Choose any combination of nuts or seeds (like almonds, sunflower seeds, or flaxseeds), chopped into 1/4 inch pieces for optimal texture.
- 1.25 cups peanut butter: Creamy or crunchy, just make sure it’s natural without added sugars.
- 0.75 cup honey: For a vegan-friendly option, you can substitute with maple syrup.
- 1.5 tsp vanilla: Pure vanilla extract will elevate your bars’ flavor.
Prep Notes: Ensure your peanut butter is at room temperature for easy mixing.
Step-By-Step Instructions
-
Prepare Your Pan: Start by lining a 9×13 inch baking dish with parchment paper, leaving some overhang to easily lift out the bars later.
-
Measure Ingredients: Using separate containers, measure out all your ingredients for a smooth process.
-
Mix the Dry Ingredients: In a large bowl, combine the oats, cinnamon, and sea salt. Give it a good stir to combine everything evenly.
-
Chop and Add: Take your mix-ins (nuts and seeds) and chop them into roughly 1/4 inch pieces, adding them to the oat mixture.
-
Whisk the Wet Ingredients: In another bowl, whisk together the peanut butter, honey, and vanilla until smooth. This will be the binding magic for your entire mix!
-
Combine Mixtures: Pour the wet mixture into the dry ingredients and stir until everything is well coated. You want to ensure that every oat is covered in that delicious peanut butter goodness.
-
Transfer to the Pan: Pour the mixture into your prepared baking dish, pressing it firmly down using a spatula to create an even layer.
-
Chill: Pop the pan in the refrigerator for at least 1 hour (or overnight for that perfect firmness).
-
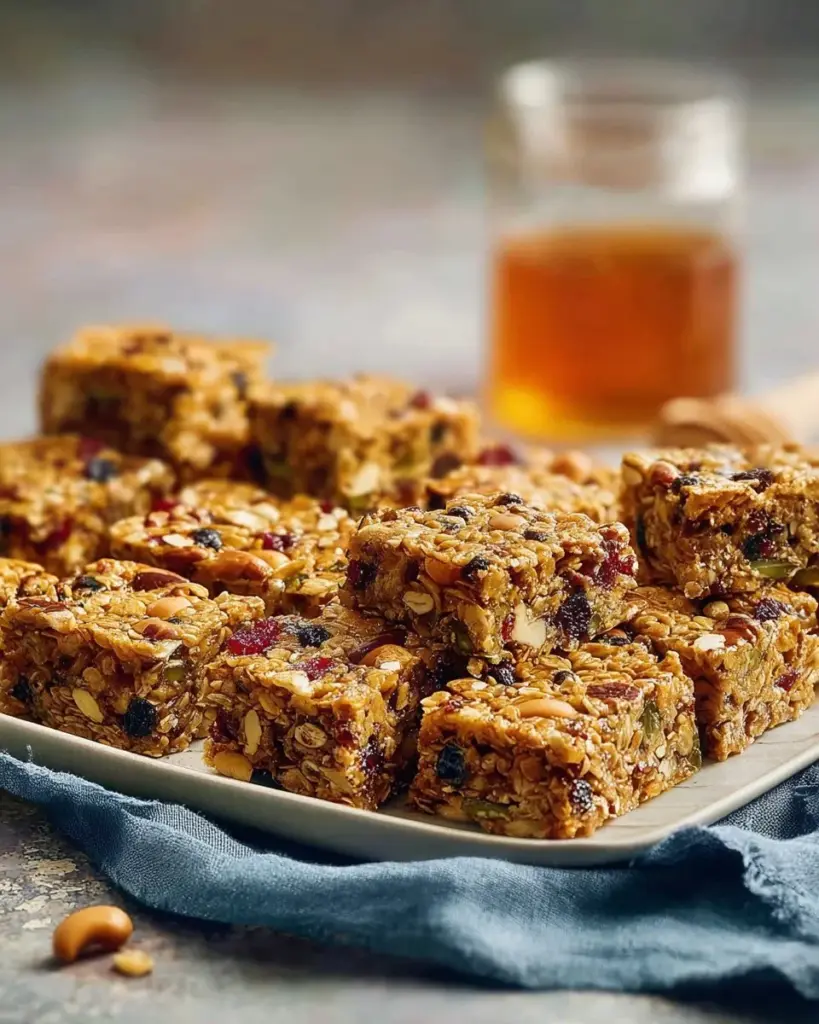
Slice and Serve: Once chilled and set, lift the bars out using the parchment overhang, slice into 16 bars, and enjoy!
Chef’s Tips:
- If the mixture feels too dry, add a bit more honey or peanut butter.
- Store leftover bars in an airtight container for freshness.
Common Mistakes to Avoid:
- Don’t skip the refrigeration step; it ensures the bars firm up nicely.
Expert Tips & Tricks
-
Storage: Keep your No Bake Granola Bars in an airtight container to maintain freshness at room temperature for about a week or refrigerate for longer shelf life.
-
Make-ahead: These bars are perfect for meal prep! Make a batch over the weekend, and you’ll have snacks ready all week.
-
Troubleshooting: If your bars fall apart when cutting, they might need more binding agent. A touch more peanut butter or honey can work wonders!
-
Flavor Boosts: Add a pinch of sea salt on top before chilling for that sweet-and-salty finish.
-
Freeze for Later: You can freeze these bars! Wrap them individually and store in a freezer-safe bag. Thaw as needed.
Serving Suggestions
These No Bake Granola Bars are delicious enough to stand alone, but you can also pair them with a side of Greek yogurt or a smoothie for a nutritious breakfast. For a fun presentation, stack them on a platter and drizzle with melted dark chocolate for an irresistible treat. Perfect for family gatherings or a weekend brunch!
Variations & Substitutions
- Nut-Free Version: Skip the nuts and use seeds like pumpkin or sunflower.
- Chocolate Lovers: Add cocoa powder or mini chocolate chips for a delightful twist.
- Seasonal Fruits: You can incorporate dried cranberries in the fall or chocolate-covered raisins in warm weather for seasonal flair.
Nutrition & Storage Info
- Prep Time: 20 minutes
- Chill Time: 1 hour (or overnight)
- Yield: 16 servings
- Estimated Calories per Serving: 180
- Storage: Store at room temp for 1 week, in the fridge for 2 weeks, or freeze for up to 3 months.
FAQ Section
-
Can I use different nut butters?
- Absolutely! Almond butter, sunflower seed butter—any nut or seed butter will do.
-
How can I make these bars vegan?
- Substitute honey with maple syrup and ensure your nut butter is vegan-friendly.
-
Can I add protein powder?
- Yes! Just reduce the amount of oats slightly to keep the consistency balanced.
-
Why are my bars crumbly?
- They may need more binding agents like honey or nut butter. Ensure you press them firmly before chilling!
-
Do I have to refrigerate them?
- While they can be stored at room temperature, refrigerating makes them hold together better.
-
Is this recipe gluten-free?
- Use certified gluten-free oats, and you’re good to go!
-
What if I don’t have parchment paper?
- Grease the pan lightly with cooking spray or coconut oil, but be careful while slicing!
-
Can I include fresh fruit?
- Fresh fruits can make the bars more perishable, so consider using dried fruits instead.
-
How thick should they be?
- Aim for at least an inch thick; that gives them a nice chewiness!
-
What other flavor combinations can I try?
- Consider coconut and chocolate, cinnamon raisin, or even matcha with white chocolate chips!

Conclusion
These No Bake Granola Bars are more than just a recipe—they’re a pathway to creating delicious memories with your loved ones. The joy of making and munching on these chewy bars will surely bring a smile to your face! I encourage you to try them out, and I’d love to hear your feedback in the comments. Would you like to explore other quick and scrumptious recipes on the blog? Check out my other favorites, and let’s keep the cooking conversation going!
No Bake Granola Bars
Ingredients
Method
- Line a 9x13 inch baking dish with parchment paper, leaving some overhang.
- Measure out all your ingredients into separate containers.
- In a large bowl, combine oats, cinnamon, and sea salt. Stir to combine.
- Chop mix-ins into roughly 1/4 inch pieces and add them to the oat mixture.
- In another bowl, whisk together peanut butter, honey, and vanilla until smooth.
- Pour the wet mixture into the dry ingredients and stir until well coated.
- Pour the mixture into the prepared baking dish, pressing down firmly with a spatula.
- Chill in the refrigerator for at least 1 hour or overnight.
- Once set, lift the bars out using the parchment overhang and slice into 16 bars.