Delight in Decadence: The Ultimate Peanut Butter Banana Cream Pie Recipe
Growing up, rainy afternoons were filled with the comforting smell of fresh-baked goodies wafting through the house. My mom had a knack for whipping up desserts that felt like warm hugs in pie form. One of my all-time favorites was her Peanut Butter Banana Cream Pie—a delightful combo that marries rich, creamy peanut butter with sweet bananas and a fluffy topping that practically melts in your mouth.
What sets my version of this classic dessert apart? It’s all about balance. The nutty flavor of peanut butter plays beautifully against the sweet creaminess of bananas and whipped cream. Each slice is a delightful blend of flavors and textures, and it takes me back to those cozy moments around the table, surrounded by family and laughter.
In this recipe, I’ll share the secrets to achieving that perfect, luscious filling and a crust that’s so delicious you might want to eat it on its own! Plus, I can’t wait to show you how easy it is to whip up this delight at home. By the end of this post, you’ll have your very own slice of nostalgia right on your kitchen counter.
What Are Peanut Butter Banana Cream Pies?
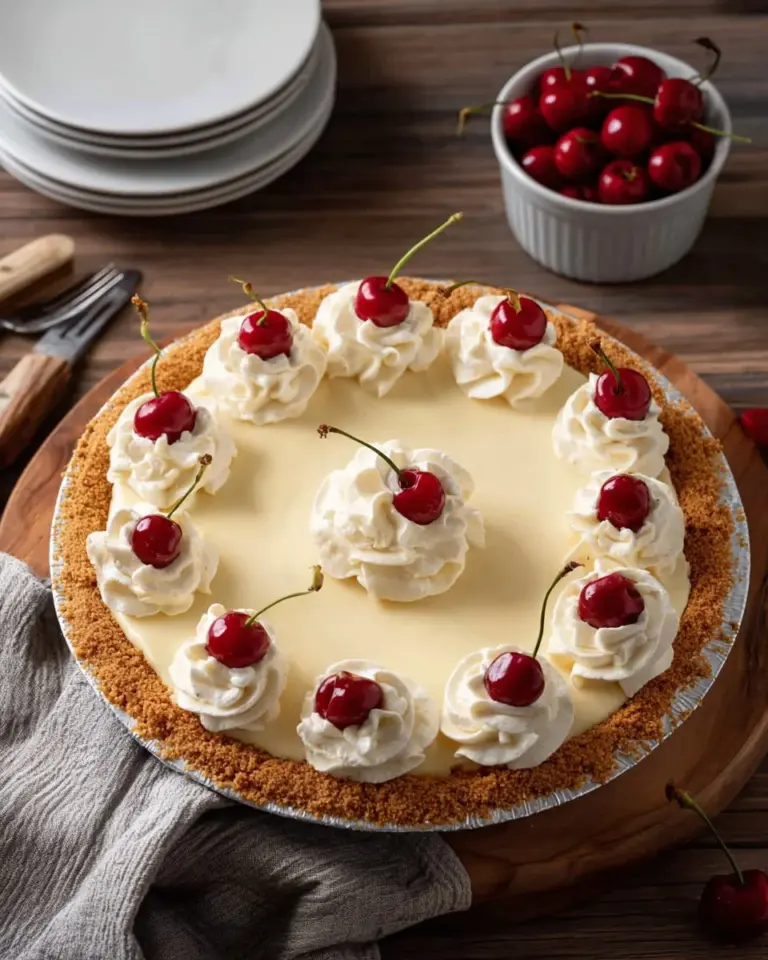
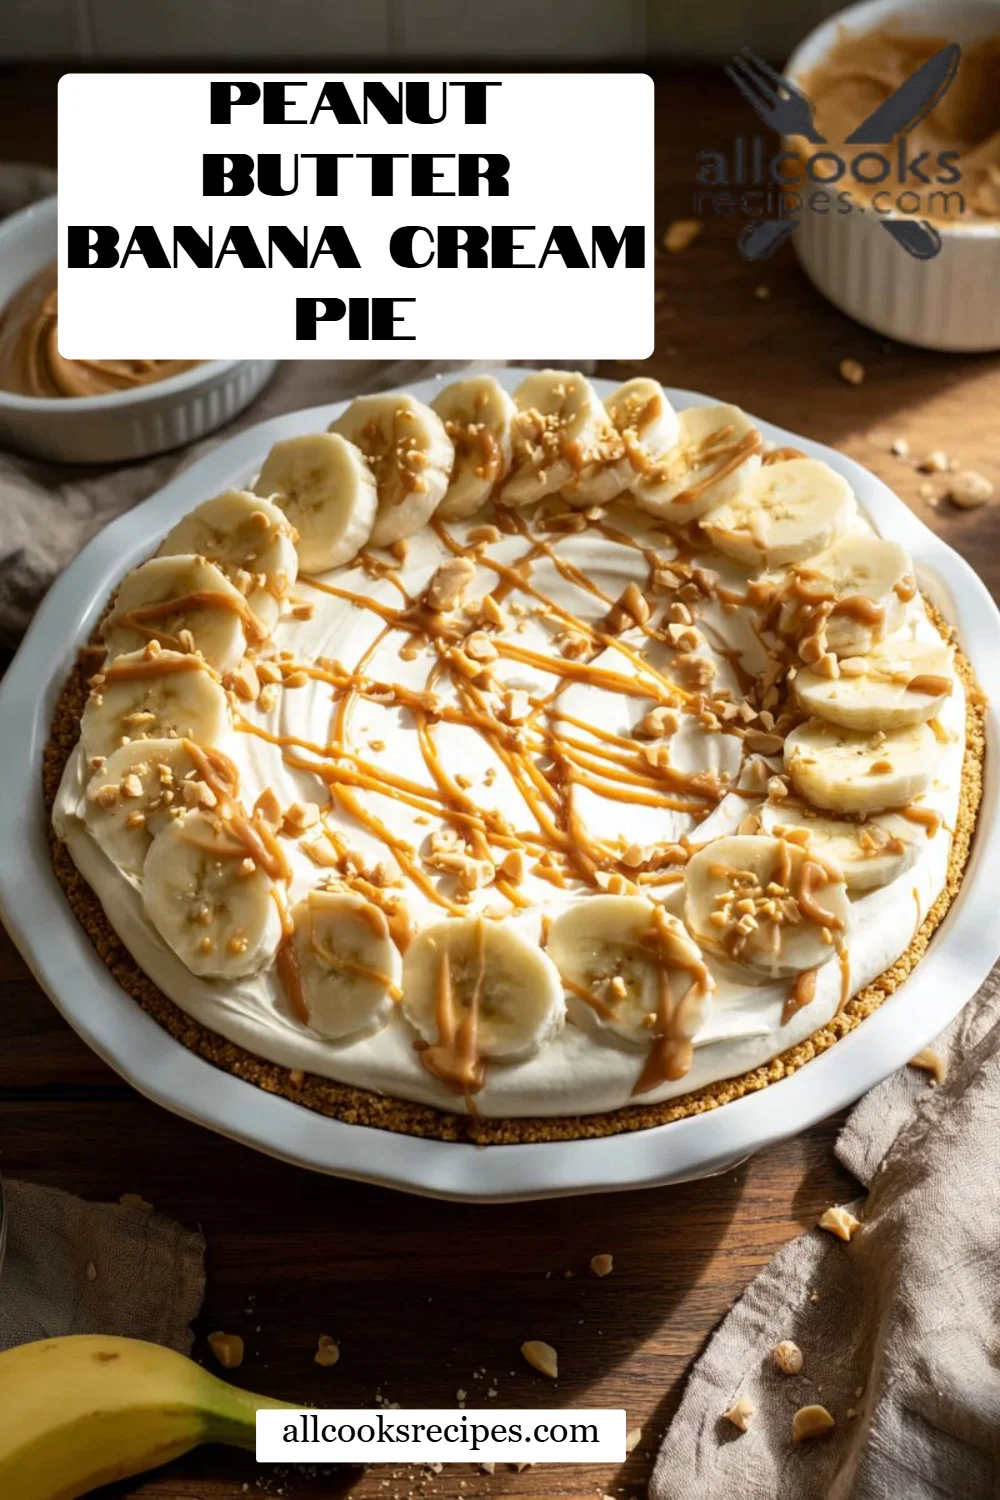
The Peanut Butter Banana Cream Pie is a delightful twist on the classic banana cream pie. Traditionally, banana cream pie features a savory vanilla pastry cream layered with bananas and whipped cream. In my version, the addition of peanut butter adds a depth of nutty flavor that elevates it to a whole new stratosphere of deliciousness.
Imagine the taste: a sturdy yet creamy crust filled with a velvety peanut butter and cream cheese mixture, punctuated by sweet banana slices, and crowned with airy whipped cream. The texture is a wonderful contrast between the smooth filling and crisp crust, making each bite an adventure.
This pie is perfect for any gathering—whether you’re celebrating a birthday, hosting a BBQ, or just indulging on a regular Tuesday night. It’s casual enough for a family dessert yet impressive enough to wow your friends at a dinner party.
Why You’ll Love This Recipe
-
Irresistible Flavor Combination: Who wouldn’t love the classic combo of peanut butter and banana? This recipe elevates that nostalgic combination into a rich, creamy dessert that feels both indulgent and comforting.
-
Cost-Effective and Homemade: Rather than splurging on a store-bought dessert that often disappoints, you can make this pie at home with simple ingredients. It’s budget-friendly without sacrificing taste or quality!
-
Customizable to Your Tastes: One of my favorite things about this recipe is its flexibility. Want to turn it into a chocolate-peanut butter pie? You can add cocoa powder or chocolate pudding for an extra kick!
-
Simple Yet Stunning: You don’t need to be a baking pro to make this pie. The steps are easy to follow, but the end result is one that looks as good as it tastes—making it perfect for impressing guests (or yourself!).
-
Make-Ahead Friendly: Not only is this pie delicious, but it can also be made in advance—allowing you to spend more time enjoying your company and less time stressing in the kitchen. It keeps well in the fridge for a couple of days, so you can savor every last bite.
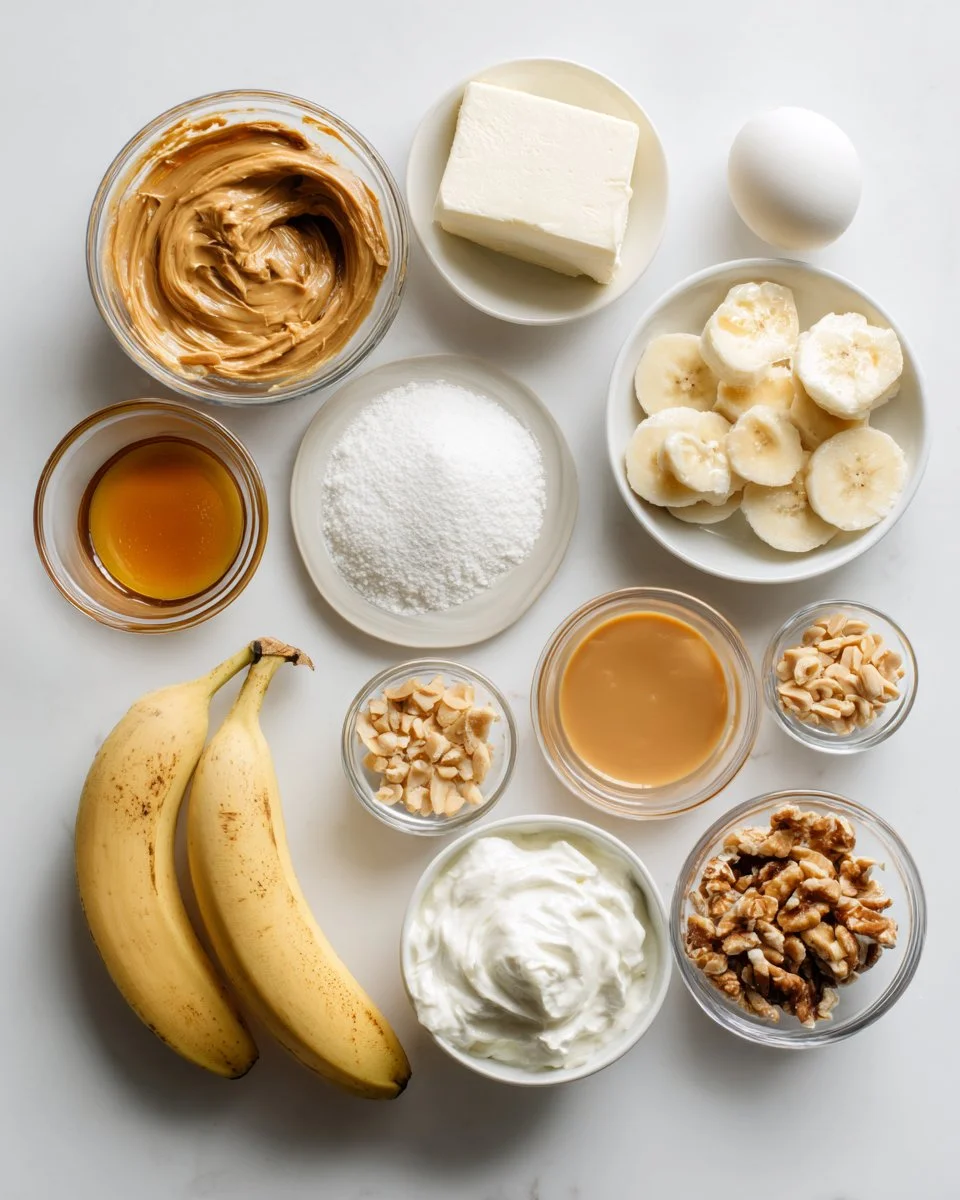
Ingredients
-
For the Crust:
- 1 cup peanut butter (creamy or crunchy)
- 1 cup granulated sugar
- 1 large egg (room temperature)
-
For the Filling:
- 3 packages cream cheese (softened)
- 3/4 cup granulated sugar
- 2 cups heavy whipping cream
- 1 package banana cream instant pudding mix
- 2 medium bananas (sliced)
-
For Garnish:
- Sliced banana
- Whipped cream
- Chopped peanuts
- 1/4 cup creamy peanut butter (melted)
Notes on Ingredients
- Peanut Butter: I personally prefer creamy peanut butter for its smooth texture, but crunchy adds a delightful bite!
- Granulated Sugar: Ensure you have enough sugar on hand—trust me; it helps balance the flavors beautifully.
- Heavy Whipping Cream: Fresh cream yields the best results. You can use substitutes if necessary, but it won’t be quite as rich.
- Room Temperature Ingredients: Allowing your cream cheese and egg to reach room temperature will make for a smoother filling.
Step-by-Step Instructions
1. Preheat Oven to 350°F
Start by preheating your oven. This is a crucial step in getting that perfect crust.
2. Prepare the Crust
In a medium mixing bowl, stir together 1 cup of peanut butter, 1 cup of granulated sugar, and 1 room temperature egg until fully combined. The mixture should be thick and sticky.
3. Form the Crust
Press the cookie batter evenly into the bottom and up the sides of a deep dish 9-inch pie pan. Aim for a nice, even layer that will hold its shape.
4. Bake
Bake for 13-14 minutes or until slightly crisp and no longer shiny—you want it to look golden and delicious. This crust will be the foundation of your pie!
5. Cool Completely
Allow the crust to cool completely. Patience is key here; a hot crust won’t hold the filling well.
6. Prepare the Creamy Filling
In a large mixing bowl, beat together 3 packages of softened cream cheese with 3/4 cup of sugar until the mixture is smooth and creamy.
7. Whip the Cream
In a separate bowl, whisk together 2 cups of heavy whipping cream and the banana cream instant pudding mix until combined. It should form soft peaks; aim for a fluffier texture here.
8. Combine Mixtures
Add the pudding mixture to the cream cheese mixture, beating until smooth and well-combined.
9. Layer with Bananas
Place your sliced banana in a single layer on the cooled crust.
10. Add the Filling
Spoon the creamy filling on top of the sliced bananas, smoothing it into an even layer. This is where the magic happens!
11. Chill
Refrigerate for at least one hour to let everything set.
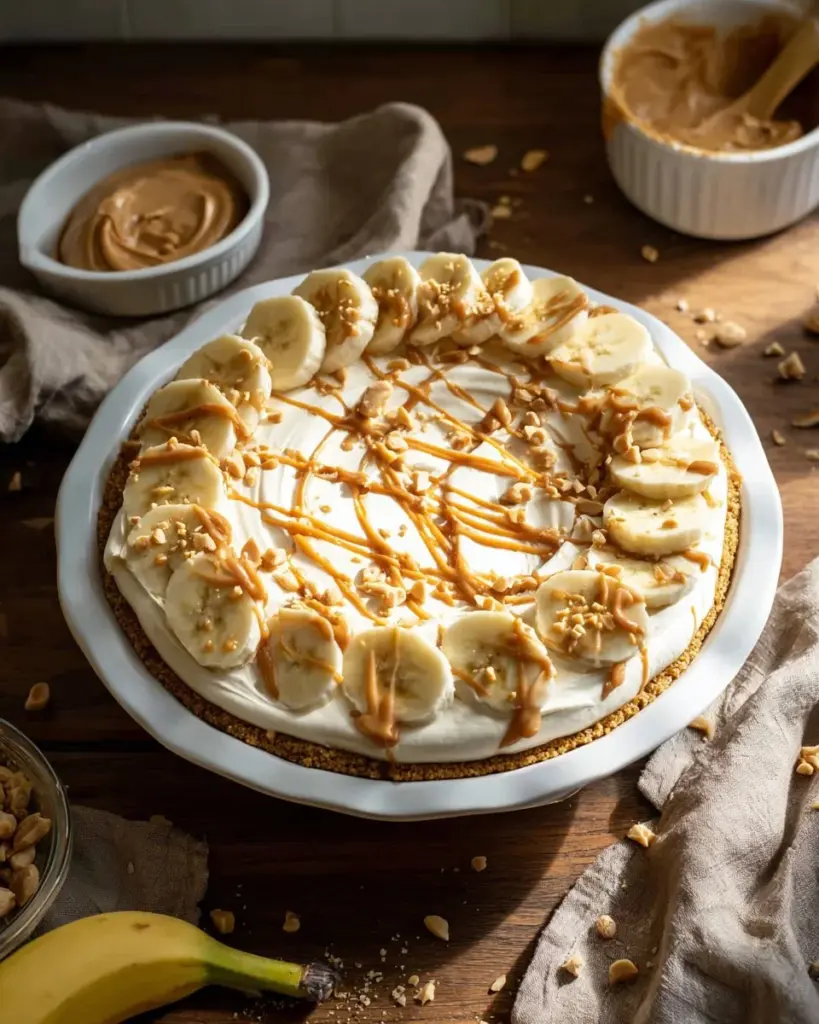
12. Garnish and Serve
Before serving, decorate with more sliced bananas, whipped cream, and chopped peanuts. Finish with a drizzle of melted peanut butter. Get ready for a crowd-pleaser!
Expert Tips & Tricks
- Use Quality Ingredients: Investing in good cream cheese and whipped cream can make all the difference.
- Make Ahead: This pie can be made a day in advance—just ensure it’s tightly covered in the fridge.
- Avoid Overmixing: When combining your mixtures, overmixing can cause the filling to become too soft.
- Store Properly: Keep leftover pie in a tightly sealed container in the fridge for up to 3 days.
- Troubleshooting: If your crust cracks, don’t panic! A drizzle of peanut butter over the top can hide it perfectly.
Serving Suggestions
Pair your Peanut Butter Banana Cream Pie with a scoop of vanilla ice cream for an extra indulgence, or serve it alongside a steaming cup of coffee to balance the sweetness of the pie. For a more festive touch, try serving it at birthday parties or family gatherings—your friends and family will rave about this dessert!
Variations & Substitutions
- Chocolate Lovers: Add a layer of chocolate pudding beneath the banana slices for a rich chocolate-peanut butter experience.
- Dietary Adjustments: For a vegan version, substitute the cream cheese for cashew cream and use a plant-based whipping cream.
- Seasonal Flavors: In fall, try adding a hint of cinnamon or nutmeg to the filling for a seasonal twist.
Nutrition & Storage Info
- Prep Time: 30 minutes
- Cook Time: 15 minutes
- Total Time: 1 hour 45 minutes (including chilling)
- Yield: 8 slices
- Estimated Calories: Approx. 400 per slice
- Storage: Keep it in your fridge for up to 3 days, or freeze manageable portions for up to a month.
FAQ Section
-
Can I use natural peanut butter?
- Yes! However, natural peanut butter may have a different texture and oil separation. Stir it well before use.
-
How can I make this pie gluten-free?
- Ensure your sugar and any other additives are gluten-free. The crust will be naturally gluten-free with the ingredients listed.
-
Can I use fresh whipped cream instead?
- Absolutely! Just be sure to follow the whipping instructions carefully to get that perfect fluffiness.
-
Is it necessary to refrigerate?
- Yes, chilling allows the filling to set and flavors to meld beautifully!
-
How do I prevent the bananas from browning?
- Brush sliced bananas with lemon juice before placing them in your pie to prevent browning.
-
Can I make mini pies?
- Definitely! Divide the crust and filling among mini pie tins for individual servings.
-
What if I can’t find instant pudding mix?
- You can make your own pudding from scratch or use a similar flavored mix as a substitute.
-
What desserts complement a Peanut Butter Banana Cream Pie?
- Pair with fruit salads, cookies, or brownies for a perfect dessert spread.
-
Can I make it without sugar?
- Consider using a sugar substitute like Stevia or monk fruit. Experiment to find the right balance!
-
How long does it last in the fridge?
- This pie is best consumed within 3 days, but it can last up to 5 if sealed properly.
Conclusion
In a world overflowing with dessert options, my Peanut Butter Banana Cream Pie stands out as a beloved classic that marries delightful flavors with cherished memories. I genuinely encourage you to try this recipe, as not only will it spark joy in your kitchen, but it will also create memories around the table just like it did for me. Don’t forget to drop a comment with your thoughts or any fun variations you try! And for more delicious recipes, check out my other posts for a cookie or two—your sweet tooth will thank you!
Peanut Butter Banana Cream Pie
Ingredients
Method
- Preheat your oven to 350°F.
- In a medium mixing bowl, stir together 1 cup of peanut butter, 1 cup of granulated sugar, and 1 room temperature egg until fully combined.
- Press the cookie batter evenly into the bottom and up the sides of a deep dish 9-inch pie pan.
- Bake for 13-14 minutes or until slightly crisp and no longer shiny; it should look golden.
- Allow the crust to cool completely.
- In a large mixing bowl, beat together 3 packages of softened cream cheese with 3/4 cup of sugar until the mixture is smooth and creamy.
- In a separate bowl, whisk together 2 cups of heavy whipping cream and the banana cream instant pudding mix until combined and soft peaks form.
- Add the pudding mixture to the cream cheese mixture and beat until smooth.
- Layer sliced banana evenly on the cooled crust.
- Spoon the creamy filling on top of the sliced bananas, smoothing it into an even layer.
- Refrigerate for at least one hour to allow it to set.
- Decorate with more sliced bananas, whipped cream, and chopped peanuts.
- Drizzle with melted peanut butter before serving.