The Ultimate Homemade Vanilla Milkshake: Creamy Bliss in a Glass
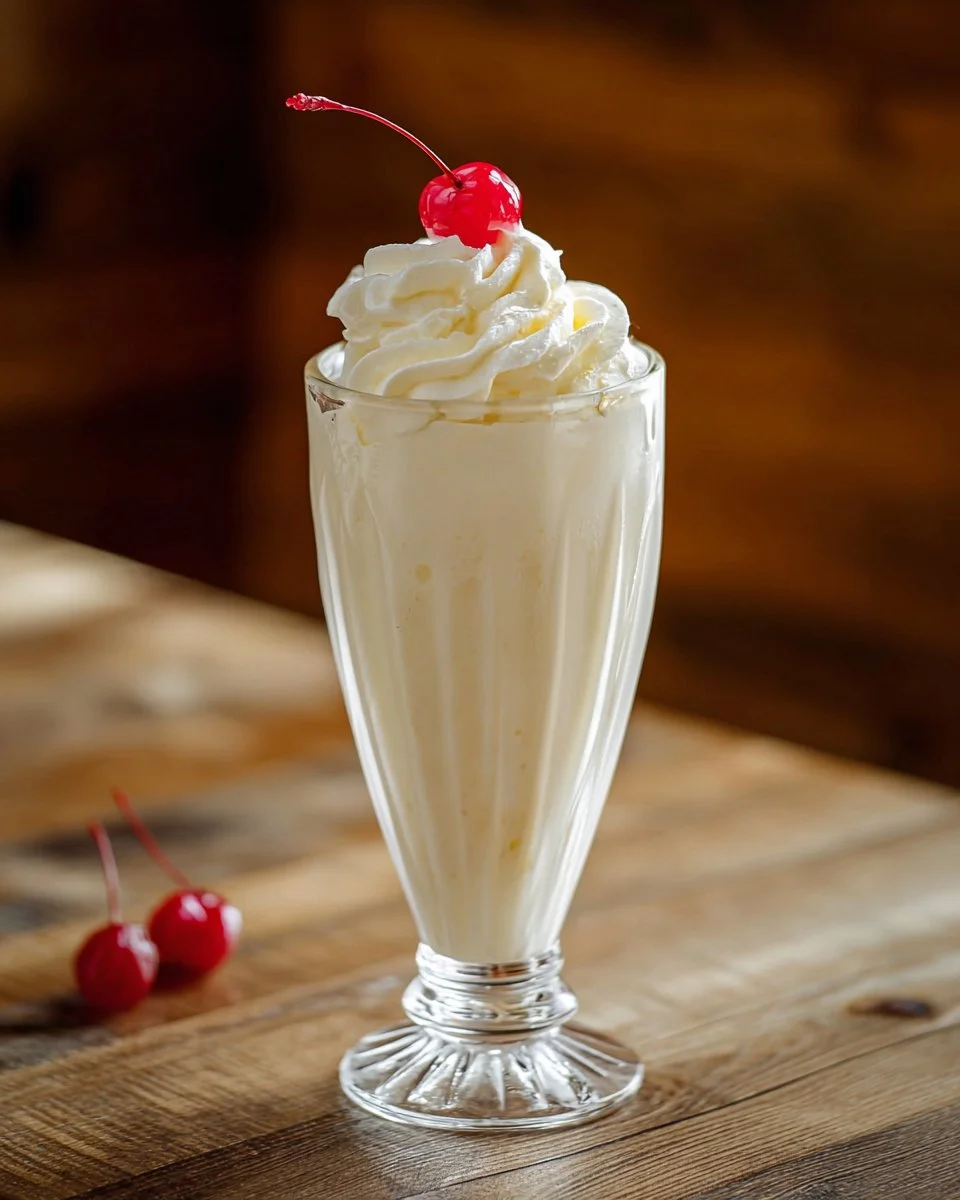
I still remember the first time my grandmother made her famous Vanilla Milkshake on a hot summer afternoon. The sun blared, and all I craved was something cold and sweet. She would hand me that tall glass brimming with frosty creaminess topped with whipped cream and a bright red maraschino cherry. The first sip was pure magic. It transported me to a world of delicious comfort, and from that moment on, my love affair with milkshakes began.
There’s something about a Vanilla Milkshake that transcends generations. It’s not just a simple blend of ice cream and milk; it’s a nostalgic trip, a family gathering staple, and a way to cool down after an exhausting day. What makes this recipe special, you ask? It’s not just taste, though it certainly shines there—it’s also about quality ingredients and a personal touch. Unlike those store-bought or restaurant options that can be overly sweet and artificial, this version allows you to control every element, ensuring a creamy, dreamy delight with every sip.
In this post, I will guide you through crafting the perfect Vanilla Milkshake at home. Get ready to indulge in its velvety texture, rich flavor, and that nostalgic feeling of pure joy!
What Are Vanilla Milkshakes?
Vanilla milkshakes, the timeless classic, have graced the dessert menus and diners worldwide for decades. Originating in the late 19th century, they were initially made with eggs and whiskey for a fizzy effect, evolving over time into the creamy treat we know and love today.
A Vanilla Milkshake is loved not only for its simple yet indulgent flavor but also for its smooth, velvety texture that sends anyone on a mini-vacation with each sip. Made primarily from velvety vanilla ice cream and rich whole milk, every milkshake brings a palette of nostalgia, sweetness, and comfort to the table. Whether it’s a hot summer day or a cozy winter night, a vanilla milkshake is a beloved treat that knows no season.
But when should you whip one up? The answer is simple: anytime! Celebrate a personal victory, cool off on a sunny day, or bring family and friends together for game night. The Vanilla Milkshake is versatile enough to join you on any occasion.
Why You’ll Love This Recipe
-
Simplicity at its Best: With just four ingredients, this Vanilla Milkshake comes together in less than 10 minutes. It’s an easy recipe that anyone can master. You’ll find it hard to believe that something so delicate and delicious can be so effortlessly prepared!
-
Quality Over Quantity: Unlike the overly sugary concoctions found at fast-food joints, this milkshake is made with high-quality vanilla ice cream and whole milk. You get to select the brands that suit your taste, ensuring each sip is pure bliss.
-
Budget-Friendly Indulgence: Making this Vanilla Milkshake at home is not only enjoyable but also economical. Why spend $5 on a store version when you can create several for the same price? This recipe serves about two large glasses for the cost of a single shake at a diner.
-
Endless Customization: One of the best things about this recipe is its flexibility. Add chocolate syrup for a classic twist, or toss in mint leaves for a refreshing feel. You can even swap the vanilla ice cream for your favorite flavor, like cookies and cream or strawberry. The possibilities are endless!
-
Set for Success: No complicated techniques are required here. Just blend a few ingredients and voilà! With easy adjustments to achieve the perfect consistency, you’ll be a milkshake master in no time.
Get ready to experience the joy of crafting a treat that not only satisfies your cravings but brings the whole family together!
Ingredients
-
2 cups (344 g) vanilla ice cream, softened slightly: I recommend using a high-quality ice cream for the best flavor, like Häagen-Dazs or Ben & Jerry’s. If you’re looking for a lighter option, Trader Joe’s has great low-fat varieties.
-
1/2 cup (122 g) whole milk: Whole milk makes the milkshake extra creamy, but feel free to use 2% or even almond milk if you prefer a dairy-free version.
-
1/2 teaspoon vanilla extract: Use pure vanilla extract for a richer flavor. I love Nielsen-Massey for its robust profile.
-
Whipped cream, optional, for topping: Homemade whipped cream is the way to go! It’s quick to make and tastes infinitely better than store-bought. However, if you’re in a rush, the canned version is a handy alternative.
-
Maraschino cherry, optional, for topping: This adds a classic touch! Look for brands that use natural colors and flavors for the best taste.
Remember, the quality of your ingredients truly impacts the outcome of your Vanilla Milkshake, so choose wisely!
Step-by-Step Instructions
-
Prep Your Ingredients: Before anything, gather your ingredients. Let your vanilla ice cream soften at room temperature for about 5-10 minutes. This will make blending easier!
-
Blend the Base: Place the softened vanilla ice cream, whole milk, and vanilla extract into a blender. Tip: Start with the ice cream at the bottom to help create a vortex, ensuring everything blends smoothly.
-
Blend Until Smooth: Blend on high speed until the mixture is smooth and creamy, which should take about 30 to 60 seconds. Chefs Tip: Stop halfway to scrape down the sides of the blender to make sure everything is well mixed.
-
Adjust Consistency: If the milkshake seems too thick, add a little more milk, one tablespoon at a time, blending after each addition until you reach your desired consistency. Conversely, if it’s too thin, add a bit more ice cream and blend again.
-
Serve It Up: Pour the luscious milkshake into tall glasses. Top generously with whipped cream and garnish with a maraschino cherry. Pro Tip: For an extra touch, drizzle some chocolate syrup inside the glass before pouring the milkshake. It’s a visual delight!
-
Enjoy Immediately: Serve with thick straws or spoons—the choice is yours!

Expert Tips & Tricks
-
Temperature Matters: Ensuring your ice cream is softened is key to a smooth blend. Too hard, and your blender might struggle; too soft, and it will melt too quickly.
-
Storage Recommendations: If you have any leftovers (which is rare!), pour the milkshake into a container and freeze it for up to an hour for a thicker treat. However, it’s best enjoyed fresh.
-
Make-Ahead Instructions: If you’re prepping for a party, you can have the components ready in the fridge. Just blend them right before serving to maintain that creamy goodness.
-
Troubleshooting: If your milkshake isn’t creamy enough, try adding more ice cream rather than milk. Remember, you can always thicken but can’t easily fix a watery milkshake!
-
For a Richer Flavor: Consider adding a pinch of salt or even some espresso powder for a flavor boost that complements the sweetness wonderfully.
-
Get Creative: Don’t shy away from trying different mix-ins like crushed cookies, crushed candy bars, or fruits to elevate your milkshake experience!
Serving Suggestions
When it comes to enjoying your Vanilla Milkshake, the pairing possibilities are delightful! How about serving it alongside freshly baked cookies, a slice of pie, or even some homemade brownies? Not only do they complement the coolness and creaminess of the milkshake, but they also make for a truly indulgent dessert experience.
For presentation, consider serving your milkshake in whimsical glassware or mason jars drizzled with chocolate syrup. A sprinkle of colorful sprinkles on top would elevate it further, making it a perfect treat for birthday parties or casual summer get-togethers!
Variations & Substitutions
-
Flavor Combinations: Swap vanilla ice cream for chocolate or strawberry for a delightful twist. You could even try a cookies and cream milkshake by tossing in your favorite crushed cookies!
-
Dietary Restrictions: For a dairy-free option, use coconut milk or almond milk, along with dairy-free vanilla ice cream. There are some fantastic options on the market now that won’t compromise on flavor.
-
Seasonal Variations: Incorporate seasonal flavors! For fall, add a splash of pumpkin spice. In summer, consider blending in some fresh strawberries or peaches for a fruity touch.
Nutrition & Storage Info
- Prep Time: 10 minutes
- Total Time: 10 minutes
- Yield: 2 large servings
- Estimated Calories per Serving: Approximately 400 calories, depending on the ice cream used.
- Storage Instructions: Milkshakes are best enjoyed immediately. Any leftovers can be stored in the freezer for a few hours but are best consumed fresh.
FAQ Section
-
Can I use low-fat ice cream?
- Yes, but remember that the creaminess may be less than with full-fat options.
-
Can I use non-dairy milk?
- Absolutely! Almond milk, soy milk, or oat milk are all great alternatives.
-
What if I don’t have a blender?
- You can use an immersion blender or even a hand whisk, though it will require more elbow grease!
-
How can I thicken my milkshake?
- Add more ice cream! If you don’t have any on hand, chilling the milk can also help.
-
Can I add protein powder?
- Yes! Just blend a scoop with your usual ingredients for an extra health boost.
-
What are other flavor recommendations?
- Mint chocolate chip, peanut butter, and caramel are fantastic additions to make your shake unique!
-
How do I make this milkshake healthier?
- Try using frozen fruits sweetened with honey or maple syrup instead of ice cream.
-
How long does it take to make?
- From prep to pouring, you’re looking at about 10 minutes total.
-
Can I make this a milkshake float?
- For sure! Top your Vanilla Milkshake with soda for an exciting float experience.
-
Do I need whipped cream?
- While optional, it’s a classic topping that enhances the indulgent experience!
Conclusion
This Vanilla Milkshake recipe is more than just a sweet treat; it’s a bridge to memories and moments filled with joy. Whether you’re indulging alone or sharing it with family and friends, every sip is bound to warm your heart.
I truly encourage you to try this recipe! Once you do, I’d love to hear your thoughts in the comments below. Did you add any unique twists? Got a family favorite variation? And while you’re here, check out my other delightful recipes for desserts that will sweeten your day!

Vanilla Milkshake
Ingredients
Method
- Gather your ingredients. Let the vanilla ice cream soften at room temperature for 5-10 minutes.
- Place the softened vanilla ice cream, whole milk, and vanilla extract into a blender.
- Blend on high speed for 30 to 60 seconds until smooth and creamy. Scrape sides halfway to ensure thorough mixing.
- If the milkshake is too thick, add milk one tablespoon at a time and blend until desired consistency is reached.
- If too thin, add more ice cream and blend again.
- Pour the milkshake into tall glasses. Top with whipped cream and a maraschino cherry.
- For an extra touch, drizzle chocolate syrup inside the glass before adding the milkshake.
- Serve immediately with thick straws or spoons.