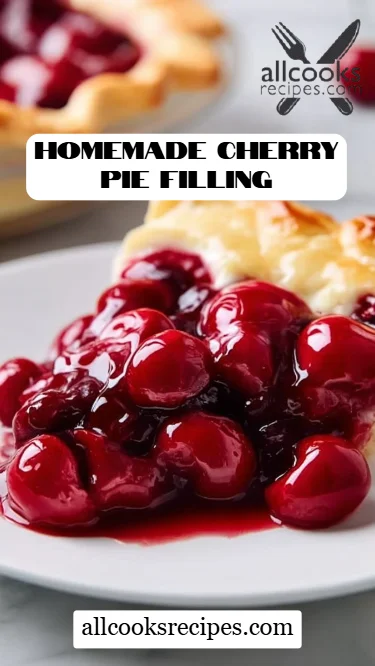
Irresistibly Delicious Homemade Cherry Pie Filling: The Perfect Sweet Treat
There’s something utterly magical about the scent of freshly baked goods wafting through the house, and nothing makes my heart sing quite like the aroma of Homemade Cherry Pie Filling bubbling away on the stovetop. I remember my grandmother pulling out her old family recipe each summer when cherries were in season; the joy of watching her work in the kitchen is a cherished memory that I hold close to my heart. Homemade cherry pie, with its glossy filling spilling over a buttery crust, became our family’s go-to dessert for every gathering, and now I’m thrilled to share that love with you.
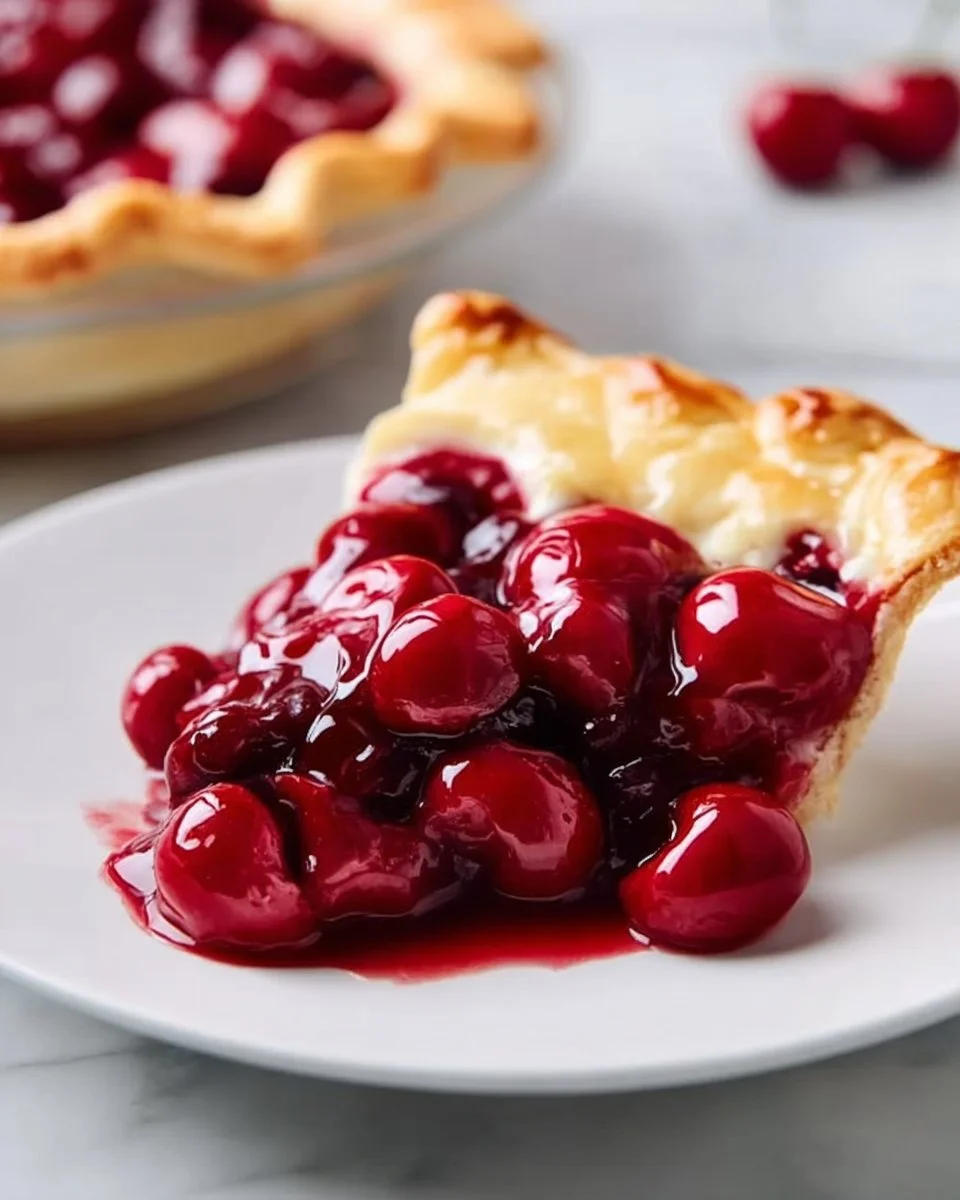
What makes my Homemade Cherry Pie Filling stand out from the store-bought versions? For starters, we’re using luscious, ripe cherries that scream summer sweetness, enhanced by just the right amount of sugar to bring out their natural flavor. It’s the texture and warmth of this filling that truly makes it special—perfectly thickened, bursting with flavor, yet so silky that it begs to be spooned over vanilla ice cream.
In this post, I promise you’ll learn not just how to make it, but also tips and tricks to elevate your filling to legendary status—just like Grandma used to make!
What Are Homemade Cherry Pie Fillings?
Homemade Cherry Pie Filling is a classic American treat that hearkens back to pioneer days, when families relied on fruit preserves for sustenance during long winters. Being a staple in American desserts, this filling is a delightful mingling of tart and sweet flavors that come from fresh cherries.
Taste-wise, it’s all about balance—the tartness of the cherries paired with just enough sweetness to create a tangy flavor sensation. The texture is another highlight: jewel-like syrup clinging to each cherry, forming a luxurious sauce that’s both rich and satisfying. What makes this filling truly unique is the absolutely fresh taste, which is often missing in store-bought versions packed with preservatives and artificial flavors.
You might want to whip up this filling in the summer when cherries are in their prime, or whenever those nostalgic cravings hit—because who doesn’t love the cozy comforts of cherry pie?
Why You’ll Love This Recipe
-
Homemade Goodness: Imagine filling your kitchen with the sweet, tangy aroma of cherries and sugar simmering on the stove—it’s like a warm hug in dessert form! Each jar of this delicious filling holds memories and flavors that store-bought versions simply can’t replicate.
-
Better Ingredients: With this Homemade Cherry Pie Filling, you have control over the ingredients, meaning no preservatives or unrecognizable additives—just fresh cherries, sugar, and flavor boosters. Plus, the joy of canning allows you to pick your favorite cherries at peak freshness!
-
Customizable: Want a little extra zing? Add a splash of almond extract. Prefer it less sweet? Adjust the sugar to your liking. You are the chef here, meaning you can tweak this recipe to create your perfect balance.
-
Cost-Effective: A pint of fresh cherries costs a fraction of a pre-made filling, and making it yourself? It’s a small investment for something that delivers big on flavor and nostalgia.
-
Easy to Make: This recipe falls on the easier side of the baking spectrum. In just a little over 20 minutes, you can craft this delicious filling, so even beginners will find it approachable and rewarding.
Ingredients Section
Ingredients
- Fresh Cherries (about 4 cups, pitted): Always choose ripe, firm cherries for the best flavor. I love Bing cherries for their sweetness.
- Sugar (1 cup): Adjust to your taste; reduce for tart cherries or increase if you prefer it sweeter.
- Cornstarch (1/4 cup): This thickener is essential for achieving that perfect, luscious consistency.
- Lemon juice (2 tablespoons): Freshly squeezed for a bright, zingy flavor.
- Vanilla extract (1 teaspoon): For depth; feel free to swap for almond extract for a different twist.
- Salt (1/4 teaspoon): A pinch enhances the overall flavor.
Prep Notes: Make sure your cherries are fresh and washed. If you want to make life easier, you can use a cherry pitter!
Step-by-Step Instructions
-
Wash and pit the fresh cherries. Start by rinsing those beautiful cherries under cold water. Once clean, use a cherry pitter to remove the pits. This step is key; no one wants to bite into a hard pit!
-
Combine ingredients in a saucepan. In a medium-sized saucepan, combine the pitted cherries, sugar, cornstarch, lemon juice, vanilla extract, and salt. Give it a gentle stir until everything is mixed well.
-
Cook over medium heat. Place the saucepan over medium heat and stir constantly. In about 5-10 minutes, the mixture will begin to thicken and bubble. Look for the cherries to be fully coated in a glossy sauce—this is where the magic happens!
-
Cool before using. Once thickened, remove the saucepan from heat and let the filling cool for about 10-15 minutes. You want it to cool to room temperature before using it in your favorite pies or desserts.
Chef’s Tips:
- Watch the mixture carefully to avoid burning; it can happen quickly!
- If you’d like a smoother filling, feel free to use an immersion blender for just a few seconds!
Expert Tips & Tricks
-
Storage Recommendations: Store your Homemade Cherry Pie Filling in airtight containers. In the fridge, it will last about a week, and if you want to preserve it longer, canning is a great option.
-
Make-ahead Instructions: This filling can be made ahead of time and stored in the freezer for up to 6 months—just allow it to thaw in the fridge before using.
-
Troubleshooting Common Problems: If your filling turns out too runny, mix a little cornstarch with cold water and stir it in while reheating. Too thick? Add a splash of water or cherry juice to loosen it up.
-
Experimenting with Spices: Consider adding a pinch of cinnamon or nutmeg for a warm twist to the classic recipe.
-
Serving Ideas: Use this cherry filling to top cheesecakes, ice cream, or even pancakes; the possibilities are endless!
Serving Suggestions
This Homemade Cherry Pie Filling is incredibly versatile! Serve it warm over a scoop of vanilla ice cream for a stunning dessert. Pair it with whipped cream on cheesecake for a decadent treat, or fold it into yogurt for a refreshing breakfast option.
For presentation, a simple drizzle of additional syrup on top and a sprig of mint can make any dish look gourmet. This filling is perfect for summer picnics or holiday gatherings!
Variations & Substitutions
-
Flavor Combinations: While cherry is classic, consider mixing in other fruits like blueberries or raspberries for a unique twist!
-
Dietary Adaptations: For a low-sugar option, try a natural sweetener like honey or maple syrup; just adjust accordingly, as they can yield different sweetness levels.
-
Seasonal Variations: During fall, you might substitute apples for cherries to create a delightful apple pie filling instead!
Nutrition & Storage Info
- Prep Time: 5 minutes
- Cook Time: 15 minutes
- Total Time: 20 minutes
- Yield: About 2 cups (serving suggestion: 8)
- Estimated Calories: Approximately 100 calories per serving
- Storage Instructions: Store at room temperature for 3 days, in the fridge for up to 1 week, or freeze for up to 6 months.
FAQ Section
-
Can I use frozen cherries instead of fresh?
Yes, but make sure to thaw and drain excess moisture before cooking. -
What should I do if my filling is too sweet?
Add a bit more lemon juice to elevate the tartness and balance the sweetness. -
How can I thicken my filling if it’s too runny?
Mix a tablespoon of cornstarch with water to create a slurry, then add it back to your mixture while cooking until thickened. -
Can I can this filling for long-term storage?
Yes! Make sure to follow standard canning procedures for safe storage. -
Can I use this filling in other desserts?
Absolutely! It can be used in cobblers, cheesecakes, and even as a topping for pancakes or waffles. -
How do I know if my cherries are ripe?
Look for firm, plump cherries with a vibrant color—avoid any that are mushy or have dark spots. -
Can I make this with other types of fruit?
Of course! This recipe is versatile enough to work with many fruits, such as peach or plum. -
What is the best way to pit cherries?
Using a cherry pitter is the easiest way. If you don’t have one, a small knife can be used to cut them in half and remove the pit. -
How do I adjust the filling for a larger pie?
Simply double or triple the recipe according to the size of your pie dish! -
How long will the filling last in the freezer?
It can be stored in the freezer for up to 6 months if properly sealed.
Conclusion
This Homemade Cherry Pie Filling recipe is more than just a set of instructions; it’s a heartwarming return to family traditions and joyful moments spent in the kitchen. I invite you to try it yourself—feel free to share your creations and experiences with me! Don’t forget to browse my blog for related recipes that will make your dessert table even more delightful. Happy baking, my friends!