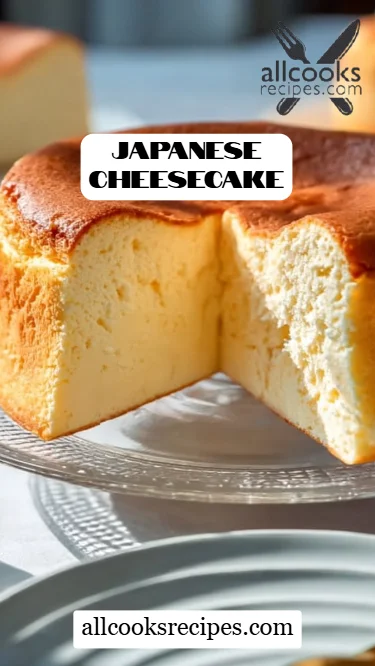
Fluffy Japanese Cheesecake: A Slice of Joy from My Kitchen to Yours
Is there anything better than the cloud-like softness of a homemade Japanes cheesecak? For me, it’s not just a dessert; it’s a heartwarming bridge to my childhood. I vividly remember the first time I tasted this delight—my mother pulling it from the oven, its delicate golden top promising a flavor that was nothing short of extraordinary. As I dove into slice after slice, the rich blend of cream cheese, cake flour, and love enveloped me in a comfort I had never known before.
Japanese Cheesecake is special—it’s a harmonious blend of fluffy, light sweetness that dances on the tongue and leaves you craving more. Unlike its denser Western counterpart, this heavenly treat rises to perfection, creating a blissful, melt-in-your-mouth experience unlike any other. What sets this recipe apart is its simplicity and ease of execution, making it accessible even for those new to baking.
Through this blog post, I’ll take you step-by-step into my kitchen to discover the magic of Japanese Cheesecake. By the end, you’ll have a deliciously fluffy cake ready to share with family and friends, just like my mother did many years ago.
What Are Japanese Cheesecake?
Japanese Cheesecake, often referred to as "soufflé cheesecake," originated in Japan and quickly made its mark around the world for its unique texture and taste. What makes it stand out from traditional cheesecakes is its fluffy, soufflé-like quality, which results from a combination of beaten egg whites and a delicate batter. It’s baked gently to create a light, airy interior—a stark contrast to the heavy, cream-cheese-laden American versions.
The taste is subtly sweet with a hint of tang from the cream cheese, and the texture? Imagine slicing into a cloud, where each bite is an experience of ethereal softness. This dessert is perfect for special occasions or when you’re looking to impress your guests with something a little different. Whether it’s a birthday celebration or a cozy family gathering, Japanese Cheesecake can add a touch of elegance and comfort to your table.
Why You’ll Love This Recipe
-
Light and Fluffy Texture: Forget about the dense cheesecakes that weigh you down! This Japanese Cheesecake is a delightful escape from the ordinary, offering a fluffy, melt-in-your-mouth experience that will have everyone asking for seconds.
-
Cost-Effective: Making this dessert at home is not only fun, but it’s also budget-friendly. With just a handful of ingredients, you can create a gourmet treat that would typically cost a pretty penny at a bakery.
-
Customization Options: Want to infuse new flavors? You can easily experiment by adding matcha powder, lemon zest, or even a layer of fruit compote. The possibilities are endless, giving you the freedom to tailor it to your preferences.
-
Easy Execution: This recipe is perfect for beginners. I promise, if I can nail it on my first try, you can too! The process involves simple steps that lead to an impressive result; it’s more about technique than difficulty.
-
Impressive Presentation: Once you unveil your fluffy masterpiece, it’s bound to steal the show. Serve it chilled with a light dusting of powdered sugar or fresh berries, and watch jaws drop all around!
Ingredients
For the Japanese Cheesecake:
- 200g cream cheese – Use high-quality brands like Philadelphia for the best flavor and texture in your cheesecake.
- 50g butter – Make sure your butter is unsalted and at room temperature for easy blending.
- 100ml milk – Whole milk is preferred, but you can substitute with almond or soy milk for dairy-free versions.
- 3 large eggs, separated – Fresh eggs are crucial as they help in getting that light, airy texture.
- 100g sugar – Granulated sugar is ideal, but feel free to adjust the amount for sweetness to your liking.
- 30g cake flour – Use cake flour for a softer, lighter cake. All-purpose flour can be used but may slightly affect texture.
- 20g cornstarch – This helps stabilize the cake and gives a delicate finish.
- 1 tsp vanilla extract – Opt for pure vanilla extract for the best flavor.
- 1/4 tsp cream of tartar – This helps stabilize the egg whites, making for a fluffier cake.
- A pinch of salt – Enhances the flavors of the cake.
Prep Notes:
- Ensure your butter and cream cheese are at room temperature for smooth mixing.
- Separate the egg whites and yolks carefully to avoid contamination.
Step-by-Step Instructions
-
Preheat Your Oven: Set your oven to 160°C (320°F) and line the bottom of a round cake pan with parchment paper. This prevents sticking and aids in an even bake.
-
Melt the Mixture: In a saucepan, combine the cream cheese, butter, and milk over low heat. Stir continuously until the mixture is melted and smooth. This should take about 5-7 minutes.
-
Cool Slightly: Once melted, remove the pan from heat and let it cool slightly (about 5 minutes) before moving to the next step.
-
Whisk Egg Yolks: In a mixing bowl, whisk together the egg yolks and sugar until pale and creamy, about 3-4 minutes.
-
Combine Mixtures: Pour the cooled cream cheese mixture into the egg yolks, add the vanilla extract, and mix well to combine.
-
Sift Dry Ingredients: Sift in the cake flour and cornstarch, then mix until you reach a uniform batter.
-
Beat Egg Whites: In a separate bowl, beat the egg whites with cream of tartar and a pinch of salt until soft peaks form, approximately 2-3 minutes.
-
Fold Mixtures Together: Gently fold the beaten egg whites into the cream cheese mixture, being careful not to deflate the batter.
-
Prepare for Baking: Pour the batter into the prepared pan and place it in a larger baking dish filled with water (this is your water bath). The steam will help keep the cake moist.
-
Bake: Bake for about 60 minutes or until set and the top is lightly golden. A toothpick should come out clean when inserted into the center.
-
Cool Down: Allow the cheesecake to cool in the pan for about 15 minutes before transferring it to a wire rack.
-
Chill & Serve: For the best experience, refrigerate the cheesecake for at least two hours before serving. The flavors will meld beautifully, resulting in an even tastier cake.
Expert Tips & Tricks
-
Don’t Rush the Cooling Process: Letting your cheesecake cool before refrigerating helps to prevent cracks in the surface.
-
Water Bath Importance: The water bath helps maintain moisture as it bakes, avoiding a dry texture. If you notice the water has evaporated, replenish it halfway through baking.
-
Storage Recommendations: If you have leftovers (though it’s unlikely!), store them in the fridge in an airtight container for up to three days. Alternatively, you can freeze slices, tightly wrapped, for up to a month.
-
Make Ahead: You can prepare the cheesecake a day in advance. It actually gets better as it sits!
-
Troubleshooting Common Problems: If your cake sinks in the middle, it could be due to underbaking; if overcooked, it will become dry. Monitor closely toward the end of the baking time.
Serving Suggestions
Pair your Japanese Cheesecake with a dollop of whipped cream or a fresh fruit compote for a refreshing contrast. For a touch of elegance, serve it on a beautiful plate with a sprinkle of powdered sugar and a few berries for that Instagram-worthy shot. This dessert is fabulous for tea parties, birthdays, or simply when you want to treat yourself to a special evening at home.
Variations & Substitutions
- Flavor Exploration: Consider adding ingredients like matcha for a green tea twist, fresh lemon zest for a citrusy zing, or even chocolate for a decadent treat.
- Dietary Adaptations: If you’re vegan, substitute ingredients like cream cheese with cashew cream or tofu blended until smooth and sweetened naturally.
- Seasonal Delights: In the fall, why not add spices like cinnamon or nutmeg for a seasonal nod?
Nutrition & Storage Info
- Prep Time: 20 minutes
- Cook Time: 60 minutes
- Total Time: 1 hour 20 minutes
- Yield: 8 slices
- Estimated Calories per Serving: Approximately 190 calories
- Storage Instructions: Keep in the refrigerator for up to 3 days. You can freeze cut slices for up to 1 month. To thaw, simply place in the fridge overnight.
FAQ Section
-
Can I use a different type of cheese?
You can experiment with different soft cheeses like mascarpone for a unique spin. Just note that the texture may vary. -
Is it normal for the cheesecake to crack?
Yes, a few cracks can happen, especially if the baking temperature is too high. The water bath helps minimize this. -
How do I know when it’s done baking?
Look for a slight jiggle in the center when you shake the pan gently. If it’s too wobbly, it needs a bit more time. -
What if I don’t have cake flour?
You can substitute with all-purpose flour, but your cheesecake may be a bit denser. -
Can I make this recipe gluten-free?
Yes! Use gluten-free cake flour or a 1:1 gluten-free flour blend for a delicious gluten-free version. -
What should I serve it with?
Whipped cream, fresh fruits, or a fruit coulis make perfect accompaniments. -
How long does it take to cool completely?
Allow the cheesecake to cool in the pan for about 15 minutes. For best results, chill it in the refrigerator for at least 2 hours. -
What kind of pan should I use?
A round cake pan works, but a springform pan makes it easier to release the cheesecake without it sticking. -
Can I halve the recipe?
Absolutely! Just reduce all ingredients by half and adjust your baking time accordingly, as it may bake faster. -
Why did my cheesecake sink?
Most often, it’s due to overmixing or not incorporating the egg whites gently enough. Always fold carefully to retain air.

Conclusion
This Japanese Cheesecake truly is a culinary gem, merging nostalgia with a modern twist. I encourage you to give this recipe a try and experience the fluffy delight for yourself. Your family and friends will be overjoyed with the stunning results, and you’ll surely want to treasure this recipe in your collection for years to come. If you try this, let me know how it turns out! Also, be sure to check out my other recipes for delicious desserts and family-friendly meals!