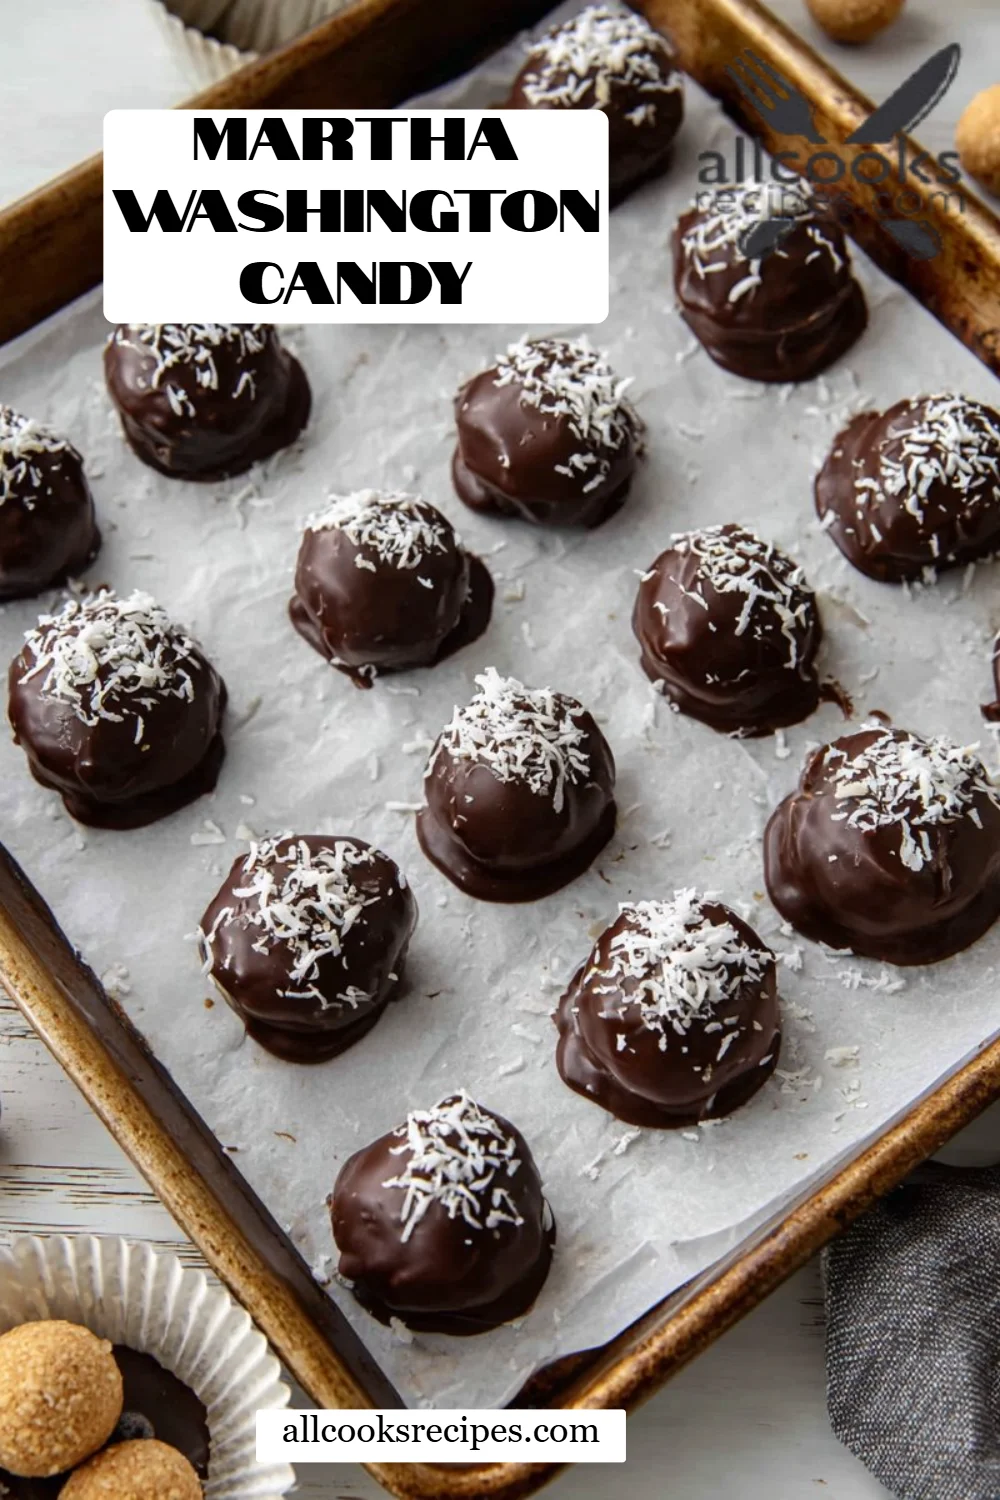
Indulge in Homemade Martha Washington Candy: A Sweet Tradition Revived
Ah, Martha Washington Candy! Just the name conjures up delightful memories of family gatherings and holidays spent sharing sweet treats with loved ones. Whether I’m reminiscing about my grandmother’s kitchen bustling with laughter or envisioning a cozy evening with friends, these decadent confections always seem to find their way back into my heart and home. There’s something incredibly special about a recipe that’s been passed down through generations, and Martha Washington Candy is no exception.
This recipe, rich with butter, confectioners’ sugar, and the toasty flavors of coconut and pecans, is not only easy to make but also offers a homemade touch that store-bought versions lack. Unlike many versions you might find on candy shop shelves, this one brings a freshness that’s hard to resist and a sweetness that feels like home.
Join me as I guide you through crafting these melt-in-your-mouth treats that will surely become a cherished addition to your family’s dessert lineup. You’ll learn how to achieve that perfect texture and flavor balance, leading to a candy that will wow at any occasion!
What Are Martha Washington Candy?
Martha Washington Candy has an interesting origin story dating back to the 19th century. These treats are a classic American confection often celebrated for their unique flavors and textures. Their trademark features include a creamy, buttery center infused with coconut, nuts, and cherries, all then coated in rich chocolate. The blend of smooth, sweet filling and the crunchiness from the nuts creates a heavenly bite that’s both comforting and indulgent.
What sets these candies apart is their nostalgic value and versatility. They are often made during festive occasions, particularly around the holidays, but trust me, they are delightful no matter the time of year! You’ll want to whip them up for parties, potlucks, or just for a sweet family treat on a quiet afternoon.
Why You’ll Love This Recipe
You might wonder why my Martha Washington Candy recipe is the go-to version. Here are a few compelling reasons to grab your apron and try it:
-
Homemade Flavor: Unlike store-bought candies that can be overly sweetened or artificial, this homemade version offers a fresh, natural taste. The balance achieved through quality ingredients makes all the difference!
-
Economically Friendly: Making your own candy can also be cost-effective. You’ll find that the ingredients for this recipe—like butter, sugar, and chocolate—are quite affordable, especially when prepared in bulk.
-
Customizable to Your Taste: The base recipe allows for various adaptations. Don’t have pecans? Swap out for walnuts. Not a fan of cherries? Feel free to replace them with dried cranberries or raisins!
-
Minimal Skill Required: This recipe is beginner-friendly! If you can mix ingredients and use a microwave, you can make these delightful candies.
-
Perfect for Sharing: These candies are ideal for gifting during the holiday season or for any special occasion. Package them in decorative boxes, and you’ve got a wonderful homemade gift that will be appreciated by everyone!
Ingredients
Before we get started on the process, here’s what you’ll need to create these delectable candies:
- 1 cup unsalted butter, softened (Use high-quality butter for the best flavor.)
- 4 cups confectioners’ sugar (Look for organic or non-GMO options if preferred.)
- 1 can sweetened condensed milk (I recommend brands like Eagle Brand for consistency.)
- 2 cups shredded sweetened coconut (Feel free to use unsweetened coconut for a less sweet flavor.)
- 2 cups pecans, chopped (Lightly toasted pecans amplify the flavor!)
- 2 teaspoons vanilla extract (I always opt for pure vanilla for a rich taste.)
- 1 jar maraschino cherries, drained and chopped (These will add a delightful pop of color and flavor!)
- 6 cups semi-sweet chocolate chips (Ghirardelli or Guittard are fantastic choices!)
- 2 tablespoons vegetable oil (This helps achieve a silky chocolate coating.)
- Coconut flakes for garnish (optional, gives a lovely finishing touch!)
Prep Notes: Make sure your butter is at room temperature for easy mixing. Measure all ingredients beforehand to streamline the process!
Step-by-Step Instructions
Creating Martha Washington Candy at home is a fun and rewarding experience. Let’s dive into the preparation:
-
Mix Base Ingredients: In the bowl of a stand mixer (using the paddle attachment), combine the softened butter and confectioners’ sugar. Mix on low speed until fully blended—a minute or two should do.
-
Add Condensed Milk and Mix-ins: With the mixer off, add in the sweetened condensed milk, shredded coconut, chopped pecans, and vanilla extract. Restart the mixer on low to medium speed, mixing until everything is well combined.
-
Incorporate Cherries: Gently fold in the chopped maraschino cherries. You want to ensure they’re evenly distributed without overworking the mixture.
-
Chill the Mixture: Once mixed, cover the bowl with plastic wrap and refrigerate for at least 3 hours or up to overnight. This helps the mixture firm up, making it easier to shape.
-
Form the Candy Balls: When you’re ready, line a baking sheet with parchment paper. Using a 1-tablespoon scoop, drop the mixture onto the lined sheet, rolling each scoop into a perfect ball (think the size of a golf ball).
-
Second Chill: Return the candy balls to the refrigerator to firm up for another 30 minutes while you prepare the chocolate coating.
-
Melt the Chocolate: In a microwave-safe bowl, combine the semi-sweet chocolate chips and vegetable oil. Microwave in 20-second increments, stirring between each until the chocolate is fully melted and smooth. Let it cool for 2-2.5 minutes to avoid overheating.
-
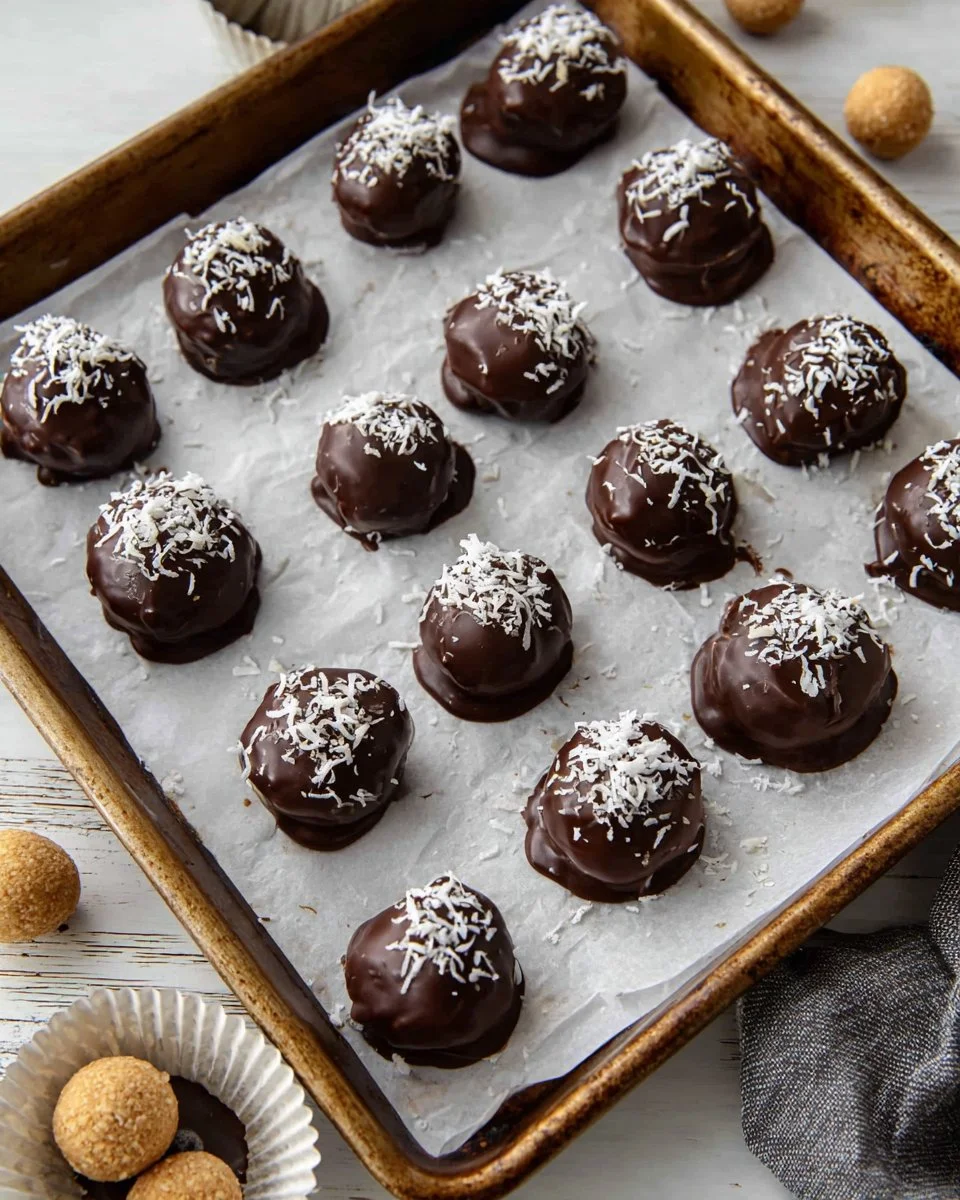
Dip the Candies: Remove the chilled candy balls from the refrigerator. Using a fork, dip each ball into the melted chocolate, letting any excess drip off. Place them back onto the lined baking sheet.
-
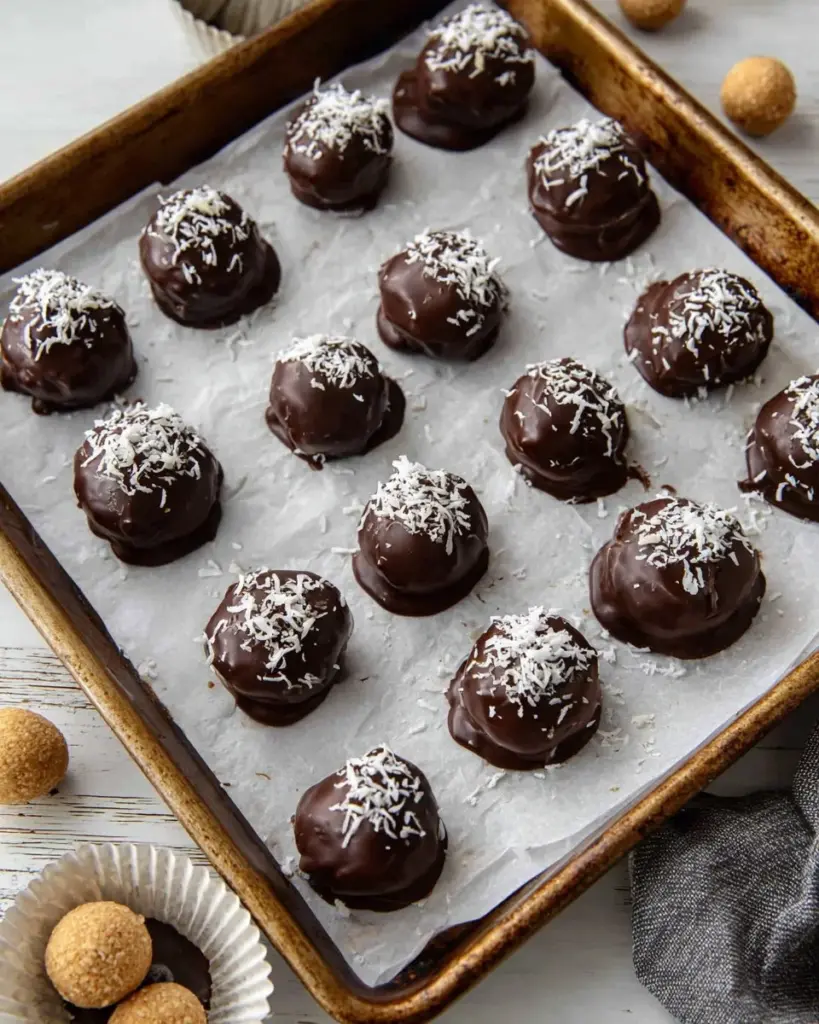
Garnish & Set: If you desire, sprinkle with coconut flakes for added texture and beauty. Allow the chocolate coating to set at room temperature or place them back in the refrigerator for quicker setting.
-
Store Properly: Once set, transfer your candies to an airtight container and store them in the fridge. They stay fresh for up to two weeks!
Expert Tips & Tricks
-
Butter Temperature: Ensure your butter is softened, not melted. This will give you the right consistency for mixing and shaping.
-
Texture Control: If your coconut and nuts are too chunky after mixing, simply pulse them in a food processor for a finer consistency before adding them to the mixture.
-
Chocolate Dipping: Make sure to allow your melted chocolate to cool slightly before dipping. This helps the chocolate adhere better and avoids melting the candy filling.
-
Make Ahead: You can prepare the candy mixture days in advance; just keep it tightly wrapped in the fridge until you’re ready to form the balls.
-
Troubleshooting: If your candy mixture is too soft to roll into balls, pop it back into the fridge for a bit longer.
Serving Suggestions
These candies are perfect for any sweet table at gatherings or accompanying a warm cup of coffee or tea. For a beautiful presentation, arrange them on a decorative platter and dust them lightly with powdered sugar or place them in cupcake liners.
Consider serving them during holiday parties, as thank-you gifts, or whenever you need a touch of sweetness in your life!
Variations & Substitutions
Feel free to switch things up! You can enhance your Martha Washington Candy with flavors like:
- Peanut Butter: Add a quarter cup of creamy peanut butter to the mixture for a nutty crunch.
- Spices: Consider adding cinnamon or nutmeg to the mixture for a warm spiced flavor.
- White Chocolate Drizzle: After dipping in semi-sweet chocolate, drizzle melted white chocolate on top for a pretty contrast—and an extra layer of flavor!
If you have dietary restrictions, you can make these candies gluten-free by using gluten-free chocolate chips or nondairy by substituting coconut cream for sweetened condensed milk.
Nutrition & Storage Info
- Prep Time: 15 minutes
- Chill Time: 3-3.5 hours
- Total Time: 3.5 hours
- Yield: About 30 candies
- Estimated Calories per Serving: 150 calories (based on a serving size of one candy)
- Storage Instructions: Store in an airtight container in the refrigerator for up to 2 weeks or freeze for up to 2 months.
FAQ Section
-
Can I use unsweetened coconut?
Absolutely! Unsweetened coconut will yield a less sugary candy that highlights the flavors of the other ingredients. -
How do I know when the chocolate is the right temperature to dip?
The chocolate should be smooth and warm, but not too hot—about 90-95°F generally works best. -
Can I make these without nuts?
Yes! Feel free to omit the nuts or substitute them with seeds like sunflower seeds if allergies are a concern. -
What can I replace sweetened condensed milk with?
You can try using homemade evaporated milk; it will change the texture slightly but still work. -
How do I store leftover chocolate?
Store leftover melted chocolate in the refrigerator for up to a month. Reheat gently in the microwave when needed. -
Why did my chocolate coating crack?
This typically occurs if the chocolate was overheated or cooled too quickly. Ensure a steady cooling process! -
How long do these candies last?
Properly stored in an airtight container in the fridge, they should remain fresh for up to 2 weeks. -
Can I freeze these candies?
Yes! Just layer them with parchment paper in an airtight container, and they’ll last in the freezer for 2 months. -
What’s the best way to package them for gifts?
For gifting, use decorative boxes lined with foil or wax paper, then seal them with pretty ribbons. -
Can I add other fruits?
Certainly! Dried fruits like cranberries or apricots can be substituted for cherries for a delightful variation.
Conclusion
Martha Washington Candy is not just a treat; it’s a nostalgic journey to sweeter times. This recipe combines simple ingredients to create a delightful candy that highlights the joy of shared moments and family traditions. I encourage you to give it a try, and I promise it will be a hit with your loved ones too!
If you’ve enjoyed this recipe, leave a comment with your thoughts, or check out my other sweet treats, like homemade truffles and raspberry-filled chocolates. Happy baking!
Martha Washington Candy
Ingredients
Method
- In the bowl of a stand mixer (using the paddle attachment), combine the softened butter and confectioners' sugar. Mix on low speed until fully blended, about a minute or two.
- Add in the sweetened condensed milk, shredded coconut, chopped pecans, and vanilla extract. Restart the mixer on low to medium speed, mixing until everything is well combined.
- Gently fold in the chopped maraschino cherries to ensure they’re evenly distributed without overworking the mixture.
- Cover the bowl with plastic wrap and refrigerate for at least 3 hours or up to overnight. This helps the mixture firm up, making it easier to shape.
- Line a baking sheet with parchment paper. Using a 1-tablespoon scoop, drop the mixture onto the lined sheet, rolling each scoop into a ball the size of a golf ball.
- Return the candy balls to the refrigerator to firm up for another 30 minutes while you prepare the chocolate coating.
- In a microwave-safe bowl, combine the semi-sweet chocolate chips and vegetable oil. Microwave in 20-second increments, stirring between each until the chocolate is fully melted and smooth. Let it cool for 2-2.5 minutes to avoid overheating.
- Remove the chilled candy balls from the refrigerator. Using a fork, dip each ball into the melted chocolate, letting any excess drip off. Place them back onto the lined baking sheet.
- If desired, sprinkle with coconut flakes for added texture and beauty. Allow the chocolate coating to set at room temperature or refrigerate for quicker setting.
- Once set, transfer your candies to an airtight container and store them in the fridge. They stay fresh for up to two weeks.