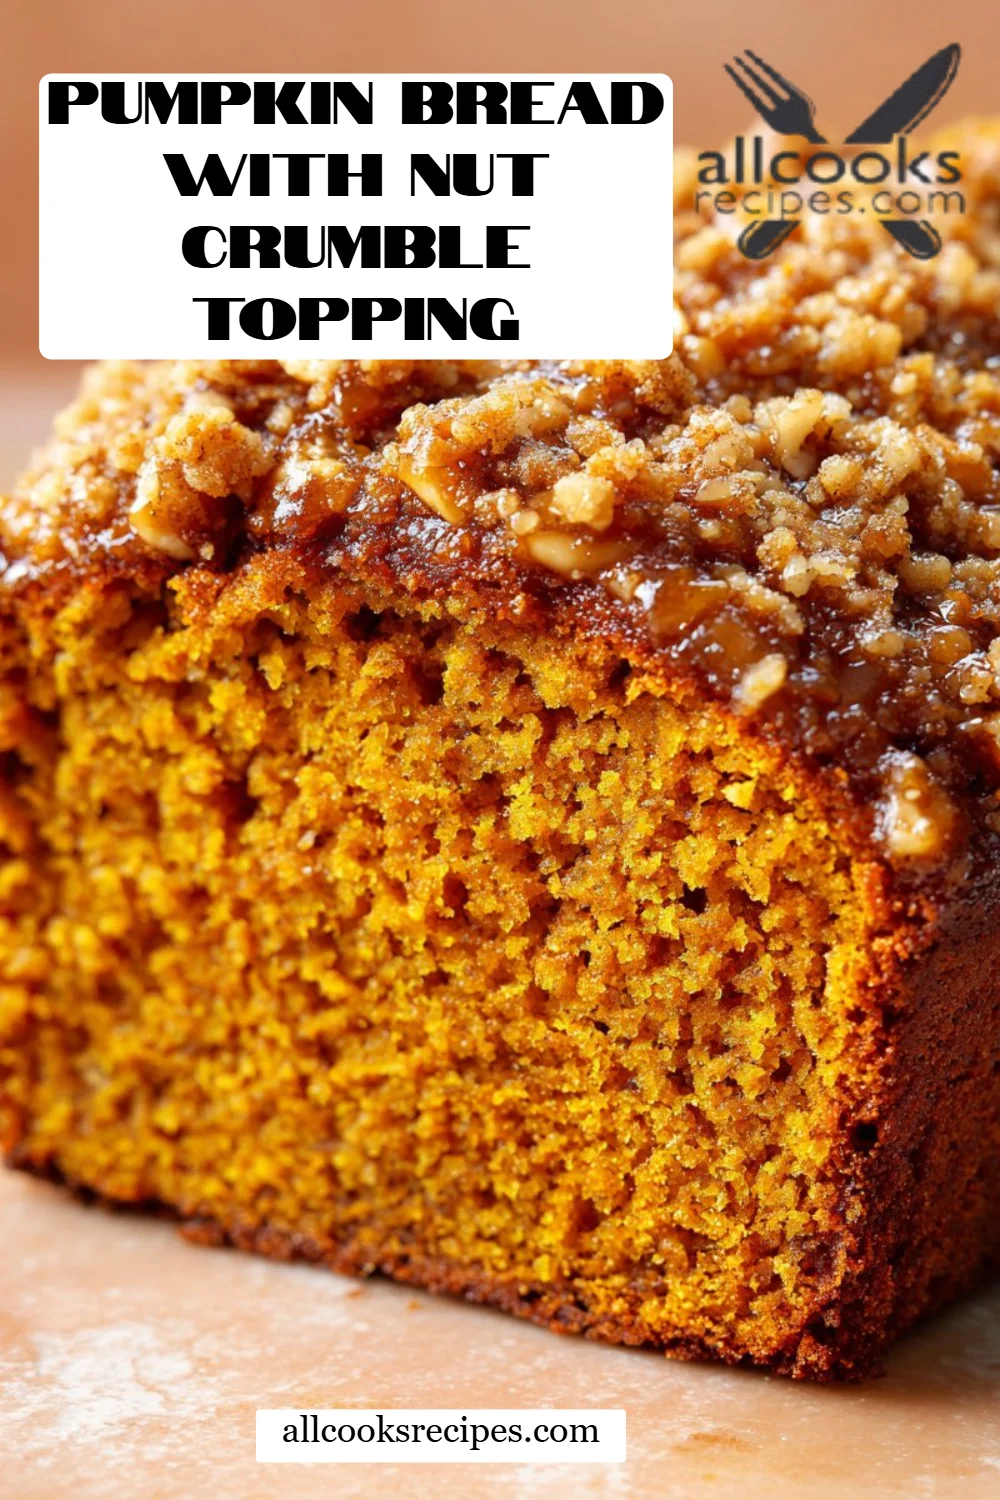
Irresistible Pumpkin Bread with Nut Crumble Topping: A Fall Favorite!
There’s something utterly enchanting about the aroma of pumpkin bread wafting through the kitchen, especially when it’s paired with a delightful nut crumble topping. Every fall, I make it a point to whip up a batch of my cherished Pumpkin Bread with Nut Crumble Topping. This recipe isn’t just about scrumptious flavors; it’s steeped in memories. Each slice takes me back to cozy afternoons spent in my grandmother’s kitchen, where she stirred pumpkin spice batter with love, her laughter filling the air like the sweet scent of baking bread.
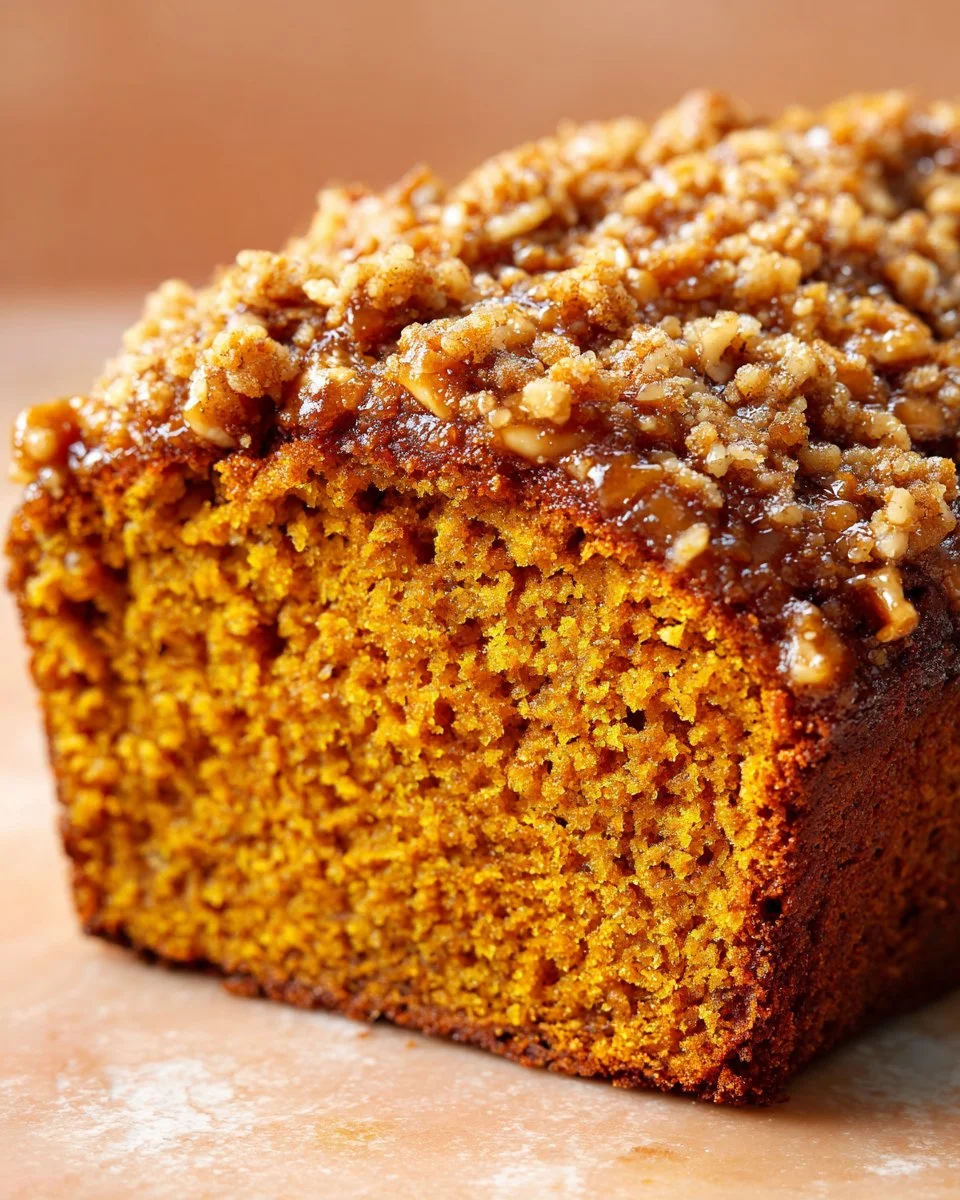
What makes this recipe stand out from the countless variations floating around the internet? It’s the perfect harmony of moist pumpkin bread that’s not overly sweet, complemented by a crunchy, nutty topping that adds a delightful texture. Imagine the first bite—soft, spiced bread meeting the satisfying crunch of freshly chopped nuts. It’s the ultimate comfort food—perfect for quick breakfasts, cozy gatherings, or a simple afternoon snack.
Stay with me, and I promise to share not just the recipe, but the little secrets that will make your pumpkin bread experience unforgettable!
What Are Pumpkin Bread with Nut Crumble Topping?
Pumpkin bread has its roots in ancient cooking traditions that utilized seasonal harvests, particularly during the fall months. Still cherished today, this lovely treat captures the essence of autumn with its warm spices and rich pumpkin flavor.
When you take a bite of this Pumpkin Bread with Nut Crumble Topping, you can expect a luscious, moist texture infused with inviting notes of cinnamon, nutmeg, and allspice. The nut crumble adds a delightful contrast, presenting a crunchy, buttery finish that perfectly balances the softness of the bread.
This recipe is perfect for those rainy or chilly afternoons when you crave something warm and inviting. Bake a loaf to share or indulge in a slice while snuggled up with your favorite book—it’s the epitome of comfort food!
Why You’ll Love This Recipe
- Easy and Straightforward: This easy recipe is perfect even for beginner bakers. With just a few simple steps, your kitchen will be transformed into a pumpkin-scented wonderland!
- Superior Taste: Unlike store-bought versions loaded with preservatives, this homemade version is full of wholesome ingredients, allowing the natural flavors of pumpkin and spices to shine through. Trust me; once you taste this homemade version, you’ll never go back!
- Cost-Effective: Baking at home not only saves money but also allows you to control the ingredients. For the price of one store-bought loaf, you can bake two or three loaves of this delightful treat!
- Customizable: Feel free to get creative! This recipe invites modifications—switch out the nuts, add chocolate chips, or even incorporate dried fruits for a pop of flavor.
- Quick to Make: With a total prep and bake time of about an hour, this recipe is perfect for squeezing into a busy schedule, making it an ideal last-minute treat for gatherings!
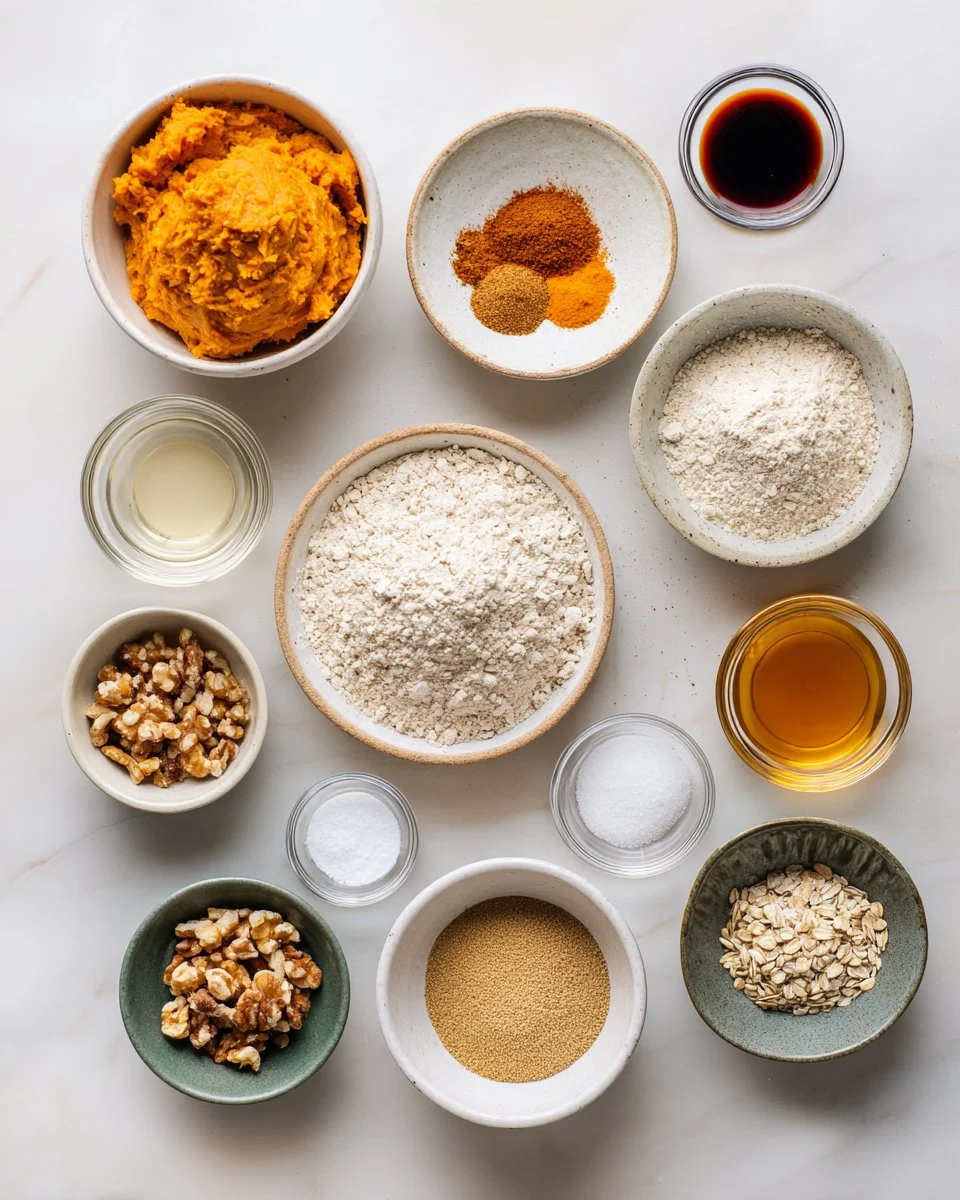
Ingredients
Here’s what you’ll need to create this heavenly Pumpkin Bread with Nut Crumble Topping:
For the Bread:
- 1 and 1/2 cups pumpkin puree: Make sure to use 100% pure pumpkin; avoid pumpkin pie filling for the best results!
- 1/3 cup almond butter: Creamy almond butter lends a nutty richness. You can substitute peanut butter if preferred.
- 2 teaspoons vanilla extract: Choose pure vanilla for the most robust flavor.
- 3 tablespoons maple syrup: Pure maple syrup adds a nuanced sweetness and depth; agave syrup can be a substitute.
- 2 and 1/2 cups oat flour: For a gluten-free option, ensure the oat flour is certified gluten-free.
- 2 teaspoons baking powder: This gives your bread the lift it needs.
- 1 teaspoon baking soda: For that perfectly airy crumb!
- 1 tablespoon apple cider vinegar: The acidity helps in activating the baking soda.
- 1 tablespoon pumpkin spice: You can make your own blend or buy a pre-made variety.
- 1/4 teaspoon sea salt: Enhances the flavors beautifully.
For the Topping:
- 1/2 cup chopped nuts or seeds: I love pecans or walnuts for their earthy flavor, but pumpkin seeds work wonderfully too.
- 1/4 cup oat flour: This will also help bind the crumble together.
- 1 teaspoon pumpkin spice: Yes, a little extra for that delicious topping!
- 1 tablespoon melted coconut oil: This keeps the crumble healthy and delicious.
- 2 tablespoons maple syrup: For a touch of sweetness.
Prep Notes: Ensure your almond butter is smooth and at room temperature for easy mixing. If using coconut oil, melt it lightly and allow it to cool slightly.
Brand Recommendations: For pumpkin puree, I love Libby’s. For almond butter, look for stores like Trader Joe’s or brands like wildlysimple for a natural option.
Step-by-Step Instructions
-
Preheat your oven to 350°F (180°C). To ensure even baking, it’s crucial to start with a well-preheated oven.
-
Prepare the loaf pan: Line an 8×4 inch loaf pan with baking paper, letting some parchment hang over the sides for easy removal.
-
Wet Ingredients: In a large bowl, whisk together 1 and 1/2 cups pumpkin puree, 1/3 cup almond butter, 3 tablespoons maple syrup, 2 teaspoons vanilla extract, and 1 tablespoon apple cider vinegar until well combined. The mixture should look creamy and smooth.
-
Dry Ingredients: In a separate bowl, mix together 2 and 1/2 cups oat flour, 2 teaspoons baking powder, 1 teaspoon baking soda, 1 tablespoon pumpkin spice, and 1/4 teaspoon sea salt until well incorporated.
-
Combine: Carefully add the dry mixture into the wet mixture, and stir gently. Do not overmix—just stir until you see no dry flour. It’s okay if the batter remains a bit lumpy!
-
Pour: Transfer the batter into the prepared loaf pan. Spread it evenly using a spatula.
-
Make the Topping: In a small bowl, mix together 1/2 cup chopped nuts or seeds, 1/4 cup oat flour, 1 teaspoon pumpkin spice, 1 tablespoon melted coconut oil, and 2 tablespoons maple syrup. This mix should be crumbly.
-
Add Topping: Sprinkle the nut crumble evenly over the batter.
-
Bake: Place the loaf in the oven and bake for 50-55 minutes. To check for doneness, insert a toothpick into the center—if it comes out clean, it’s ready! If the topping starts to brown too much, cover it loosely with foil halfway through baking.
-
Cool: Once baked, allow it to cool in the pan for 10 minutes, then carefully lift it out using the parchment paper to cool completely on a wire rack for at least 30 minutes before slicing. This helps it firm up and makes slicing easier.
Chef’s Tip: Ensure all ingredients are at room temperature for a smooth batter; cold ingredients can cause a heavier loaf.
Expert Tips & Tricks
-
Quality Ingredients Matter: Always go for the best quality spices and pure pumpkin; the flavor will make a significant difference.
-
Storage Recommendations: This pumpkin bread stores well! Keep it in an airtight container at room temperature for up to 3 days or in the refrigerator for up to a week.
-
Make-Ahead Instructions: You can prepare the batter a day in advance. Just store it in the fridge—bake fresh when you’re ready!
-
Troubleshooting Common Problems: If your bread comes out too dense, try ensuring your baking powder and soda are fresh. Also, consider folding in the dry ingredients gently rather than whisking to prevent overmixing.
-
Freezing: To freeze, slice the bread and wrap each piece in plastic wrap, then place them in a freezer-safe bag. They last for up to 3 months!
Serving Suggestions
This delectable pumpkin bread is wonderful on its own but pairs perfectly with a dollop of whipped cream cheese or a drizzle of honey. For a warm, comforting treat, serve it alongside a steaming cup of chai or apple cider. If you’re entertaining, consider cutting the bread into festive slices and presenting them on a colorful platter with assorted cheeses—guests will love the combination!
Variations & Substitutions
- Chocolate Lover: Add 1/2 cup of dark chocolate chips for a delightful twist.
- Dairy-Free Option: Replace almond butter with sunflower seed butter to keep this nut-free for school lunches or gatherings.
- Seasonal Variations: Swap the pumpkin for ripe bananas for delicious banana bread with the same nutty crumble topping.
Nutrition & Storage Info
- Prep Time: 15 minutes
- Cook Time: 50-55 minutes
- Total Time: 1 hour and 10 minutes
- Yield: 10 servings
- Estimated Calories: Approximately 180 calories per slice
Storage Instructions: Store at room temperature in an airtight container for up to 3 days, refrigerate for up to a week, or freeze for up to 3 months!
FAQ Section
-
Can I use fresh pumpkin instead of canned? Yes! If you roast and puree your own pumpkin, it will work perfectly—just make sure to drain any excess moisture.
-
Can I make this bread gluten-free? Totally! Simply replace the oat flour with a gluten-free all-purpose flour blend.
-
How can I make the topping extra crunchy? To make the nut topping crunchier, toast the nuts or seeds briefly in a pan before adding them.
-
Is it possible to reduce the sugar in this recipe? Yes! You can reduce the maple syrup by a tablespoon or two. Just keep in mind that it may slightly alter the texture and moisture.
-
Can I add fruits or veggies to this bread? Absolutely! Chopped apples, raisins, or even grated carrots can be wonderful additions for extra flavor and texture.
-
What can I use if I don’t have almond butter? Any nut or seed butter will work. Sunflower seed butter is a great nut-free alternative.
-
Can I mix everything in a stand mixer? Definitely! However, just be careful not to overmix your batter.
-
What should I do if my bread is still wet inside? If the toothpick comes out with batter, put it back in the oven for another 5-10 minutes. Cover with foil if the top begins to darken too much.
-
How do I know when it’s done baking? Use the toothpick test! When inserted in the center, it should come out clean or with just a few dry crumbs.
-
Can I bake mini loaves? Yes! You can bake them in mini loaf pans. Just adjust the baking time to about 25-30 minutes.
Conclusion
This Pumpkin Bread with Nut Crumble Topping isn’t just about satisfying a craving; it’s about embracing the cozy, heartwarming traditions of fall. This recipe is special because it brings a warm piece of nostalgia to your table, uniting family and friends with each slice.
I hope you give this beloved recipe a try and experience the joy it brings just like I do. I’d love to hear your thoughts or any adaptations you make, so don’t hesitate to leave a comment! And if you’re looking for more seasonal delights, check out my other cozy recipes right here on the blog!