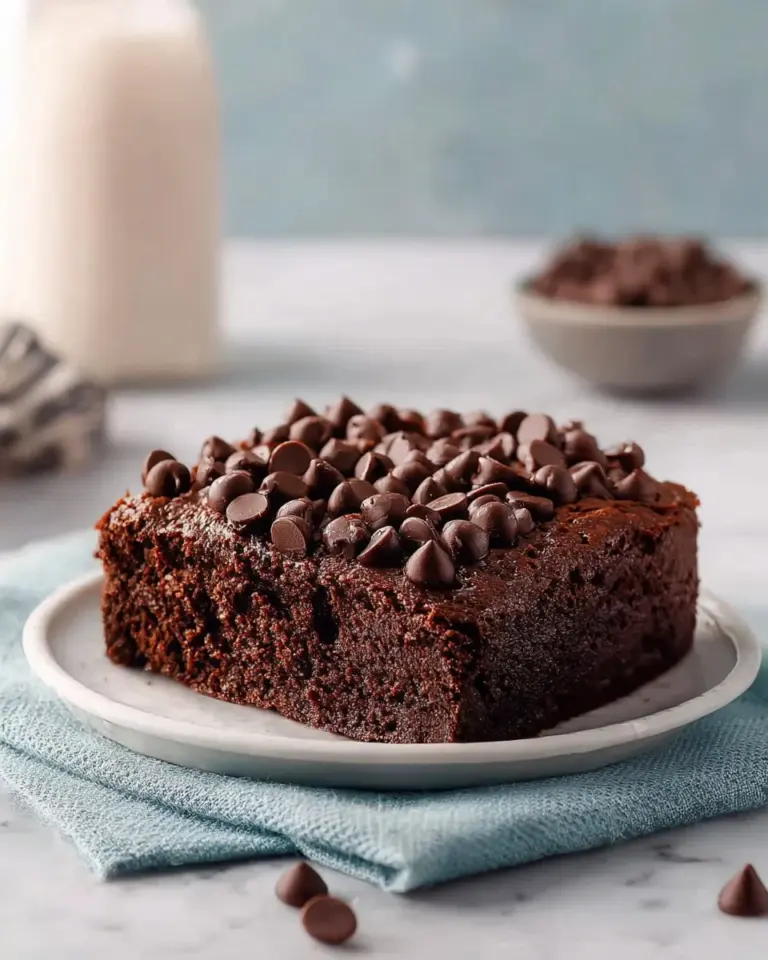
Spring Brownies: A Delightful Twist on Classic Fudge Brownies
Spring is a magical time when life seems to bloom all around us, and what better way to celebrate this season of renewal than with a batch of Spring Brownies? These brownies are not just your average chocolate treat; they are a celebration of spring’s vibrant colors and the joyous feelings that come with warmer weather. I remember the first time I made them—my kitchen filled with the rich aroma of cocoa and melted butter, and the moment I pulled them from the oven, I was greeted with an irresistible, chewy texture and a glossy top. Instantly, I was transported back to lazy afternoons spent baking with my grandmother, her warm laughter filling the kitchen.
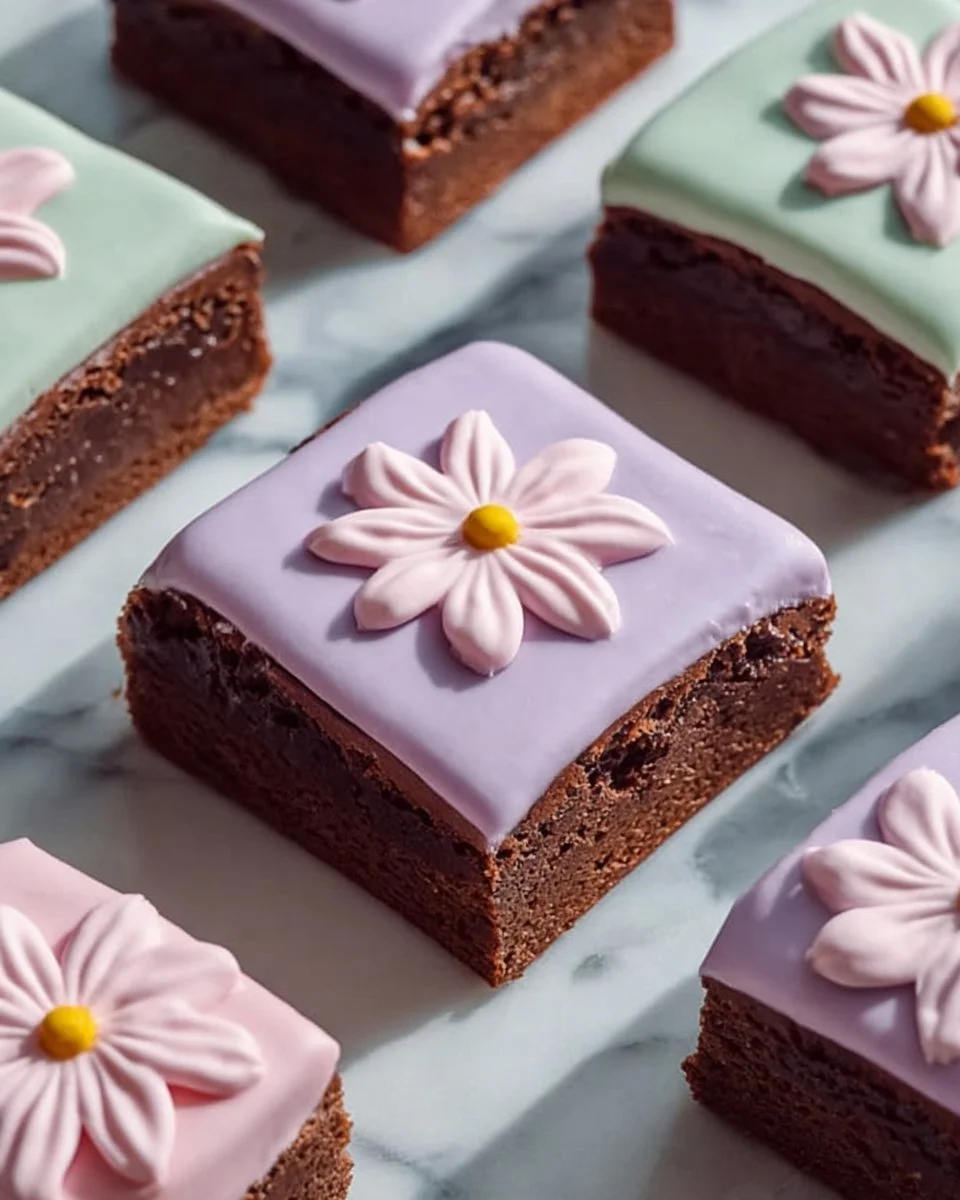
What sets my Spring Brownies apart from others is the unique addition of pastel candies that create a delightful crunch and visual appeal, making them perfect for any spring gathering. The nostalgia of those family recipes combined with this modern twist makes every bite a joyful experience. In this blog post, you’ll learn how to whip up your own batch of these decadent, chewy brownies, and trust me, they will become your go-to spring treat!
What Are Spring Brownies?
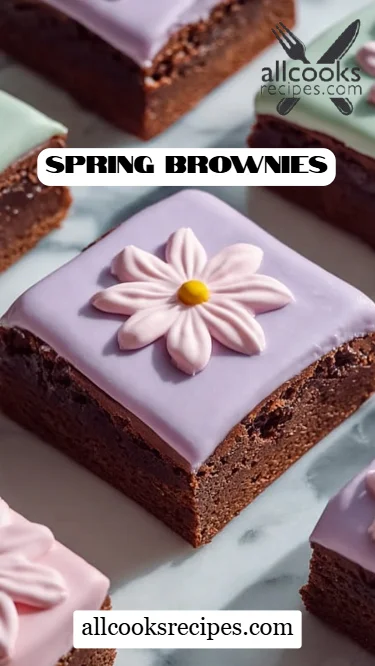
Shrouded in tradition and warmth, Spring Brownies have evolved from a classic fudgy treat into a festive celebration of life. These brownies are exceptionally rich and moist, offering a delicate balance between gooey chocolate and a slight crisp on the edges. Their texture is akin to a velvety hug, invoking feelings of comfort and happiness. What makes them unique is the vibrant topping of pastel candies, setting them apart from your usual chocolate brownie and giving them an added pop of color—perfect for springtime gatherings!
You’ll want to whip up these Spring Brownies for any occasion, whether it be a picnic in the park, a vibrant birthday party, or simply to brighten up a rainy day at home. Regardless of the reason, these brownies are sure to bring smiles and satisfied palates!
Why You’ll Love This Recipe
- Decadent Flavor: The blend of rich cocoa and sweet butter creates an indulgent taste that rivals any store-bought brownie.
- Cost-Effective: Saving money while indulging? Yes, please! Making brownies at home is far cheaper than buying those fancy ones from the bakery.
- Customization Options: You can easily personalize these brownies with your favorite mix-ins or toppings. Swap pastel candies for nuts or add a pinch of sea salt for a sweet-and-salty finish.
- Easy to Make: With straightforward steps, this recipe is perfect for bakers of all levels, whether you’re a newbie or a pro.
- Big Batch: This recipe yields a hearty 24 brownies, so it’s a great option for gatherings, or you can freeze extras for later!
Unlike the store-bought options, which often contain preservatives and artificial flavors, these Spring Brownies are made with simple, quality ingredients right from your kitchen. Plus, they offer the joy of baking with your loved ones, creating memories while the smell of chocolate fills the air!
Ingredients
Here’s what you’ll need to create these delightful Spring Brownies:
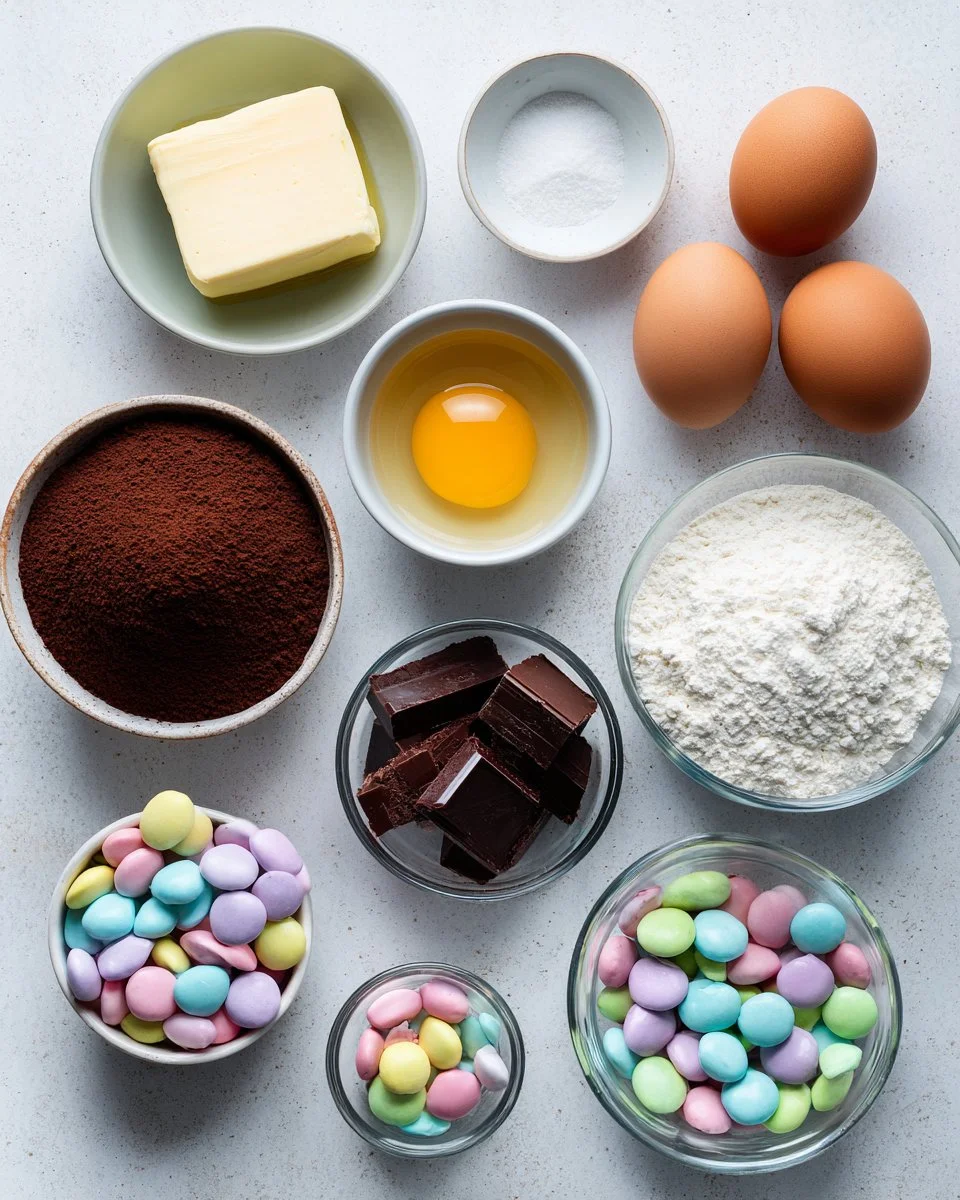
- 1 cup unsalted butter (room temperature is best for easy mixing)
- 2 cups granulated sugar (I prefer brands that are organic for a richer taste)
- 4 large eggs (always reach for fresh eggs; they’ll make a world of difference in rise and flavor)
- 1 teaspoon vanilla extract (real vanilla or high-quality pure vanilla extract will elevate your brownies)
- 1 cup all-purpose flour (I usually go for a brand that yields a fine texture)
- 1 cup cocoa powder (Dutch-process cocoa enhances the chocolate flavor, although regular will work)
- 1/2 teaspoon salt (don’t skip this; it enhances the sweetness!)
- 1/2 teaspoon baking powder (ensure it’s freshly opened for the best rise)
- Pastel candies for topping (feel free to get creative; M&Ms or sprinkles would also add a delightful touch)
- Frosting for decoration (store-bought or homemade; I love a simple buttercream for this!)
Prep Notes: Make sure your butter is at room temperature and your eggs are fresh for the best results.
Step-by-Step Instructions
-
Preheat the Oven: Begin by preheating your oven to 350°F (175°C). While that heats up, grease a 9×13 inch baking pan generously to prevent sticking.
-
Mix the Butter and Sugar: In a large bowl, melt the butter. Then, add the granulated sugar and mix until well combined—aim for a smooth, creamy blend.
-
Incorporate the Eggs: Add the eggs one at a time, mixing well after each addition. This ensures that the batter is aerated properly. Stir in the vanilla extract until it’s fully blended.
-
Prepare the Dry Ingredients: In another bowl, sift together the flour, cocoa powder, salt, and baking powder. Sifting will eliminate any lumps and results in a smoother batter.
-
Combine Wet and Dry Ingredients: Gradually add the dry mixture to the wet ingredients, folding gently until just combined. Avoid over-mixing!
-
Pour into the Pan: Transfer the batter into your prepared baking pan, smoothing it out evenly.
-
Bake to Perfection: Bake for 20-25 minutes or until a toothpick inserted into the center comes out clean or with a few moist crumbs attached. Keep an eye on them, as every oven can vary!
-
Cool Down: Allow them to cool completely in the pan on a wire rack before frosting. Patience is key here—this will make cutting them more manageable.
-
Finish with Flair: Decorate with your pastel candies and swirls of frosting as desired. Get creative—it’s your masterpiece!
-
Slice and Serve: Cut into squares (I recommend about 2 inches) and enjoy out of the pan with family or friends.
Chef’s Tips:
- Timing is Everything: Set a timer for the lower end of the baking range to avoid overcooking.
- Visual Cues: Look for the edges pulling away slightly from the pan as an indicator they are done.
- Storage: These brownies keep well in an airtight container, so save some for later!
Expert Tips & Tricks
- Use Quality Ingredients: Higher quality cocoa and fresh eggs can significantly enhance the flavor of your brownies.
- Storage Secrets: Store your brownies in an airtight container to maintain their fudginess. They can stay at room temperature for up to a week or in the fridge for up to two weeks.
- Make Ahead: You can prepare the batter the day before and bake it fresh the next day. Just be sure to store it in the fridge overnight.
- Baking Troubles?: If your brownies come out too dry, it might be that they were baked too long. Keep an eye on them, especially for your first batch!
- Experiment with Flavors: Add a teaspoon of espresso powder to intensify the chocolate flavor or mix in some nuts for a crunchy texture.
Serving Suggestions
These brownies are perfect on their own, but why not elevate your dessert experience? Pair them with a scoop of vanilla ice cream for the ultimate indulgence or serve with fresh strawberries for a refreshing contrast. For a festive look, arrange them on a colorful platter and sprinkle some edible flowers on top!
Consider serving these brownies at a spring picnic, baby shower, or Easter brunch. They will undoubtedly become a favorite wherever you share them!
Variations & Substitutions
Looking to customize your Spring Brownies? Here are some flavor inspirations:
- Mint Chocolate Brownies: Incorporate mint extract into the batter for a refreshing twist.
- Nutty Brownies: Add walnuts or pecans for a delightful crunch.
- Gluten-Free Version: Substitute the all-purpose flour with a gluten-free flour blend. Just make sure it’s 1:1 baking-friendly!
- Vegan Option: Swap eggs for flax eggs (1 tablespoon ground flaxseed mixed with 2.5 tablespoons water) and use coconut oil in place of butter.
Nutrition & Storage Info
- Prep Time: 15 minutes
- Cook Time: 25 minutes
- Total Time: 40 minutes
- Yield: 24 brownies
- Estimated Calories per Serving: Approximately 150 calories
- Storage Instructions: Store brownies in an airtight container at room temperature for up to 1 week, in the fridge for up to 2 weeks, or freeze for up to 3 months.
FAQ Section
-
Can I substitute coconut oil for butter?
Yes, melted coconut oil works well, but it may impart a subtle coconut flavor. -
What can I use instead of eggs?
Flax eggs or apple sauce (1/4 cup per egg) can be great substitutes for a vegan version. -
Why did my brownies come out cakey?
Over-mixing the batter or overbaking are common culprits. Aim for just combined! -
Can I double the recipe?
Absolutely! Just be sure to use a larger baking pan and adjust your baking time accordingly. -
Are these brownies suitable for freezing?
Yes, they freeze beautifully. Wrap them tightly in plastic wrap or store them in an airtight container before freezing. -
Can I use dark chocolate instead of cocoa powder?
You can, but you’ll need to adjust the amounts slightly, using about 10 ounces of melted dark chocolate. -
How do I know when my brownies are done?
Insert a toothpick; it should come out with a few moist crumbs—not wet batter. -
What can I top my brownies with?
Whipped cream, ice cream, or even a drizzle of caramel will take your brownies to the next level. -
Do the brownies need to be frosted?
No! They are delicious on their own, but frosting does add a fun element. -
How should I serve these brownies?
They’re perfect served warm with a scoop of vanilla ice cream or alongside fresh fruit!
Conclusion
These Spring Brownies are a delightful and vibrant way to usher in the season, combining rich fudge with playful pastel toppings that are sure to put a smile on your face. The memories you create while baking and sharing these treats will linger far longer than the calories! I invite you to give this recipe a try—let me know in the comments how yours turned out and tag me in your photos! For more delightful recipes, check out my blog for other seasonal treats. Happy baking, friends!