Delightful Easter Funfetti Cookies: A Sweet Celebration in Every Bite
As a child, Easter was a joyous time filled with colorful eggs, playful bunnies, and of course, delicious treats! My favorite memory was helping my grandmother bake cookies from scratch, giggling as we spilled flour on the kitchen floor and deemed our "funfetti" cookies a masterpiece. Those sweet, vibrant bites were always the highlight of our family gatherings, bringing smiles and cherished moments with each festive nibble.
Today, I’m excited to share my ultimate recipe for Easter Funfetti Cookies, the sweetest way to bring a little magic into your holiday festivities. What makes these cookies special isn’t just the rainbow sprinkles that dance through the dough but the love and laughter that come with making them. I believe these are far better than any store-bought version; they’re soft, chewy, and oh-so-fun to make! You’ll find the joy in every sprinkle-studded bite, just like I did back in those magical kitchen times.
In this post, you’ll learn how to recreate the spirit of Easter in your own kitchen, with tips and tricks that ensure your cookies turn out perfect every time. Let’s dive into this delightful recipe that will not only feed your sweet tooth but also create wonderful memories with your loved ones!
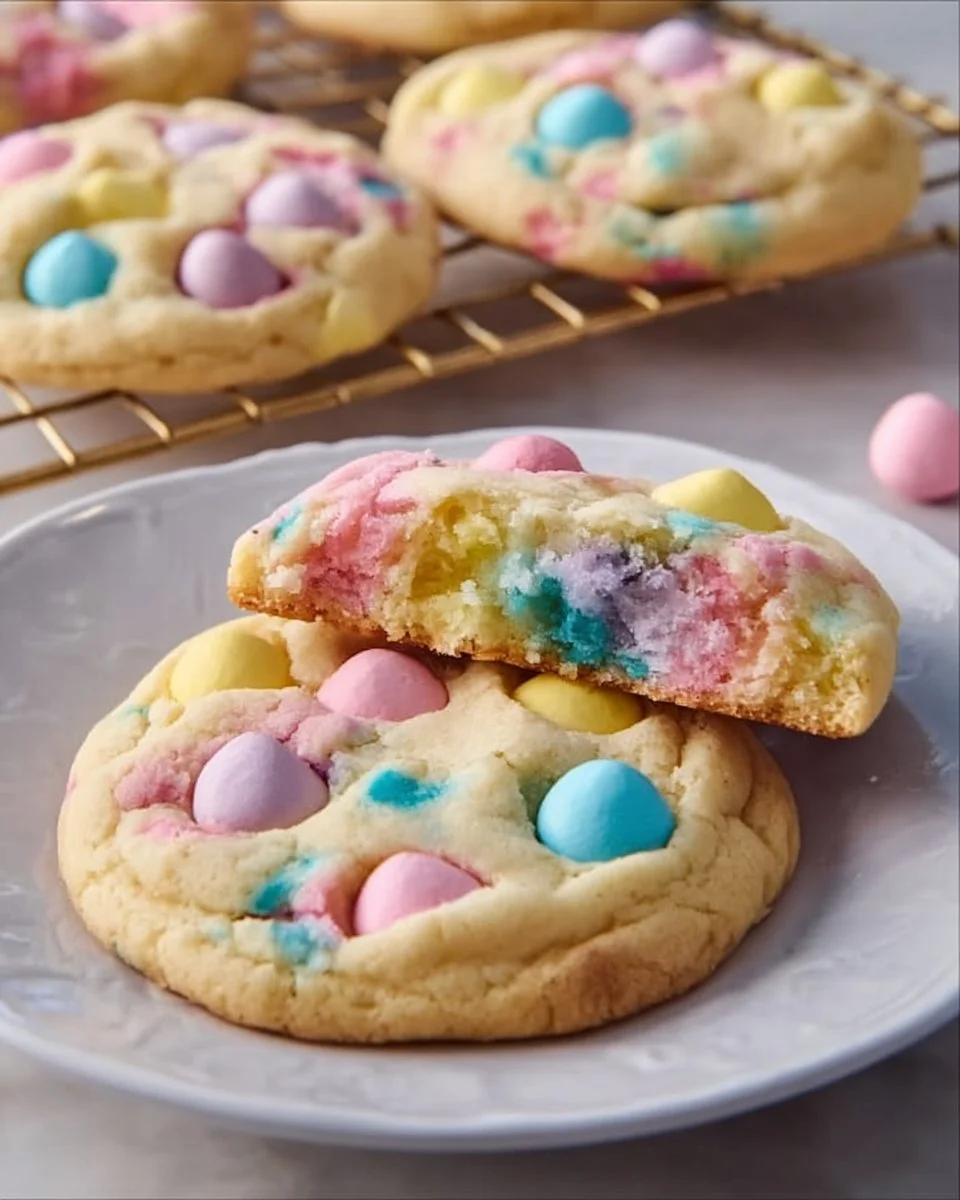
What Are Easter Funfetti Cookies?
Easter Funfetti Cookies are a vibrant twist on traditional sugar cookies, embedded with pastel-colored sprinkles that are perfect for the springtime celebration. Originating as a playful addition to birthday cakes, "funfetti" sprinkles have evolved into a beloved cookie addition that brings joy to both young and old.
These cookies deliver a soft and chewy texture with slightly crispy edges, while the burst of sweet vanilla paired with the colorful sprinkles creates a joyful experience with every bite. Unlike many average cookies, the inclusion of festive sprinkles sets this recipe apart, turning a simple treat into a celebration.
Whether you’re baking for an Easter gathering, a springtime party, or just treating yourself, these Easter Funfetti Cookies are an ideal choice. They’re not only visually appealing but incredibly easy to make, ensuring that you enjoy the baking process as much as the delightful flavors.
Why You’ll Love This Recipe
-
Simple Ingredients: This recipe uses accessible pantry staples such as flour, butter, and sugar, making it a budget-friendly option that won’t break the bank.
-
Customization: Feel free to swap out the pastel sprinkles for chocolate chips, nuts, or seasonal-themed candies to create a cookie that truly reflects your taste or occasion!
-
Cost-Effective: Let’s be honest—store-bought cookies can be pricey, especially for those high-quality options. By making them at home, you enjoy delectable cookies while keeping costs low.
-
Quick and Easy: With a prep time of just 15 minutes and a cook time of 10-12 minutes, you’ll have fresh, warm cookies in no time, perfect for last-minute guests or snack cravings.
-
Perfect for All Occasions: Whether it’s Easter, birthdays, or simply a Tuesday afternoon, these cookies are versatile enough to fit any celebration.
Embrace the joy of baking without the stress! With very few steps and simple ingredients, you’ll find that creating these Easter Funfetti Cookies is both easy and rewarding.

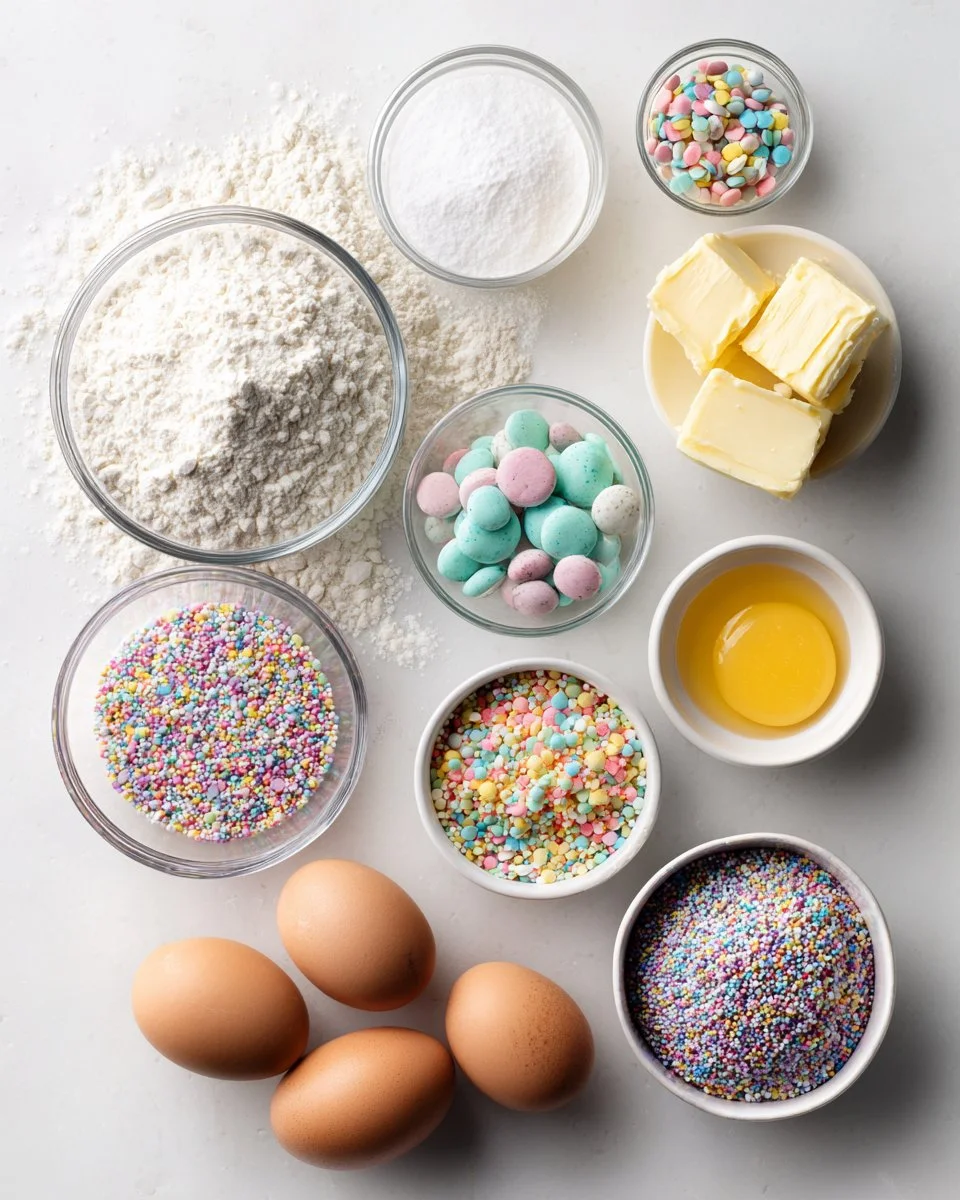
Ingredients Section
Here’s what you’ll need to delight your taste buds with these vibrant Easter Funfetti Cookies:
- 2 3/4 cups all-purpose flour: For the base of your cookies. For best results, I recommend using a high-quality brand like King Arthur Flour.
- 1 teaspoon baking soda: This will give your cookies that perfect rise.
- 1/2 teaspoon salt: A pinch to enhance the sweetness.
- 1 cup unsalted butter, softened: Make sure it’s at room temperature for the creamiest texture. I love using Kerrygold for its rich flavor.
- 1 1/2 cups granular sugar: Sweetens your cookies while creating the perfect texture.
- 1/2 cup brown sugar, packed: Adds moisture and flavor.
- 2 large eggs: They help bind the ingredients together.
- 2 teaspoons vanilla extract: The secret ingredient for a rich flavor. Use pure vanilla extract if possible.
- 1 cup pastel sprinkles: The fun, colorful addition that brings these cookies to life!
Prep Notes:
- Soften the butter by leaving it out at room temperature for about 30 minutes.
- For a dairy-free version, you can substitute the butter with coconut oil or a plant-based butter alternative!
Step-by-Step Instructions
Let’s get baking! Follow these detailed steps to whip up your cookies:
-
Preheat the oven: Start by preheating your oven to 350°F (175°C). This ensures your cookies bake evenly.
-
Mix dry ingredients: In a medium bowl, whisk together the flour, baking soda, and salt until well combined. This helps distribute the ingredients evenly.
-
Cream butter and sugars: In a separate large bowl, using an electric mixer, beat the softened butter, granulated sugar, and brown sugar together on medium speed until creamy and fluffy (about 2-3 minutes). This step incorporates air into the batter, making your cookies light and tender.
-
Add eggs and vanilla: Mix in the eggs one at a time, then add the vanilla extract, blending until fully combined.
-
Combine wet and dry mixtures: Gradually add the flour mixture to the wet ingredients, mixing on low speed until combined. Be careful not to overmix, as this can toughen your cookies.
-
Fold in sprinkles: Gently fold in the pastel sprinkles with a spatula, ensuring they are evenly distributed throughout the dough.
-
Scoop the dough: Using a tablespoon, scoop dough onto prepared baking sheets, spacing them about 2 inches apart to allow for spreading.
-
Bake: Place your baking sheets in the oven and bake for 10-12 minutes, or until the edges are lightly golden. Keep an eye out; every oven is a little different!
-
Cool down: Let the cookies cool on the baking sheets for about 5 minutes before transferring them to a wire rack to cool completely. This helps them set perfectly!
Chef’s Tip:
Be sure to watch the cookies closely during the last few minutes of baking. It’s better to take them out early if they seem to brown too quickly.
Expert Tips & Tricks
-
Storage: Keep your cookies in an airtight container at room temperature for up to a week. For longer storage, freeze them in a freezer-safe bag for up to three months!
-
Make-ahead: You can prepare the dough and refrigerate it for up to 3 days or freeze it for up to a month before baking for freshly baked cookies anytime!
-
Troubleshooting: If your cookies spread too much, make sure your butter isn’t too soft and consider chilling the dough for about 30 minutes before baking.
-
Experiment: Try adding different mix-ins such as chocolate chips, nuts, or dried fruit. Your cookie adventure doesn’t have to stop here!
-
Parchment paper: Using parchment paper not only prevents sticking but helps the cookies bake evenly, ensuring perfect results!
Serving Suggestions
Pair your Easter Funfetti Cookies with a glass of cold milk or a scoop of vanilla ice cream for a delightful dessert combo. For an extra-special presentation, arrange them on a beautiful pastel platter for your Easter collection or birthday party spread. These cookies are perfect for family gatherings, playdates, or even as a sweet surprise for your neighbors!
Variations & Substitutions
- Flavor Boosts: Experiment with flavors by replacing vanilla extract with almond or lemon extract for a refreshing twist.
- Dietary Alternatives: For gluten-free options, use a 1:1 gluten-free baking mix and check if your sprinkles are gluten-free as well.
- Seasonal Sprinkles: Switch out the pastel sprinkles for red, white, and blue for Independence Day or spooky colors for Halloween to keep the fun going year-round!
Nutrition & Storage Info
- Prep Time: 15 minutes
- Cook Time: 10-12 minutes
- Total Time: ~30 minutes
- Yield: Approximately 24 cookies
- Estimated Calories: 120 calories per cookie
- Storage Instructions: Keep at room temperature for up to one week; refrigerate for longer freshness; freeze for up to 3 months.
FAQ Section
-
Can I use organic ingredients?
Absolutely! Organic sugars and flours work wonderfully here and might even give you that slight edge in taste! -
How can I make the cookies chewier?
To achieve a chewier texture, you can slightly reduce the baking time or add an extra egg yolk to the dough. -
What kind of sprinkles work best?
Any pastel or holiday-themed sprinkles work great! Just ensure they are not too large, as that can affect the texture of the cookies. -
Can I use margarine instead of butter?
Yes, margarine can substitute butter, but be mindful of the flavor change. Stick with a high-quality margarine for the best results. -
Will these cookies stay fresh longer in the fridge?
While you can refrigerate them, they typically last longer at room temperature if stored correctly. Just ensure they are sealed airtight! -
What if my dough is too dry?
If your dough is crumbly, add a tablespoon of milk or water to help bring it together. -
Can I freeze the cookie dough?
Yes! You can roll it into balls, freeze them on a baking sheet, and then transfer them to a bag once solid. -
Are these cookies safe for kids with allergies?
Be sure to check for any specific allergens in ingredients. For nut-free options, simply omit the nuts or choose allergy-friendly sprinkles! -
Can I double the recipe?
Absolutely! If you’re planning an event or want more cookies to share, doubling the ingredients is simple – just ensure you have enough mixing space! -
How can I make these cookies more festive?
Add colored icing on top, or drizzle with white chocolate for a beautiful finish that screams celebration!
Conclusion
These Easter Funfetti Cookies are not only a delightful treat but also a heartfelt reminder of the joy that baking brings to our lives. Each cookie is a bite-sized piece of happiness, perfect for sharing with friends and family! I invite you to try this recipe and indulge in the flavors of spring. Share your baking experience in the comments below—I’d love to hear how your cookies turn out! For more delicious treats and family recipes, check out my other blog posts—your next baking adventure awaits!
Happy baking, and enjoy every colorful, delicious bite!