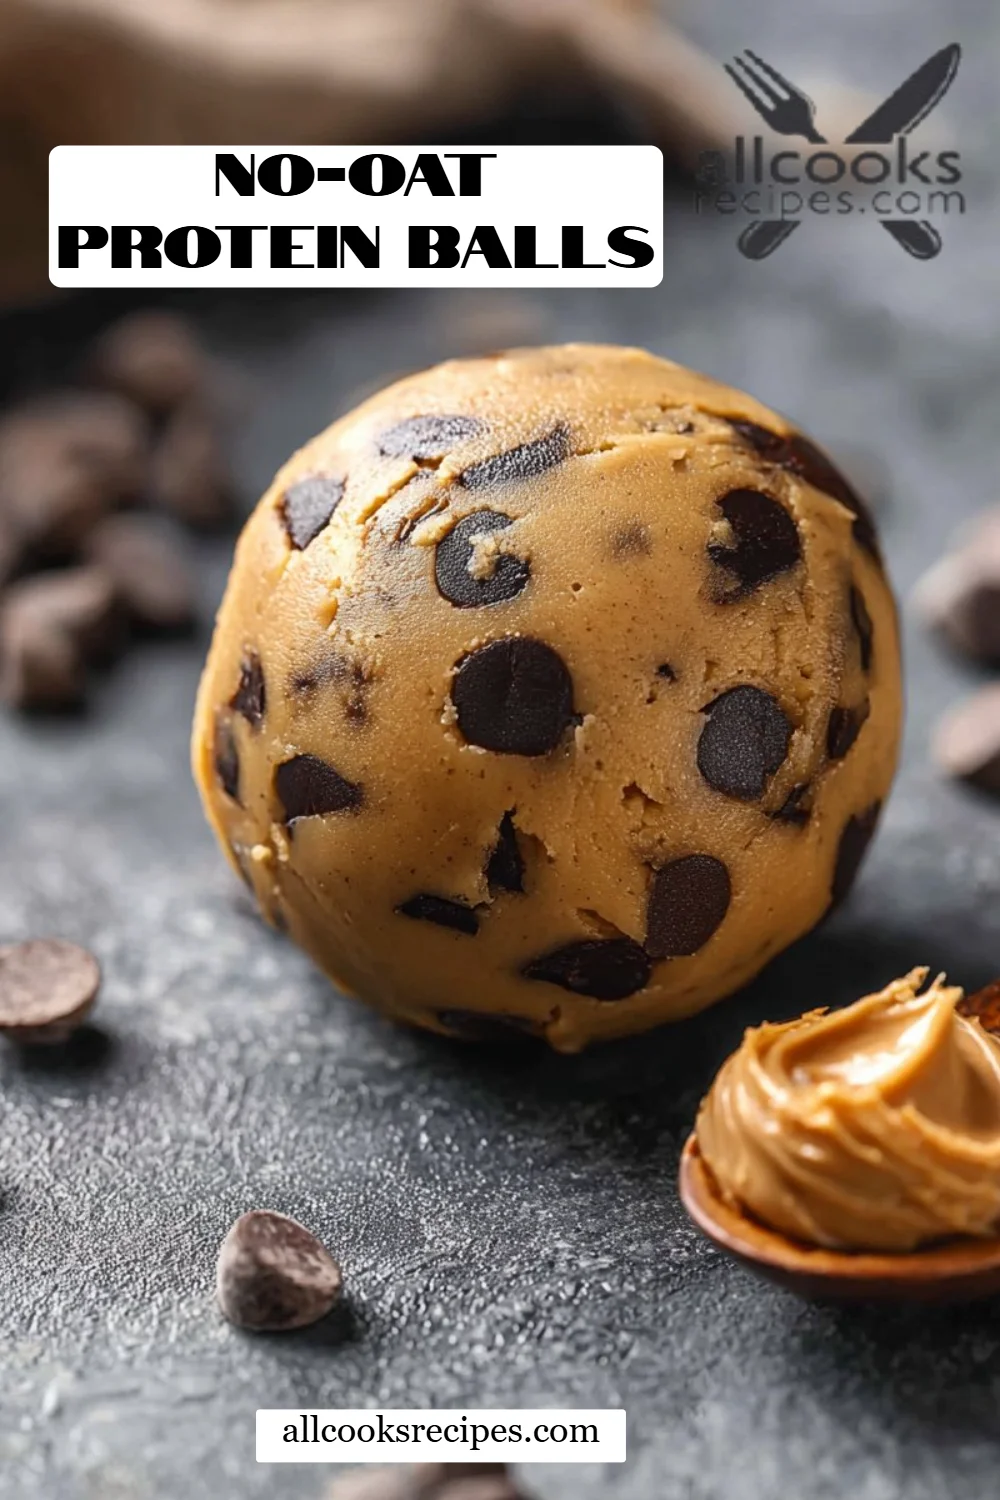
No-Oat Protein Balls: Your New Favorite Healthy Snack
Are you tired of the same boring snacks that leave you feeling unsatisfied? Picture this: the sun is shining, you’re at home, ready to power through your day, and your tummy starts rumbling. You wish you had something tasty and healthy on hand. Enter No-Oat Protein Balls! I stumbled across this delightful recipe one afternoon while trying to find a nutritious alternative to sugary treats. My family and I were stumped by the concept at first, but after just one bite, we were hooked!
What sets these protein balls apart is their rich, nutty flavor combined with a soft and chewy texture that makes you forget they’re healthy. These little bites are a nutritious powerhouse, packed with protein while being free of oats, making them an ideal choice for those adhering to a gluten-free or oat-free diet. They’ve become a staple in my home, evoking memories of my kids helping in the kitchen, their laughter mixing with the scent of peanut butter wafting through the air.
In this guide, I promise you’ll learn how to make these scrumptious No-Oat Protein Balls from scratch, complete with expert tips and endless variations to keep your snack game strong!
What Are No-Oat Protein Balls?
No-Oat Protein Balls are a delicious and easy-to-make snack that burst with flavor and nutritional benefits. Originating from the desire to create a quick, energy-boosting option without the carbs of oats, these protein bites deliver on taste and texture—a nutty explosion wrapped up in a wholesome, chewy ball.
They’re a blend of creamy peanut butter, protein powder, and a touch of sweetness from maple syrup. The almond flour adds a delightful crumbly texture, while chocolate chips promise a hint of indulgence in every bite. You can whip them up in less than 30 minutes, making them a perfect option for busy mornings, after-school snacks, or a post-workout treat.
Why You’ll Love This Recipe
-
Quick and Easy: With just a few minutes of prep and no cooking required, you can have these No-Oat Protein Balls ready in no time. Unlike store-bought snacks that can take forever to decide whether they’re healthy or just filled with empty calories, these power-packed balls deliver results without all the fuss!
-
Cost-Effective: Making your own snacks is not only fun but also saves you money. Consider the cost of a pre-packaged protein snack and then compare it to the simple ingredients needed for this recipe. You’ll be surprised at how little you spend!
-
Fully Customizable: Don’t like peanut butter? Use almond or cashew butter instead. Want a different flavor? Swap the vanilla for almond extract. The possibilities are endless, allowing you to cater to everyone’s tastes.
-
Health Benefits: These protein balls are packed with energy-boosting ingredients that provide you with sustained energy without the sugar crash. Plus, they’re suitable for various dietary needs, including gluten-free and vegan (with appropriate protein powder).
-
Less Than 30 Minutes: You can whip these up in no time. Seriously. In the time it takes to scroll through social media, you can have a week’s worth of snacks ready to go! Prep time is minimal, leaving more room for snacking.
Now that you know why these No-Oat Protein Balls are a must-try, let’s rock that ingredient list!
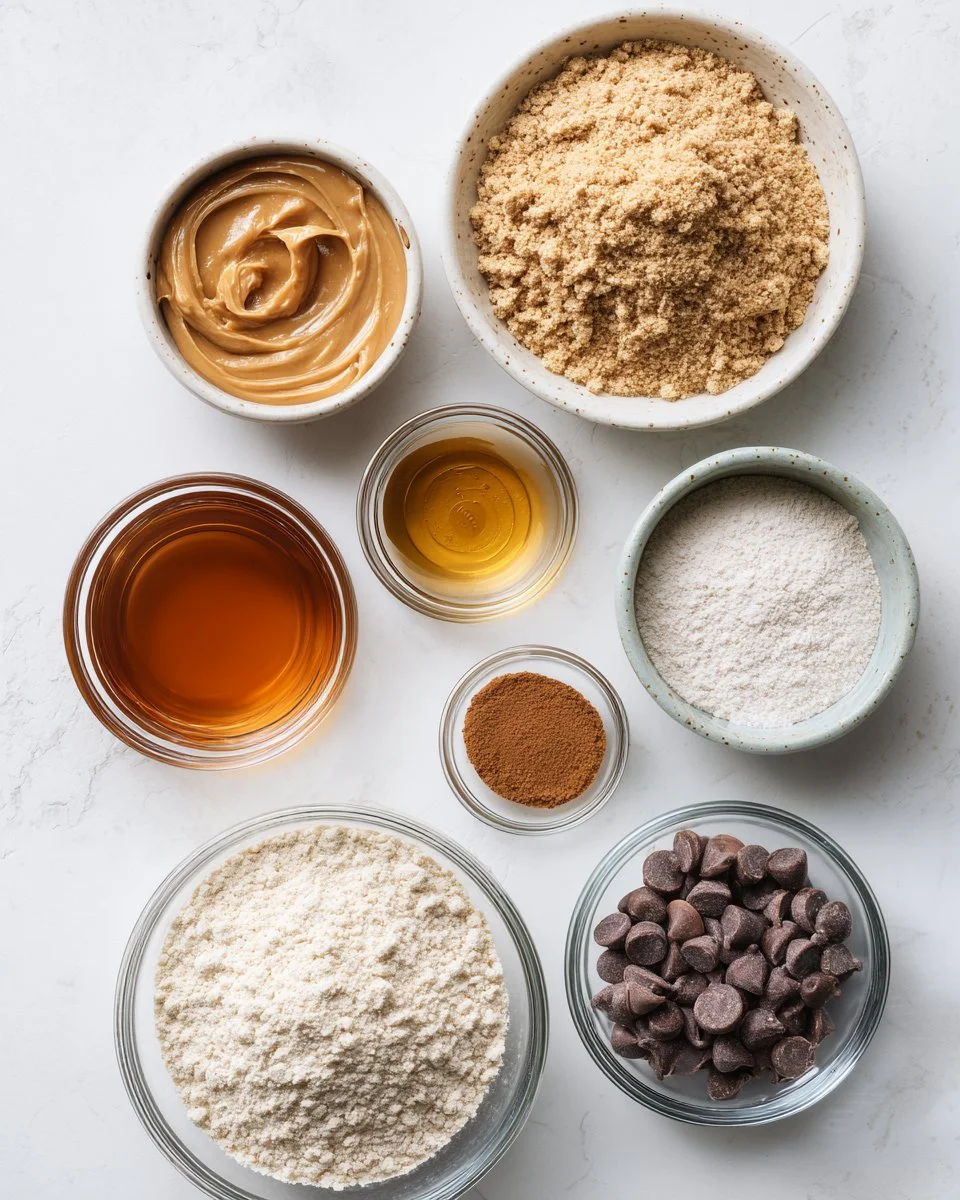
Ingredients
- 1 cup peanut butter: Use creamy or crunchy, depending on your texture preference. For a nut-free version, feel free to swap with sunflower seed butter.
- 1 cup protein powder: I recommend using a high-quality vanilla-flavored protein powder to enhance the overall taste.
- 6 tablespoons maple syrup: Pure maple syrup adds a distinct flavor. For a lower-glycemic option, agave syrup works too.
- 1/2 cup almond flour: Opt for blanched almond flour for a finer texture, or use coconut flour if you’re looking for a different flavor.
- 1 tsp vanilla: Pure vanilla extract always provides a richer taste compared to imitation. Splurge a little—it’s worth it!
- 1/4 tsp salt: A pinch of salt enhances sweetness and balances flavors.
- 1/4 tsp ground cinnamon: Adds warmth and depth, evoking memories of grandma’s baked goods!
- 1/4 cup chocolate chips: Opt for dark or semi-sweet chocolate chips to bring a little indulgence to your healthy snack.
Prep notes: Ensure your peanut butter is at room temperature for easy mixing.
Step-by-Step Instructions
-
Combine Ingredients: In a medium bowl, combine the peanut butter, protein powder, almond flour, maple syrup, vanilla, salt, and cinnamon. Use a sturdy spoon or spatula to mix until well combined and smooth. If it feels too dry, add a splash more maple syrup; if it’s too wet, stir in a bit more almond flour. Visual cue: The mixture should be thick yet moldable, like cookie dough.
-
Fold in Chocolate Chips: Gently fold in the chocolate chips until they are evenly distributed. Let the mixture sit for about 5 minutes to firm up slightly.
-
Shape the Balls: Using your hands, roll the mixture into 1-inch balls and place them on a parchment-lined plate or baking sheet. Chef’s Tip: Wet your hands slightly to avoid sticking.
-
Chill: Refrigerate the protein balls for at least 30 minutes before serving. This step helps them hold their shape and enhances the flavors.
-
Store: Transfer your No-Oat Protein Balls to an airtight container and refrigerate for up to one week. Professional technique: They also freeze well, so you can make a double batch and save some for later enjoyment!
Expert Tips & Tricks
- Storage: Keep these protein balls in the fridge for the freshest taste. However, they’re also fine at room temperature for a few hours, making them great for on-the-go snacking!
- Make-Ahead: These can be made days in advance. They’re perfect for meal prep; just pull them out as needed!
- Troubleshooting: If your mixture is too crumbly, add a tiny drizzle of maple syrup or a bit more peanut butter. If it’s too sticky, toss in extra almond flour.
- Brand Recommendations: I love using Jif natural peanut butter for its smooth consistency and great flavor. For protein powder, Optimum Nutrition’s Gold Standard Vanilla is a reliable choice!
- Don’t Overmix: Overmixing can lead to a denser texture, which isn’t what we want here! Combine just until it’s homogenous.
Serving Suggestions
These No-Oat Protein Balls can be enjoyed on their own, but why stop there? Pair them with a glass of almond milk for a quick protein fix, or maybe layer them alongside some fresh fruit for a delightful afternoon snack. For presentation, arrange them on a colorful plate with a drizzle of extra peanut butter or a sprinkle of cocoa powder. They’re perfect for any occasion—from school lunches to post-work workouts.
Variations & Substitutions
- Flavor Combinations: Try adding a tablespoon of cocoa powder to make chocolate protein balls or fold in shredded coconut for a tropical twist!
- Dietary Restrictions: Make them vegan by swapping honey for maple syrup and using a plant-based protein powder. For nut allergies, stick to sunbutter and check for nut-free chocolate chips.
- Seasonal Variations: In the fall, boost the flavor with a sprinkle of pumpkin spice or apple pie seasoning for a festive twist!
Nutrition & Storage Info
- Prep Time: 10 minutes
- Chill Time: 30 minutes
- Yield: Approximately 16 balls
- Estimated Calories: About 130 calories per ball
- Storage Instructions: Store in an airtight container in the refrigerator for up to a week or in the freezer for up to a month. Just let them thaw at room temperature before enjoying!
FAQ Section
-
Can I use a different nut butter?
Yes! Almond, cashew, or even sunflower seed butter work wonderfully as alternatives. -
Is this recipe gluten-free?
Absolutely! As long as you use gluten-free protein powder and almond flour, these No-Oat Protein Balls are safe for your gluten-free diet! -
How can I make these less sweet?
You can reduce the amount of maple syrup. Just mix a little less than the recipe calls for and taste the mixture before forming the balls. -
Can I use a different type of sweetener?
Certainly! You can substitute honey, agave syrup, or any other liquid sweetener, but make sure to adjust the quantity based on sweetness level. -
How long do they last?
These protein balls can last in the fridge for a week and can be frozen for up to a month! -
Can I double the recipe?
Yes! Simply double all the ingredients. Just ensure you have enough fridge space for them! -
What can I add for more texture?
Chopped nuts, seeds, or even dried fruit can offer a satisfying crunch alongside the smoothness of the protein balls. -
Can kids help in making these?
Definitely! This is such a fun recipe for kids. They can help with mixing ingredients and rolling the balls. -
What if the mixture is too wet or dry?
If it’s too wet, add more almond flour. If it’s too dry, add a little more peanut butter or syrup until it holds together. -
Can I make these without protein powder?
While protein powder contributes to the overall texture and protein content, you can omit it and replace with more almond flour; however, they may not hold together as well.

Conclusion
These No-Oat Protein Balls are more than just a snack—they’re a delicious blend of nostalgia, health, and pure satisfaction in every bite. They’ve brought my family together in the kitchen, and I can’t wait for you to experience the joy of making them! Try out this recipe and let me know what you think in the comments! For more tasty snacks, check out my blog for other quick and healthy recipes that your loved ones will cherish. Happy snacking!

No-Oat Protein Balls
Ingredients
Method
- In a medium bowl, combine the peanut butter, protein powder, almond flour, maple syrup, vanilla, salt, and cinnamon. Mix until well combined and smooth.
- If the mixture is too dry, add a splash more maple syrup; if it's too wet, stir in more almond flour.
- Fold in the chocolate chips until evenly distributed. Let the mixture sit for about 5 minutes to firm up.
- Using your hands, roll the mixture into 1-inch balls and place them on a parchment-lined plate.
- Refrigerate the protein balls for at least 30 minutes before serving.
- Transfer to an airtight container and refrigerate for up to one week or freeze for longer storage.