Indulge in the Bliss of White Forest Cake: A Heavenly Delight You Can Bake at Home!
Introductory Delight: My Love Affair with White Forest Cake
As I reminisce about my childhood, one dessert always stands out: my grandmother’s White Forest Cake. Each bite transported me to a world where fluffy cake layers mingled with tangy cherries and whipped cream—oh, the heavenly taste! This cake, with its luscious composition, became more than just a dessert; it embodied comfort, family gatherings, and countless joyous celebrations.
What truly makes my version of the White Forest Cake soar above the rest? It’s all about the love and care infused into every step of the process. I’ve spent years perfecting this recipe, ensuring it captures the essence of bliss in each layer. It’s not just the traditional flavors; it’s also the technique that guarantees a treat that’s airy yet rich, sweet yet refreshing.
So, are you ready to create sweet memories with this delightful White Forest Cake? In this post, I’ll guide you through my tried-and-true recipe, packed with tips, emotions, and a hint of nostalgia that ensures your cake will be the talk of the table!
What Are White Forest Cakes?
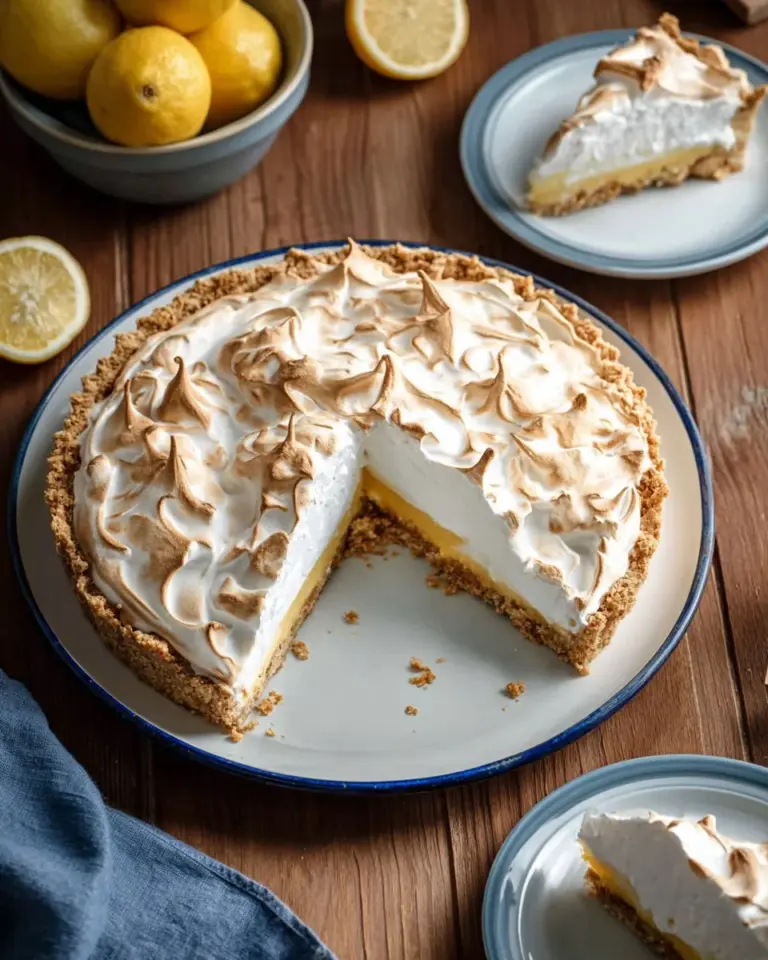
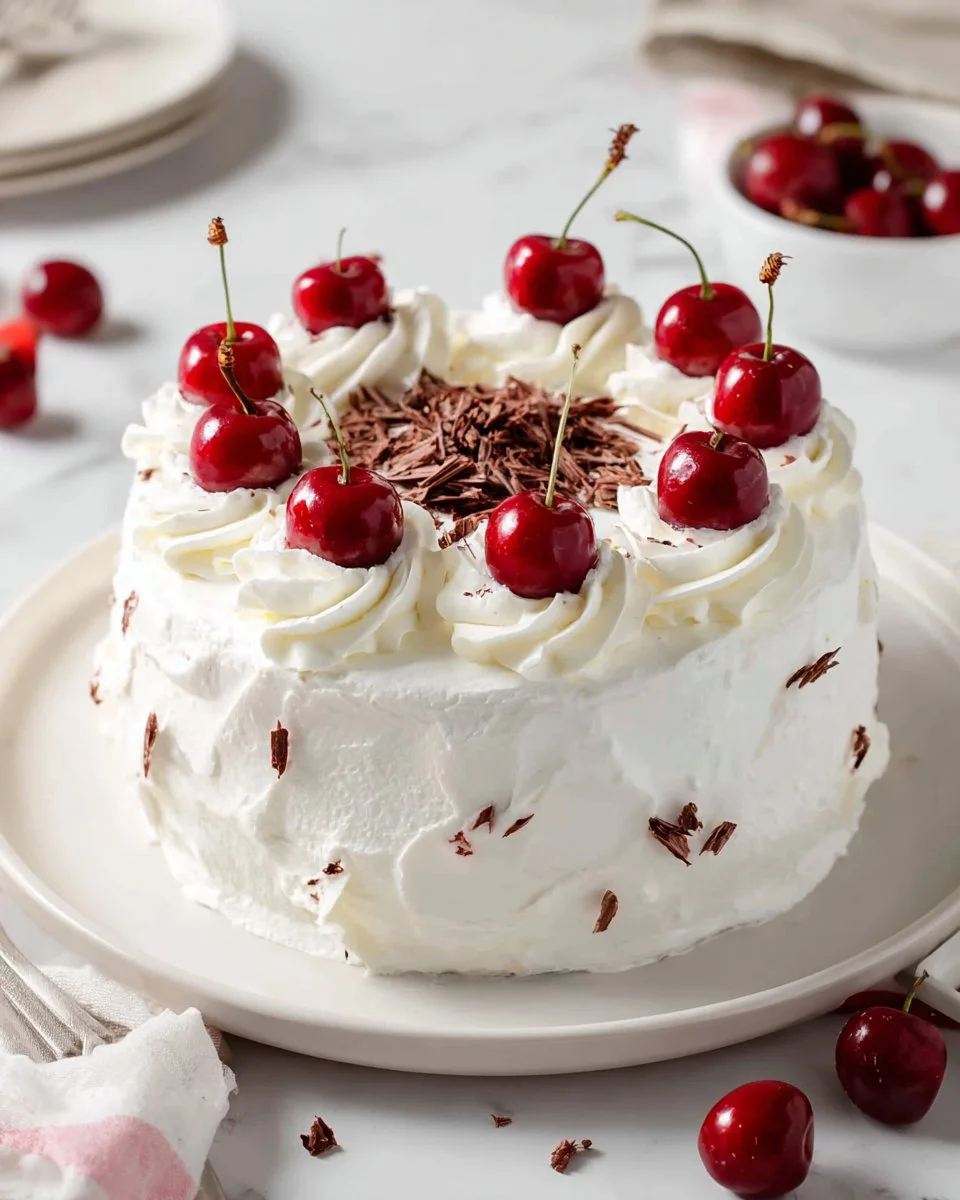
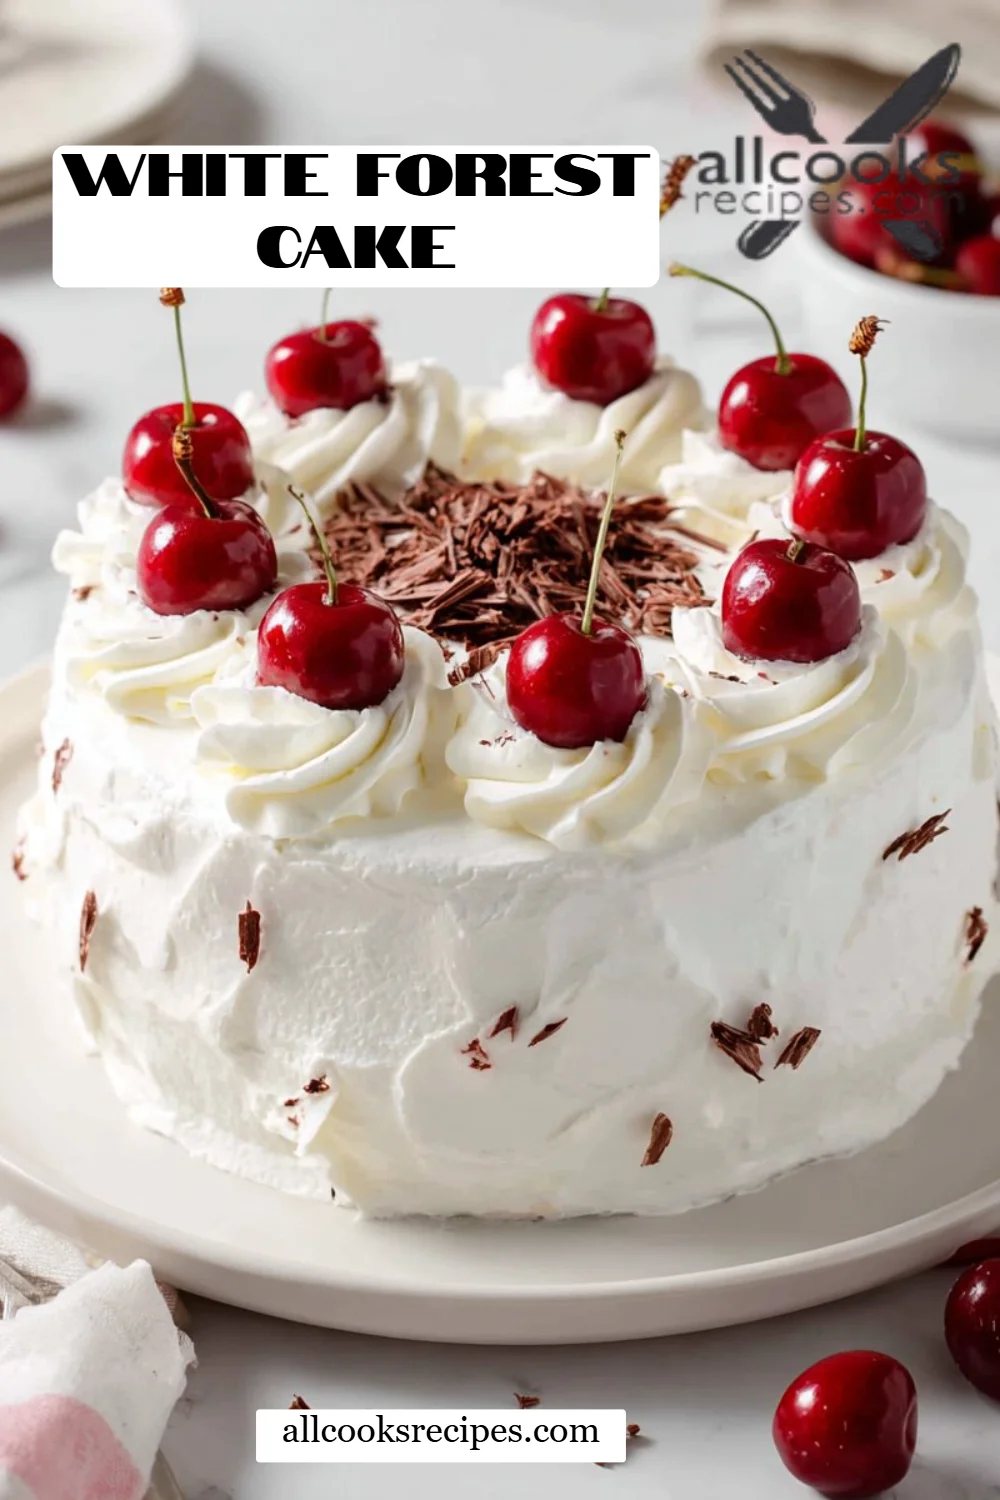
Originating from the enchanting Black Forest region of Germany, the White Forest Cake, or "Weißer Schwarzwälder Kuchen," features layers of delicate white cake, often accented with cream and cherries. Unlike the classic chocolatey Black Forest Cake, the white version is a true celebration of contrasting flavors—sweet cherries peek through fluffy cream, creating a delightful explosion of taste.
The cake typically has a soft and airy texture, which complements the creamy elements perfectly. Each slice feels like a cloud: light yet indulgent, with a balance of sweetness from the cherry pie filling and the richness of whipped cream.
Whether it’s a birthday bash, an anniversary, or simply a Sunday celebration, this cake is a perfect choice any time of year. Make it to cherish alone or share with loved ones—it’s a slice of pure joy!
Why You’ll Love This Recipe
-
Unmatched Taste: My White Forest Cake recipe beautifully balances sweetness and acidity, with tart cherries cutting through the rich creaminess. It’s a symphony of flavors that will leave your taste buds dancing.
-
Cost-Effective: Baking your cake at home not only brings you a sense of accomplishment but also saves you money compared to overpriced bakery versions. All the gourmet-style goodness at a fraction of the cost? Yes, please!
-
Customization Options: Feel free to make it your own! Add a splash of almond extract or incorporate seasonal fruits like raspberries for a unique twist. You can even play around with different types of chocolate curls—dark or milk chocolate can amplify the flavors!
-
Simple Assembly: Trust me, this cake is simpler to assemble than it looks. Even beginner bakers will feel like pros as layers stack beautifully to create a show-stopping dessert.
-
Fabulous Storage: This cake lasts well in the fridge, making it perfect for meal prepping or for those weekends when sweet cravings strike!
Get ready for the ultimate baking experience!
Ingredients
Here’s what you’ll need to create your mouthwatering White Forest Cake:
-
For the Cake:
- 2 ¾ cups cake flour (use high-quality cake flour for best results)
- 2 teaspoons baking powder
- ¾ teaspoon kosher salt
- 2 ½ cups granulated sugar
- 1 cup unsalted butter, room temperature (softened butter is crucial for a fluffy texture)
- 2 teaspoons vanilla extract
- 1 teaspoon almond extract (adds a lovely depth)
- 5 large egg whites, room temperature
- 1 cup whole milk, room temperature (make sure all dairy ingredients are at room temp for even mixing)
-
For the Whipped Cream:
- 2 ounces cream cheese, softened (for stability in whipped cream)
- ½ cup granulated sugar (for whipped cream)
- 2 cups heavy whipping cream
- ½ teaspoon vanilla extract (for whipped cream)
- 1 pinch kosher salt (for whipped cream)
-
For Decoration:
- 1 can cherry pie filling, divided (high-quality cherries elevate your cake)
- 4 ounces white chocolate bar, made into curls, divided
- Fresh cherries, for garnish (optional, but hey, they look stunning!)
Prep Notes: Ensure your butter, eggs, and milk are at room temperature to achieve a smooth, cohesive batter. I’ve personally found that brands like Land O’Lakes for butter and organic cherry pie filling provide the best flavors.
Now, let’s bring your White Forest Cake to life!
Step-By-Step Instructions
-
Preheat the Oven: Preheat to 350°F (175°C). Line the bottoms of three 8-inch round cake pans with parchment paper and spray with nonstick cooking spray. Set aside.
-
Mix Dry Ingredients: In a large bowl, whisk together the cake flour, baking powder, and salt. Set aside while we get the wet ingredients going.
-
Beat the Butter and Sugar: In the bowl of a stand mixer, cream together sugar, butter, vanilla extract, and almond extract on medium speed until light and fluffy, about 5 minutes. You’ll want to pause and inhale that buttery vanilla scent!
-
Incorporate Egg Whites: With the mixer on low, gradually add egg whites, one at a time, mixing well after each addition.
-
Combine Dry and Wet Ingredients: Alternate adding in the flour mixture and the milk until just combined. Be gentle; we don’t want to deflate our fluffy batter!
-
Bake: Distribute the batter evenly into the prepared pans and bake for 22-24 minutes, or until a toothpick comes out clean. Your kitchen will smell heavenly! Allow cooling completely on a wire rack.
-
Chill for Whipped Cream: While cakes are cooling, chill your mixing bowl and whisk attachment in the freezer for about 15 minutes. This helps your whipped cream get to the perfect consistency.
-
Make the Whipped Cream: In the chilled bowl, mix cream cheese and sugar until smooth. Gradually add the heavy cream while mixing, then increase the speed to medium until soft peaks form—scrape the bottom to incorporate all the cream cheese.
-
Finish Whipping: Once stiff peaks form, add vanilla and salt, mixing carefully.
-
Assemble the Layers: Place one cake layer on a serving plate, generously top with stabilized whipped cream and white chocolate curls, and add a circle of cherry pie filling on top. Repeat with the second layer.
-
Final Layer and Frosting: Place the last layer on top, covering with whipped cream and adding more cherry filling in the center. Frost the sides as desired—it’s okay if it gets messy!
-
Garnish: Finish with more white chocolate curls and fresh cherries if you like!
Chef’s Tip: For a professional touch, use a bench scraper to smooth the sides of your cake for perfect edges!
Expert Tips & Tricks
-
Room Temperature Ingredients: As mentioned earlier, having your ingredients at room temperature allows for better emulsification—this leads to a lighter cake.
-
Storage Recommendations: Store leftovers in an airtight container in the fridge for up to 5 days. It’s still delicious the next day!
-
Make-Ahead Instructions: You can bake the cakes a day in advance and assemble them just before serving. Just wrap tightly in plastic wrap and refrigerate.
-
Troubleshooting the Whipped Cream: If your whipped cream isn’t thickening, ensure your mixing bowl is cold, and avoid overbeating.
-
Explore Flavor Variants: You can swap the cherries for strawberries or use a mixed berry filling for a unique taste!
With these tips, you’re well on your way to creating the perfect White Forest Cake!
Serving Suggestions
Pair your stunning White Forest Cake with a light, fruity sorbet or whip up some fresh coffee to accompany each slice. A gentle sprinkling of edible flowers elevates the presentation, making it perfect for birthdays, holidays, or a special gathering with friends!
Variations & Substitutions
-
Different Flavors: Craving something unique? Try layering in a lemon curd or raspberry filling instead of cherry for a fresh twist.
-
Dietary Restrictions: Vegan or gluten-free options are easily adaptable! Use dairy-free butter, oat milk, and gluten-free flour blends to suit different diets.
-
Seasonal Variations: During the fall, add spices like cinnamon or nutmeg to the cake batter for a cozy touch. During summer, mix in some fresh berries for added freshness.
Nutrition & Storage Info
- Prep Time: 30 minutes
- Cook Time: 24 minutes
- Total Time: Approximately 2 hours (including cooling)
- Yield: Serves 12
- Estimated Calories per Serving: 370 calories
Storage Information: Keep in the fridge for up to 5 days or freeze for up to a month in an airtight container. Just thaw in the fridge before serving!
FAQ Section
-
Can I make this cake ahead of time?
Yes, you can bake the cakes a day in advance and assemble them just before serving for the best taste. -
What’s the best way to store leftover cake?
Keep it in an airtight container in the fridge for freshness. -
How can I avoid a dry cake?
Don’t overbake! Keep an eye on the cake in the last few minutes, and always use room temperature ingredients. -
Is it possible to make this cake gluten-free?
Absolutely! Substitute regular flour with a gluten-free blend. -
What’s the best way to get white chocolate curls?
Use a vegetable peeler on a room temperature chocolate bar; make sure to work quickly before they melt! -
Can other fruits be used instead of cherries?
Definitely! Consider using strawberries, raspberries, or even a mixed fruit filling. -
What if my whipped cream isn’t thick?
Ensure your mixing bowl is chilled when you whip the cream, and don’t forget the cream cheese for stability. -
Can I use oil instead of butter in this recipe?
I recommend sticking to butter for the best flavor and texture, but if you must, use a neutral-flavored oil in small amounts. -
How do I know when the cake is fully baked?
Insert a toothpick into the center—if it comes out clean, your cake is ready! -
Can I double the recipe?
Indeed, just ensure you have enough pans or bake in batches to maintain even results.
Conclusion
There you have it—the ultimate guide to creating your own White Forest Cake, filled with love and nostalgia. This cake isn’t just a dessert; it’s a delightful experience that sparks memories and brings people together. I encourage you to give this recipe a try—your friends and family will thank you!
I’d love to hear your thoughts or any variations you tried in the comments. Don’t forget to check out my other cake recipes on the blog to keep the sweet vibes going!


White Forest Cake
Ingredients
Method
- Preheat the oven to 350°F (175°C). Line the bottoms of three 8-inch round cake pans with parchment paper and spray with nonstick cooking spray. Set aside.
- In a large bowl, whisk together the cake flour, baking powder, and salt. Set aside.
- In the bowl of a stand mixer, cream together the sugar, butter, vanilla extract, and almond extract on medium speed until light and fluffy, about 5 minutes.
- With the mixer on low, gradually add the egg whites, one at a time, mixing well after each addition.
- Alternately add in the flour mixture and milk until just combined. Be gentle to avoid deflating the batter.
- Distribute the batter evenly into the prepared pans and bake for 22-24 minutes, or until a toothpick comes out clean. Allow cooling completely on a wire rack.
- While cakes are cooling, chill your mixing bowl and whisk attachment in the freezer for about 15 minutes to prepare for the whipped cream.
- In the chilled bowl, mix cream cheese and sugar until smooth. Gradually add the heavy cream while mixing, then increase the speed to medium until soft peaks form.
- Once stiff peaks form, add vanilla and salt, mixing carefully.
- Place one cake layer on a serving plate, generously top with stabilized whipped cream and white chocolate curls, and add a circle of cherry pie filling on top. Repeat with the second layer.
- Place the last layer on top, covering with whipped cream and adding more cherry filling in the center. Frost the sides as desired.
- Finish with more white chocolate curls and fresh cherries if you like.